 by
by Before moving on with the door for the guest bathroom, I had some more tools to acquire. As mentioned in the last post, my stiles and rails were joined using the Festool Domino tool. I didn’t say much about that tool in the last post, so below I am including a short video to show how it works.
Another tool that I ordered was the JambMaster. This will be used to help me prepare door openings to receive the jamb. Although I would not need this for a while, I placed the order anyway to ensure I had it when needed. It will allow me to add and rout custom flat shims rather than insert tapered shims, as is usually done. This will give me a really tight and square fit of the door jamb. The video below demonstrates how it is used.
Since I will be doing many doors, I decided to take the time and create a proper work surface where I can set all the door parts for assembly. To this end, I planned to get a 4×8 sheet of melamine coated MDF (medium density fiberboard) and drill 20mm dog holes all over it in order to make it a Multi-Function Table (MFT). Such an MFT would allow me to easily square up large pieces of material and serve as a surface on which I could clamp and cut wood. To facilitate this, I found a really interesting option, as shown below.
The Festool STM 1800 expands to accommodate a 4×8 sheet, but also can be reduced to serve as a base for a smaller work surface. That it reduces to a very small footprint when fully collapsed, makes it ideal for my small workshop. It rolls easily, so I can bring it in the house too, when the need arises.
However, in order to build my MFT I required several other tools, but those tools would not arrive for more than a month, so in the meantime I would have to make due with what I currently had.
I moved forward with the door for the guest bathroom by taking it apart after the dry fit and preparing the panels for painting. Since the panels will be free floating in the stiles and rails, painting after assembly would leave the tongue (the bit that inserts into the stiles and rails) unpainted. As the panels expand and contract with the seasons, this unpainted area could be exposed, so painting them ahead of assembly eliminated that concern.
To prepare the panels for painting, I first wiped them down with a damp cloth to raise the grain. Once that dried, I sanded them up to 220 grit. After that they were ready for primer.
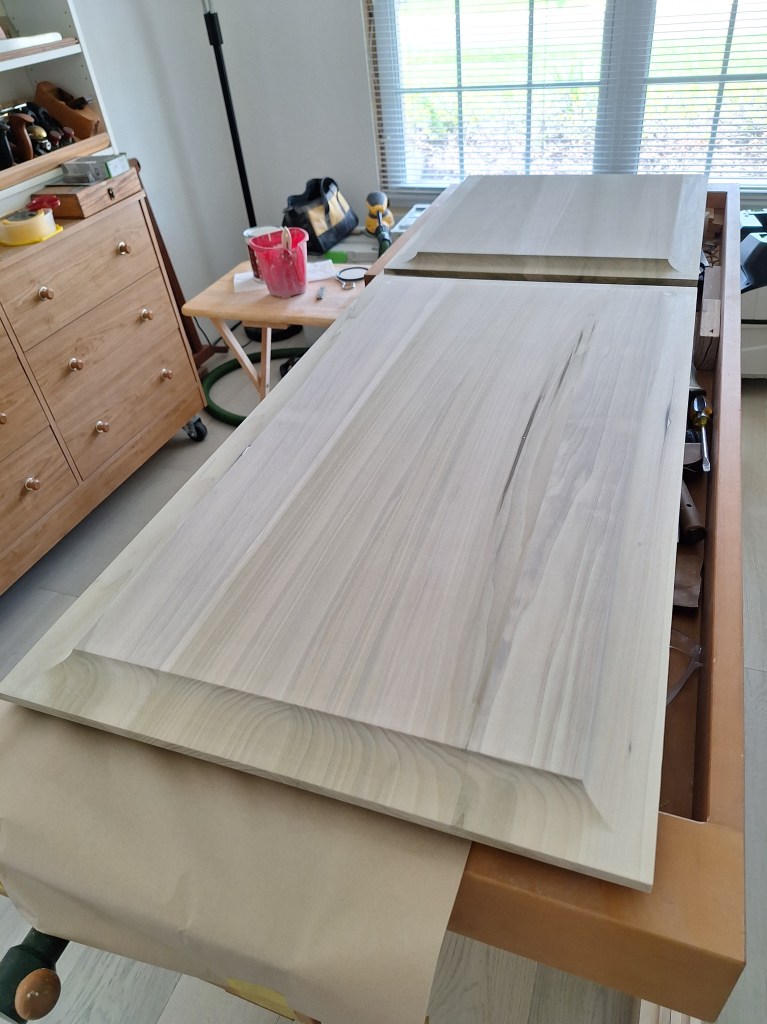
For priming, I used Zinsser Bin, which contains shellac. This will help hide any blotchy parts that could bleed through the white paint I would use as a top coat.
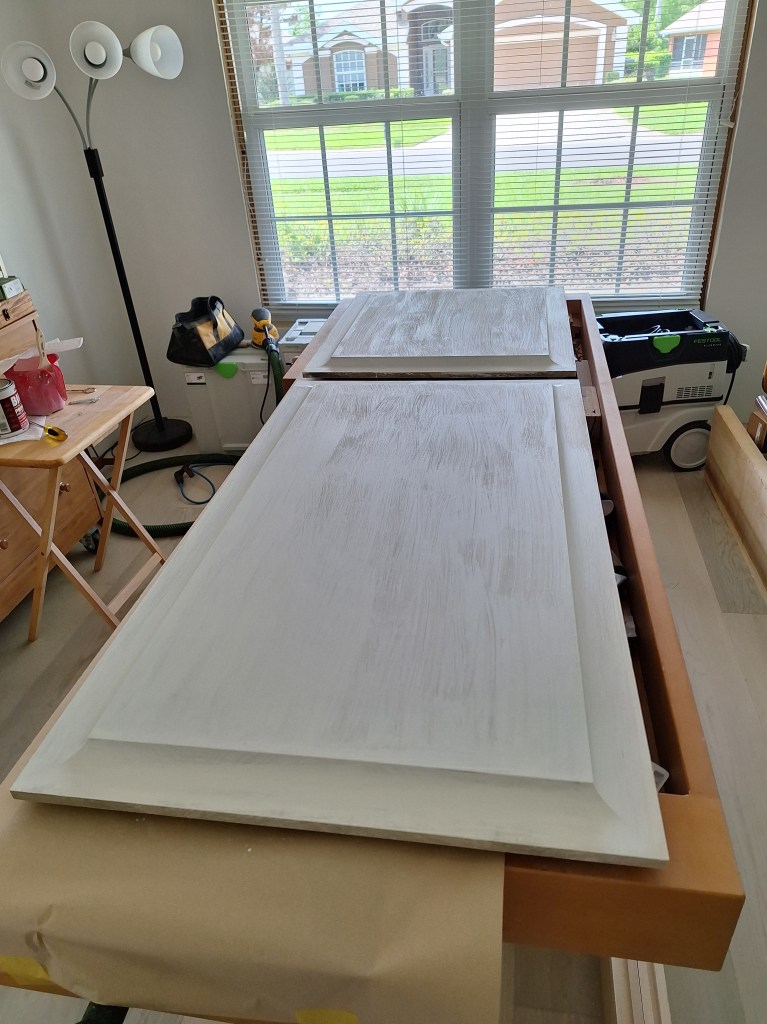
After the primer was dry, I sanded the two panels again, but only lightly with 320 grit, careful not to remove the primer. After that I checked to see how the tongue fit into the groove of one of the rails. It was tighter than before the primer, which was not surprising, but still acceptable. Because of that I taped the tongues so that no more build up would occur. After that I applied a single top coat (for now) of Behr Alkyd Semi-gloss Enamel, tinted to Ultra White to match the color of the trim in the house. Once dry, I tested the fit again, but discovered that I could see the part I did not paint, so I painted the part I masked with tape and, once dry, lightly sanded it using 320 grit sandpaper. The light sanding was enough to let the panels slide into the grooves. It was snug, but not too snug.

With the panels painted and the tongues lightly sanded, I could now assemble the door using glue. Only the stiles and rails are glued, joined by Domino loose tenons. The panels float freely to allow for expansion. Since the panels are not glued in place, small rubber spacers are inserted into the grooves in order to ensure the panels are held snuggly. As the panels expand and contract over the seasons, the spacers, being rubber, will be able to accommodate the dimensional changes.


To help with the glue up, I purchased three special clamps (called panel clamps) and put everything together on the 4×8 sheet melamine, as seen below.
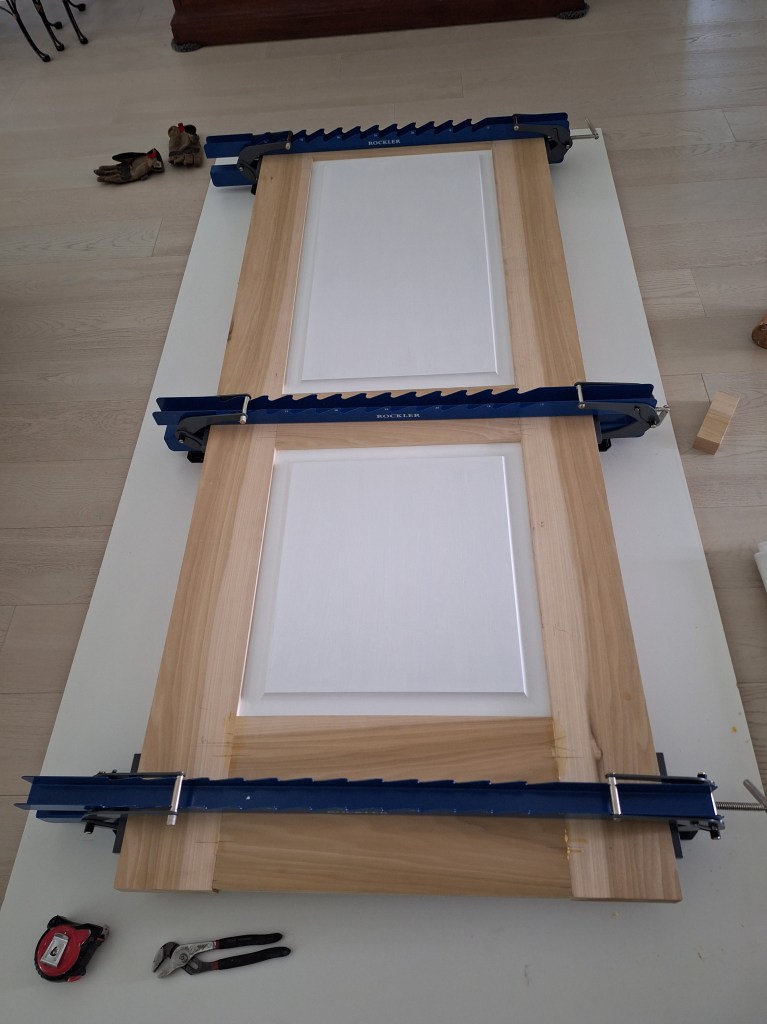

The panel clamps apply horizontal pressure to pull the glue joints together, but also provide vertical pressure to ensure the door remains flat. When applying horizontal pressure, keeping the door from cupping is very important, so it was nice to have clamps that did that for me.
The 4×8 sheet of melamine provided a nice flat surface to which glue would not stick. Once glue spilled on the melamine surface was dry, the hardened glue will just pop off. Also, the door would easily fit on top of the 4×8 sheet with room for the clamps. I originally intended to place the 4×8 sheet on top of my STM 1800 so it would be at a nice working height, but I found that it did not sit as flat as I wanted. The floor was much better for flatness, but it meant I had to work on my knees. I’ll come up with a better solution for the next door I build.
Once out of the clamps, I could get to work preparing the first side. Since the door is so heavy, I would prepare the wood and apply primer before flipping it to do the other side. I started with my smoothing plane to ensure the joints were nice and flush. I filled any small gaps I found at the joints, then I sanded it starting with 220 grit and finishing with 320.
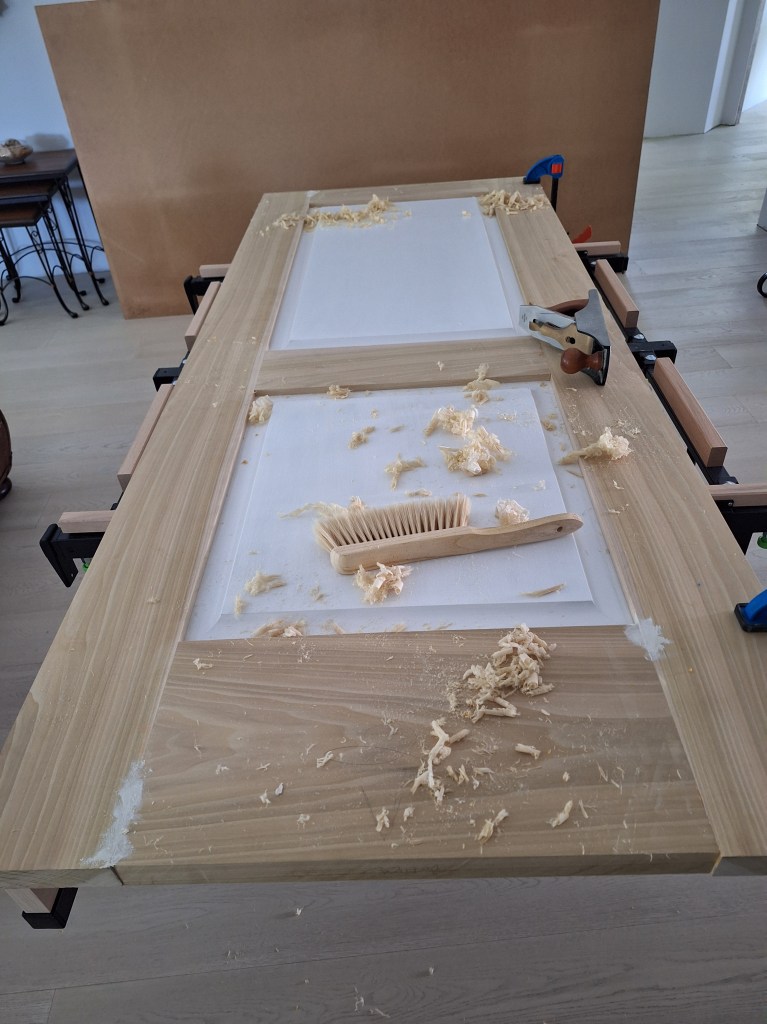
Before applying the primer, I cut off about a quarter of an inch along the bottom to even it out, then added tape to where the panels met the unfinished wood. Then it was just a matter of brushing on the primer.
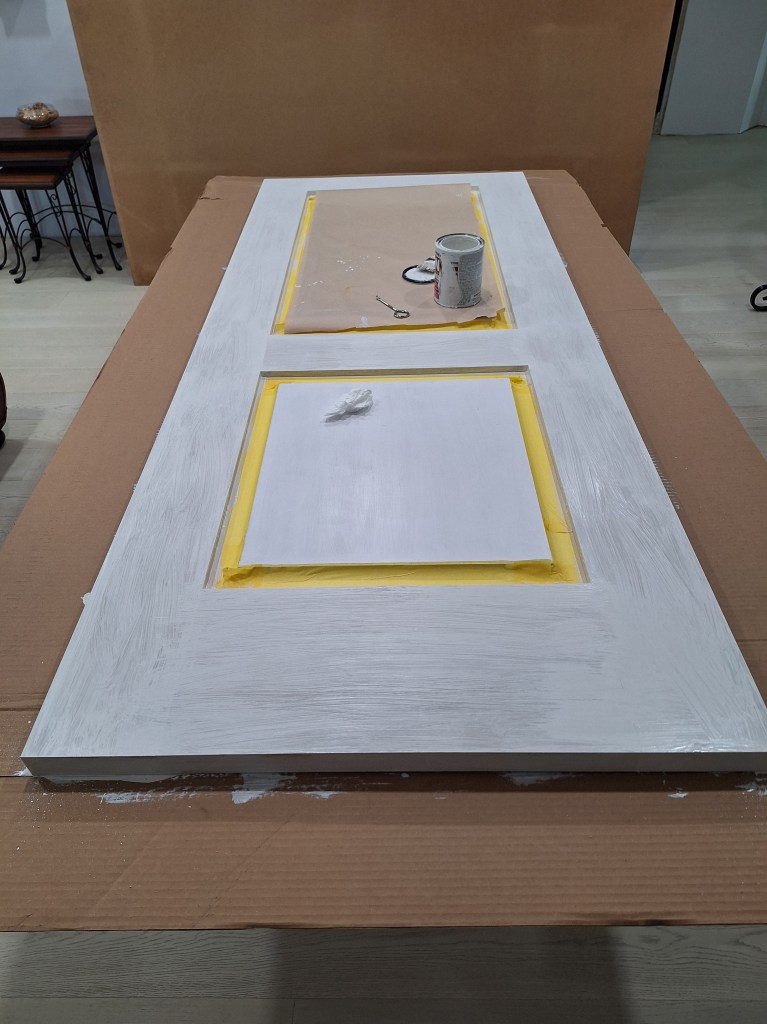
I left that for an hour or so before sanding it with 320 grit. I applied the first top coat to the rails and stiles to bring them to the same state as the panels. I removed the tape while the paint was wet.
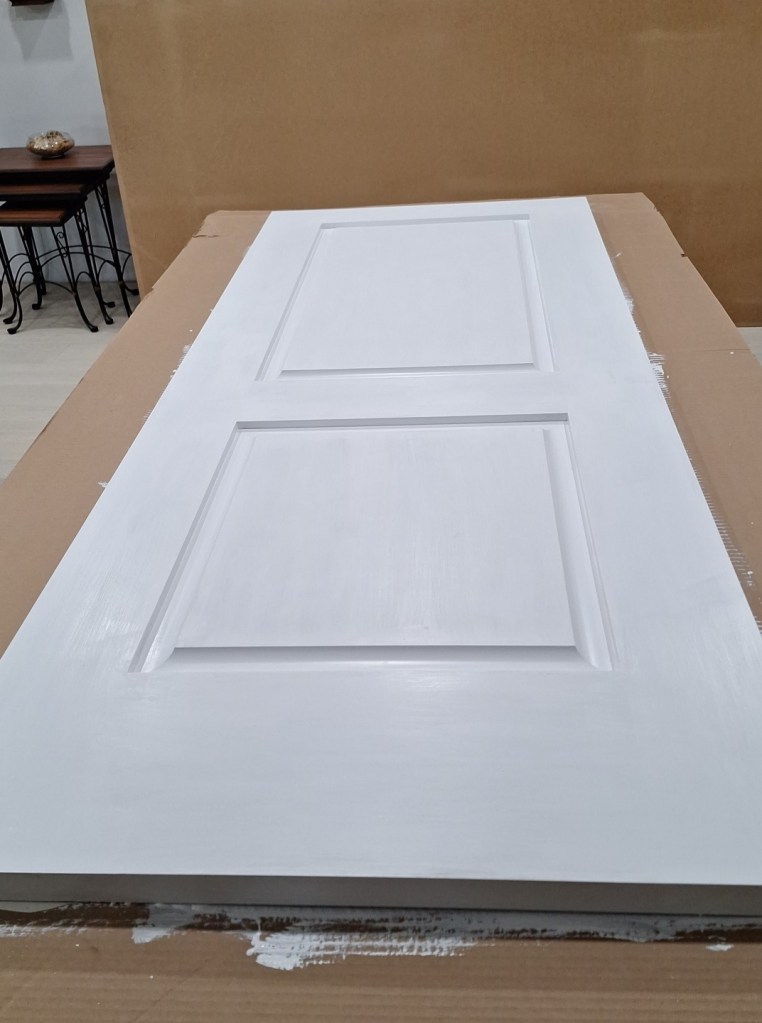
This would be left until the next day before I flipped the door and did the same thing to the opposite side.
Before the door can be hung, the door opening must be prepared to receive the door jamb. The JambMaster was intended for this purpose. However, my opening had no room to spare with the current door dimensions, so I hung the jamb the old fashioned way using tapered shims and the level. After completing this, I was not really happy with the result. It was okay, but not as plumb and square as I would like. After some thought I decided I was prepared to sacrifice some door width in order to accommodate the JambMaster, which would ensure the opening was plumb and square. So I pulled down the jamb I had just installed and put the JambMaster into position, setting it to give me as wide an opening as I could get.
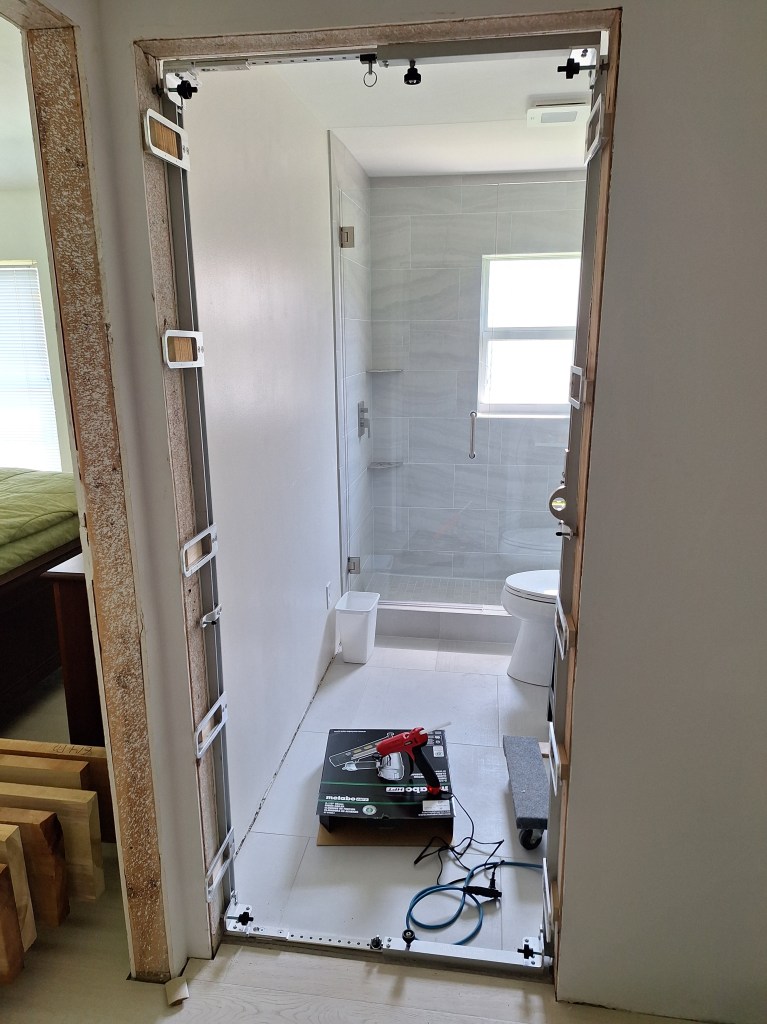
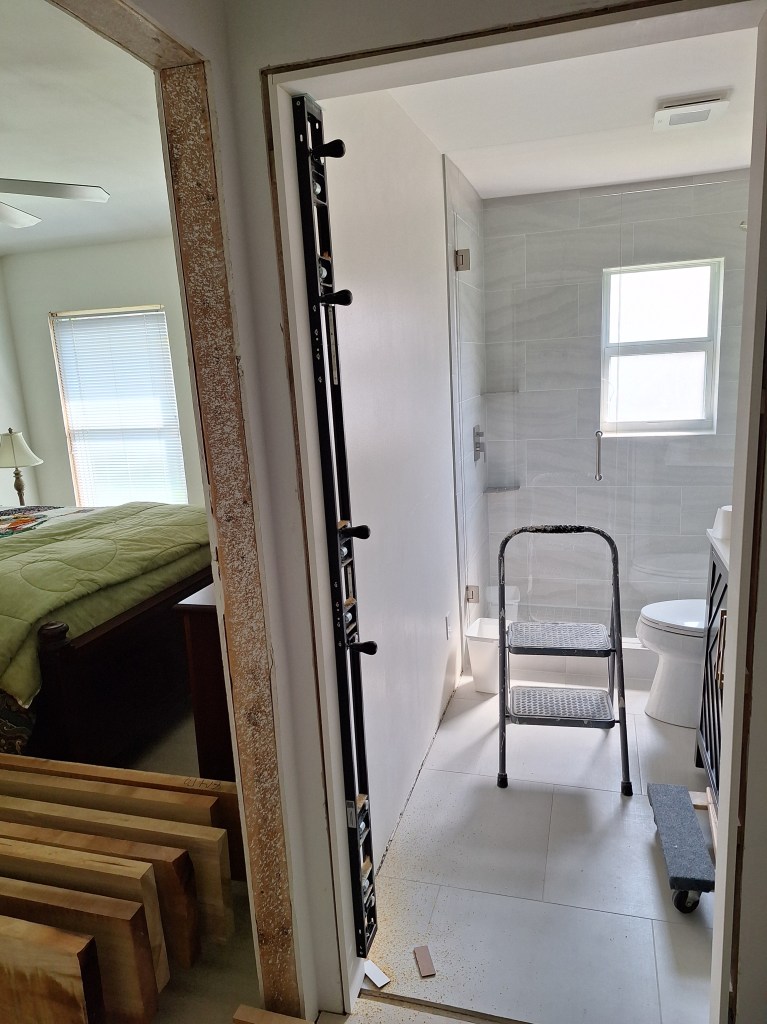
When positioning the JambMaster, I didn’t depend solely on the level attached to it. I also used my laser lever to ensure it was plumb. Once the JambMaster was in position, sufficiently thick wooden blocks were glued to the studs within the template openings. In the image above, you can see that the blocks are in position, glued, and ready to be routed. The image below shows the blocks after routing.
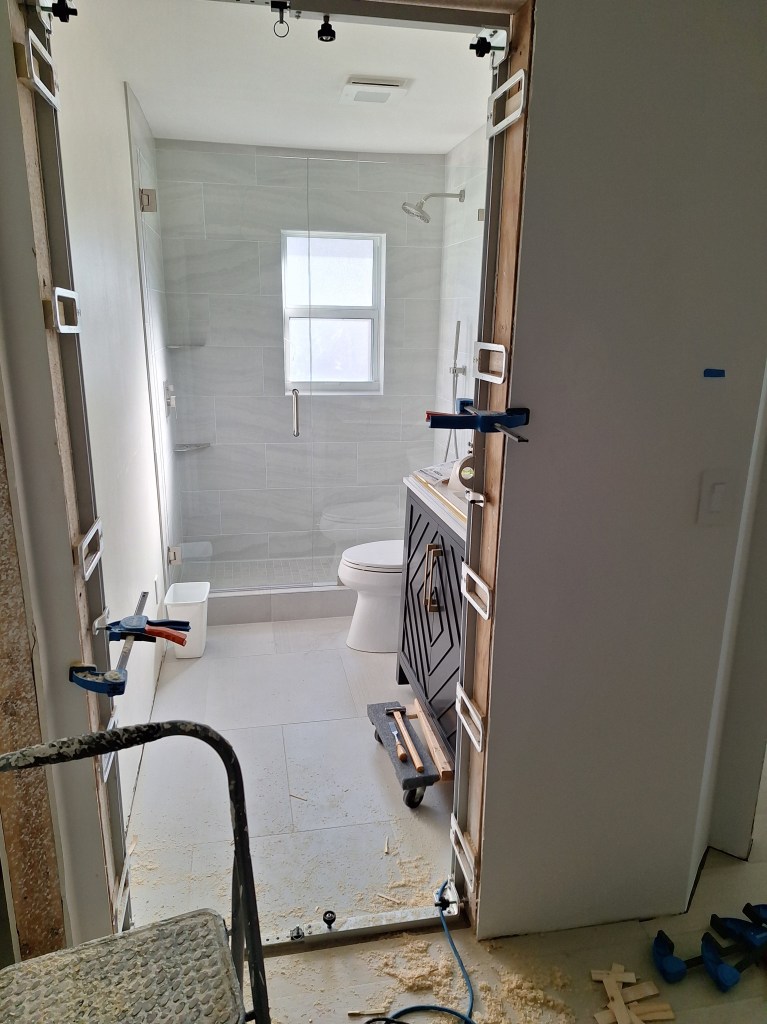
After removing the JambMaster, the opening is nice and plumb, as shown in the images below.


The opening is now ready to receive the jamb.

And here is the jamb installed.
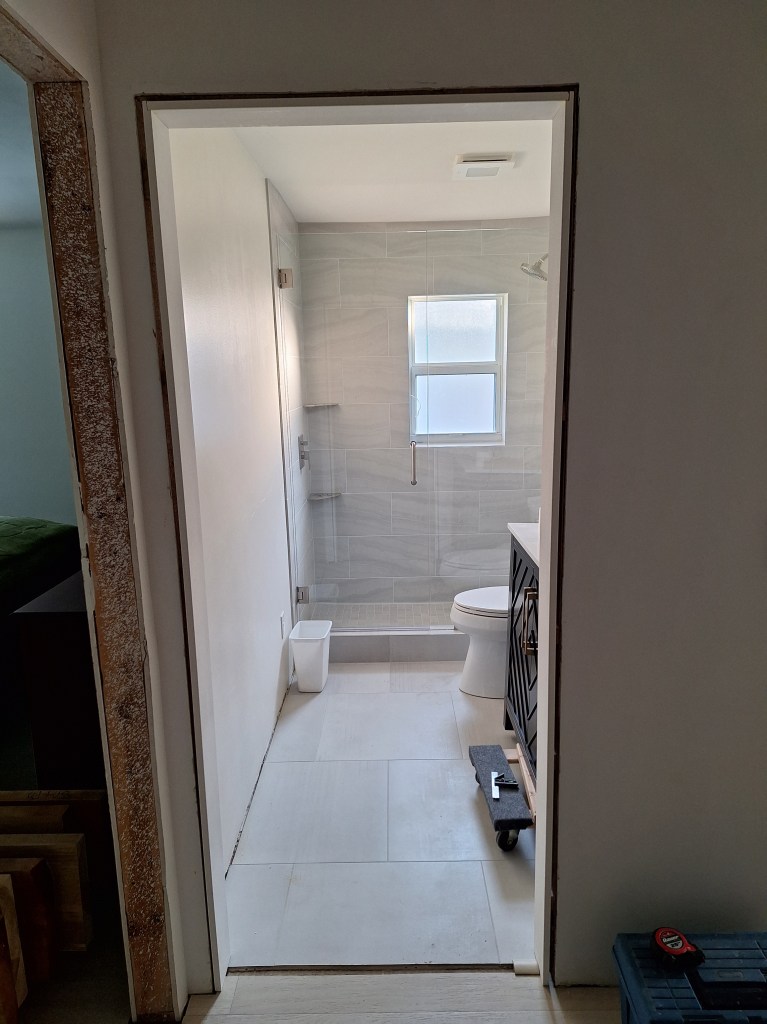
Here is another angle to better show the shimming required to get the jamb plumb and square.

With the jamb in place, I now had a true measurement of the opening. It was 32-1/4″ wide. This meant that my door had to be 32″ wide, allowing for a 1/8″ gap all around. I trimmed 1/4″ off each stile using my track saw and cleaned it up with a hand place. The freshly exposed wood had to be primed and painted as usual. During that time I used some glazing putty to repair a score mark I accidentally put in the upper panel when manipulating the door. That, too, required primer and paint to complete.
With the door’s dimensions finalized and painted, it was time to rout mortises for the hinges. This would be required for both the door and the jamb. Since precision was paramount for this task, I purchased a special jig. It was critical that I get the mortises right and that they transfer perfectly to the jamb. After all the work I had done already, messing this up would be very upsetting, so I was extra careful, and a bit nervous. I was about to cut into my newly painted door! Fortunately, it went well.

Note in the image above that the metal end of the jig hooks onto the top of the door. This metal piece is 1/8″ thick, so it accounts for the gap between the door and the top of the jamb.
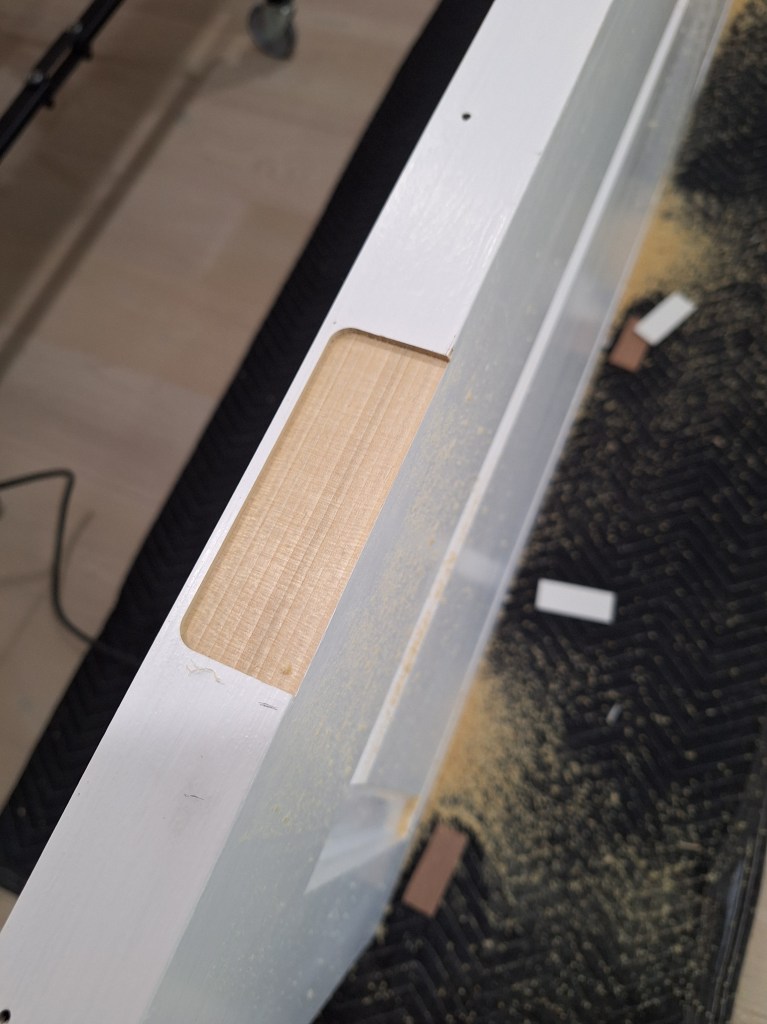
Since I was using a router, the corners are rounded. My hinges are square, so the corners had to be squared up.

And here are the hinges installed on the door.

Next, I transferred the jig to the jamb to rout out the mortises there. Note in the image below that the metal end of the jig (at the top) is now pushed up against the top of the jamb. When routing the hinge mortises for the door, it was hooked around the top of the door. This is where our 1/8″ gap at the top comes from. Very clever.
Also note in the lower left part of the image below the many 8/4 poplar boards I have acclimating in the guest bedroom. These were picked up while working on this door and should be ready to use when I start on the next door.

As with the door, I squared the corners before fitting the hinge leaves. I also added additional blocking behind the jamb where the hinges would be attached. I didn’t want any voids there. On each hinge there are four screws. I replaced two of them with much longer screws that would get a good bite into the stud behind the jamb. It is recommended that you do this to prevent any future sagging, one for each hinge, but I did two because my door is solid and therefore heavier than most.
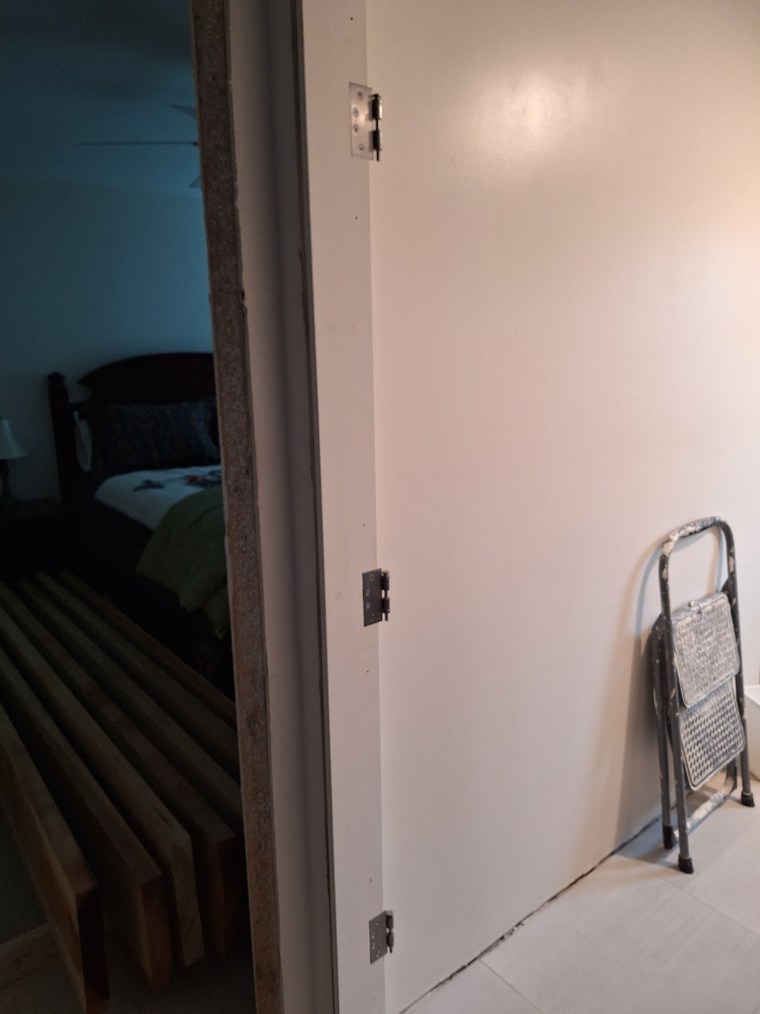
What you don’t see here is the trouble I went through before installing these leaves. The hinges are ball bearing hinges. With this type of hinge you will not get the black dust around the knuckles that show up over time due to metal against metal wear. However, when I removed the pin that connects the two leaves, the leaf on the door was fine, but the one for the jamb contained the ball bearings. I discovered that they were not sealed, and with only a little bit of manipulation, the little balls fell out. It was a real nuisance collecting them up and putting them back in place so they would stay. I found that by keeping the pin in place, that helped. This is why you see the pin in the leaves installed in the image above.
Given this, I was concerned what would happen when I had to remove the pins to install the door. I had visions of the balls spilling out while I was manipulation my very heavy door. So when it came time to install the door, this was top mind. Consequently, I neglected to capture an image of the installation process. I’ll show that when I do my next door. For now, I’ll just mention that I have a pair of door dollies that fit under the bottom of the door and capture it. This allows me to roll the door into position and then raise or lower it via screws to align the hinges. It worked very well. I had no issues with the ball bearings. I was as gentle as I could be until the knuckles of each hinge interlocked. Once they were interlocked, the ball bearings could not fall out, even if the knuckles were not properly aligned. After some persuasion, I was able to push in the top pin. That provided some relief. Shortly after, I was able to do the same with the remaining two hinges.
Once all hinge leaves were joined, the big test; would the door be properly centered in the opening and swing smoothly and properly. After all the work I did to ensure the jamb was right, the door measurements were right, and the hinge mortises were aligned, this should just work. And to my delight, it did! I was expecting some tweaking would be required. It was great that none was.
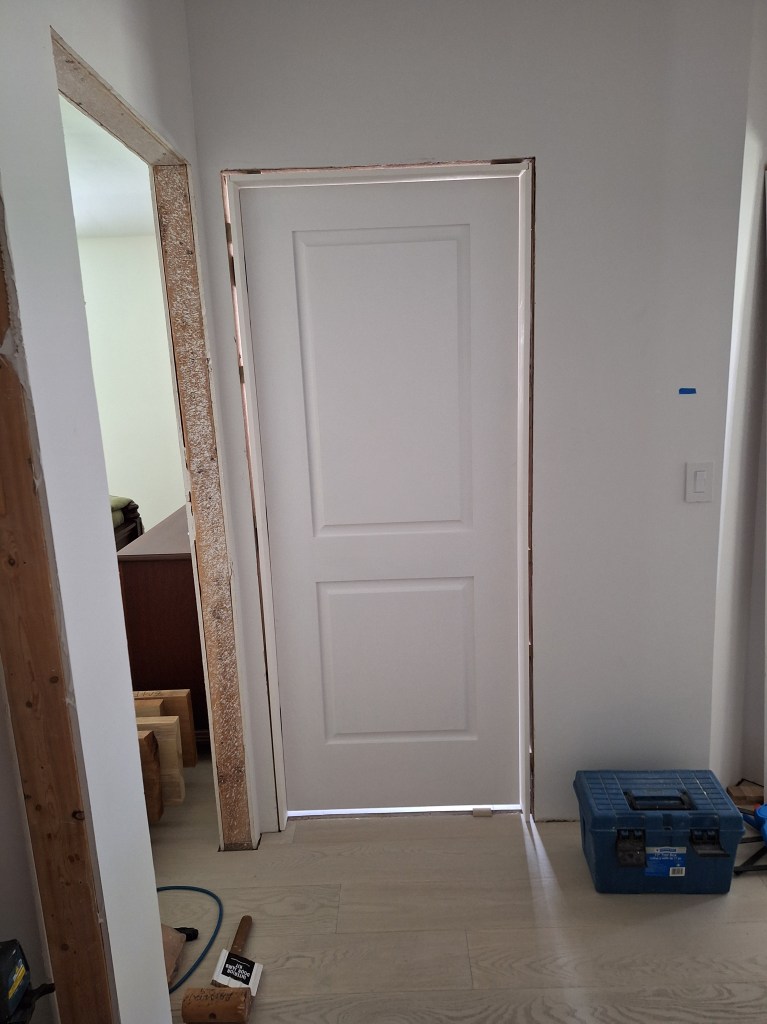


I still have the door stop to install along with the hardware, and, of course the casings all around. The transition piece between the tile and hardwood flooring will be one of the last steps to completing this. I will add the door stop next, but will not add any hardware until the other doors in this hallway are installed. This way, seeing them altogether, I can get a better sense of what kind of hardware I want.
I’ll be going away for a few weeks on vacation. When I return I have a couple of options for my next project. I’d like to get the bathroom vanity installed. Now that the door is in, I can add casing around the inside of it, which will allow me to finish the baseboard. Once that is in place I can position the vanity and install the plumbing. I suspect I’ll do that next, but I also want to make some changes to my work environment to make it better suited to door making (build that MFT table I mentioned at the top of this post). So I may get to that next. I’ll give it some thought while I’m away. Off to visit friends and family.

