The last post finished with me having just finished taping the drywall in the guest bathroom. So we start this post with the various coatings of that taping job.
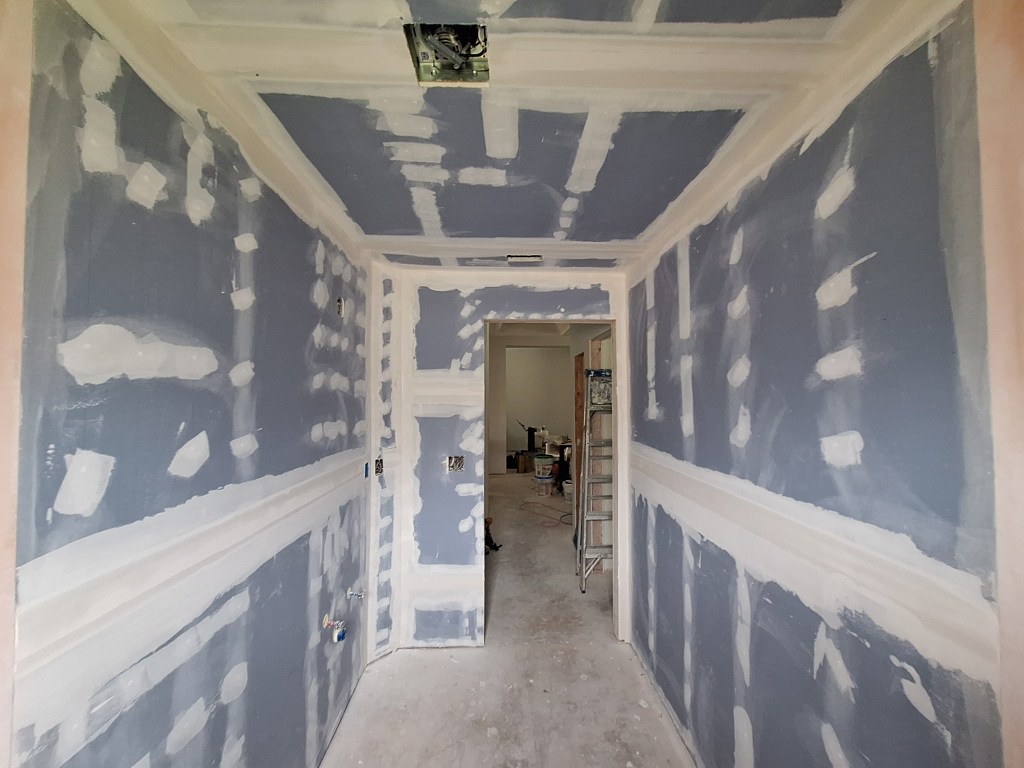
After the first cover coat of the tape, we apply a second to widen the coverage in order to flatten the seams. In between each coating, sanding is done to prepare for the next phase.

After the second cover coat of the tape, a little more attention is paid to the sanding in preparation for the first skim coat. The idea of skim coating is to cover all the drywall surfaces with joint compound so that the texture is consistent. That is, we don’t want part of the wall covered in joint compound and other parts with none.

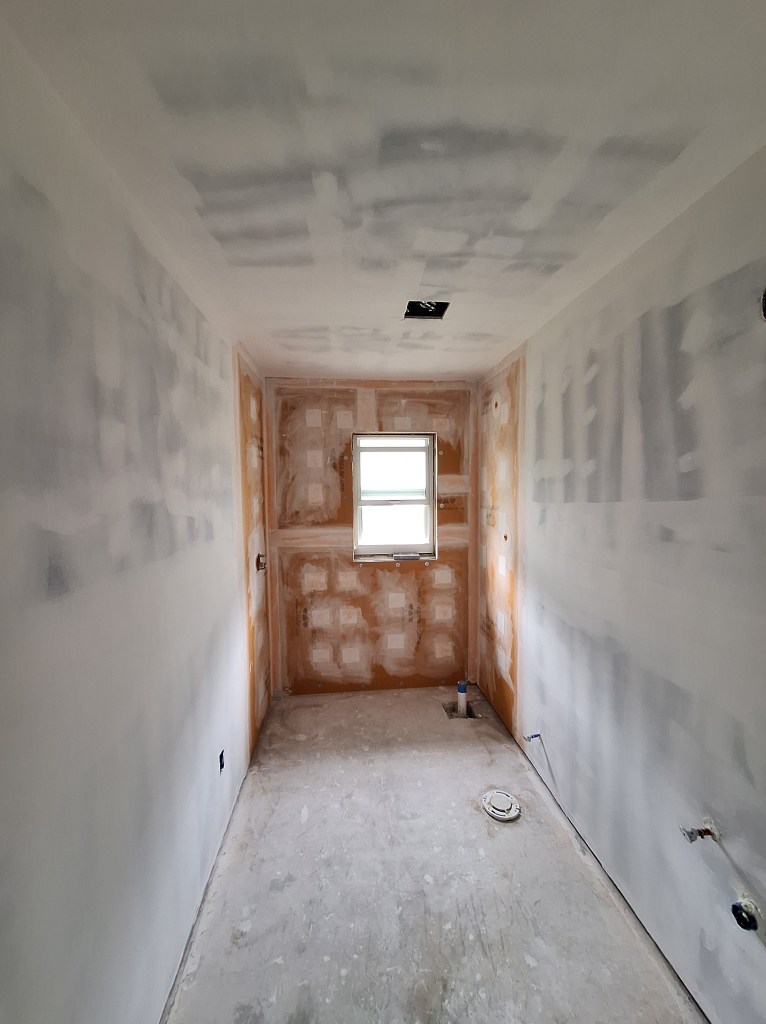
A single skim coat is normally enough, but I like to do a second to ensure there is enough joint compound on the walls (and ceiling) to make an even nicer surface. Before applying the second skim coat, the prep work becomes more important. The more attention I pay to the sanding, the less work I have to do on the second/final skim.
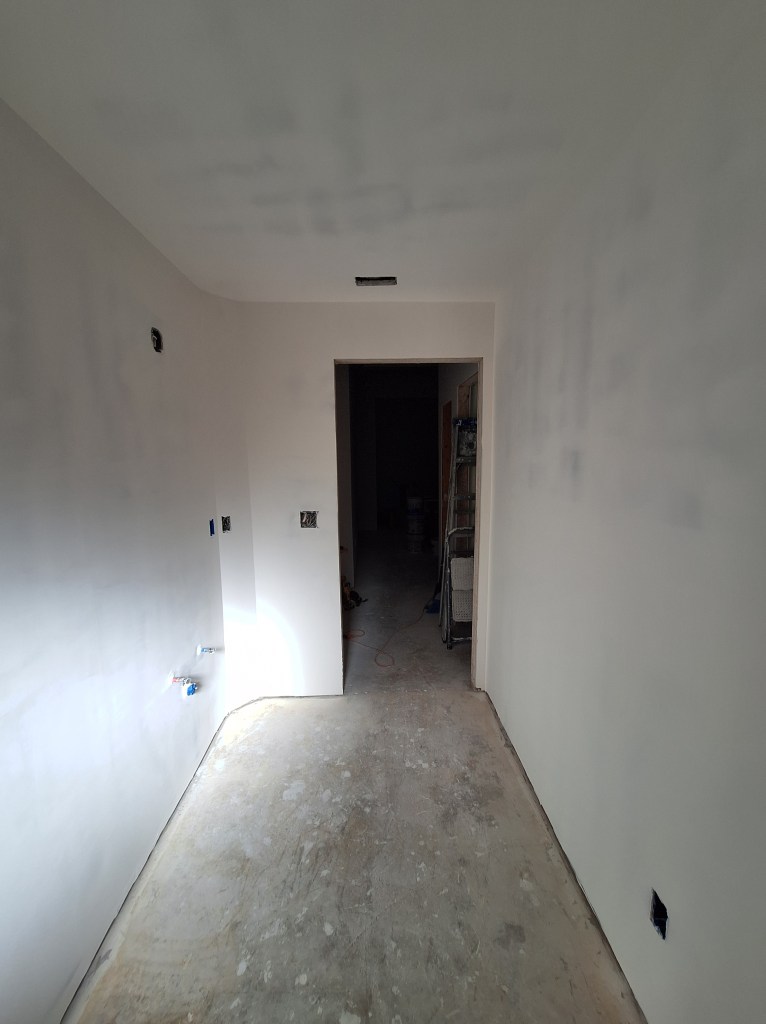

Some serious attention is paid to prep work before applying primer. I hand sand using a hand held light wand to ensure I remove as many imperfections as possible. It is inevitable that I will miss something since everything is white (snow blindness), but if I’m not able to see it with the wand, it is highly unlikely it will be noticed by anyone. Here is the room after applying a single coat of primer to the walls and ceiling.

I left the walls with only a coat of primer, since I had yet to choose a wall color. The ceiling, however, would get two coats of white ceiling paint.
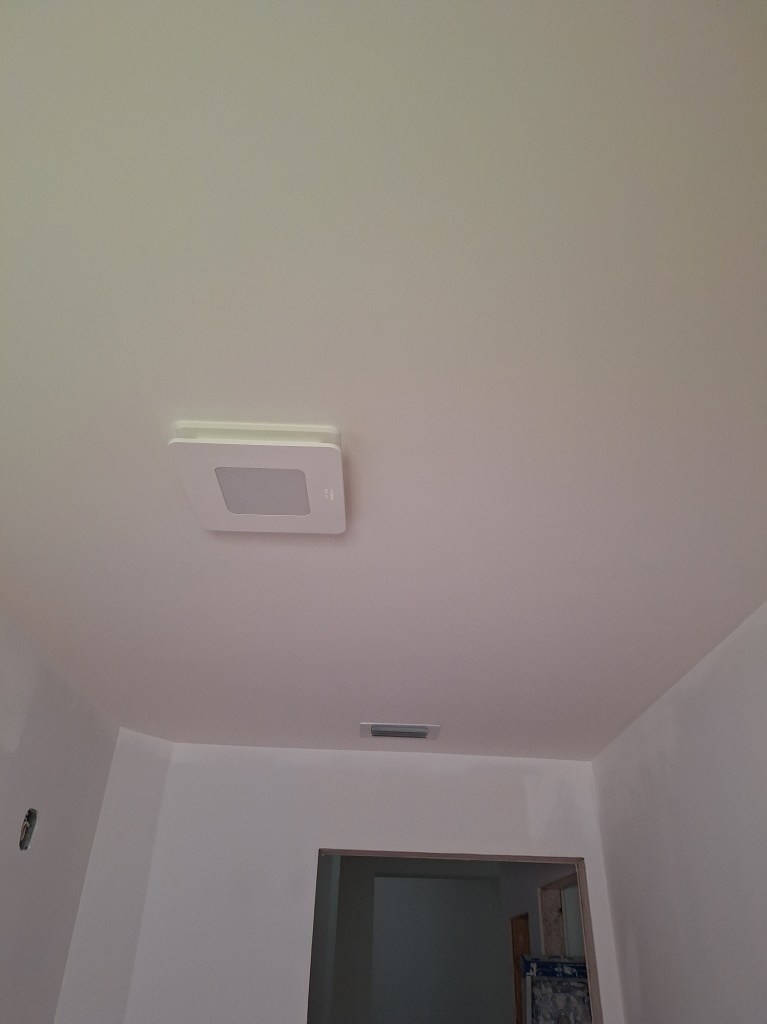
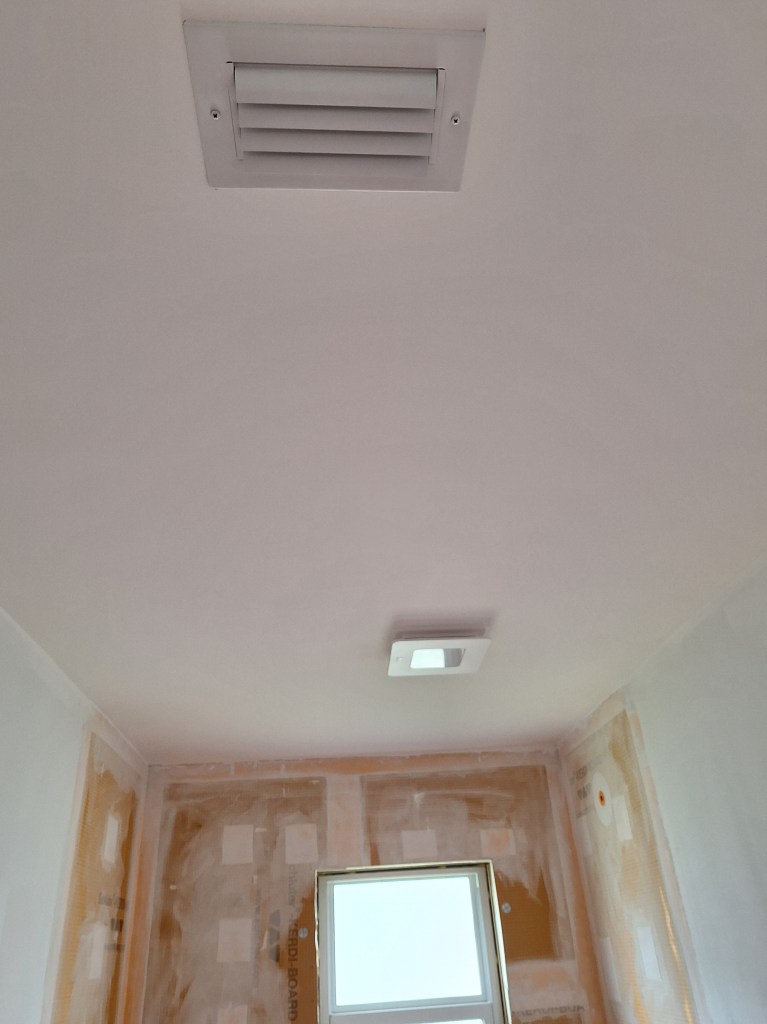
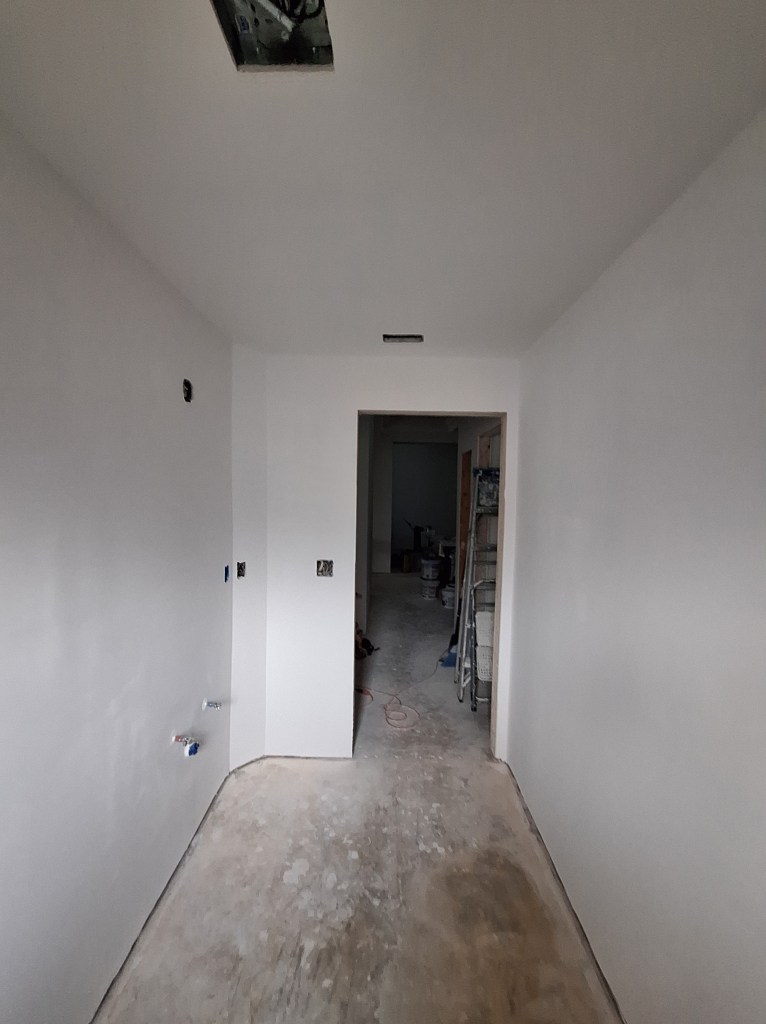
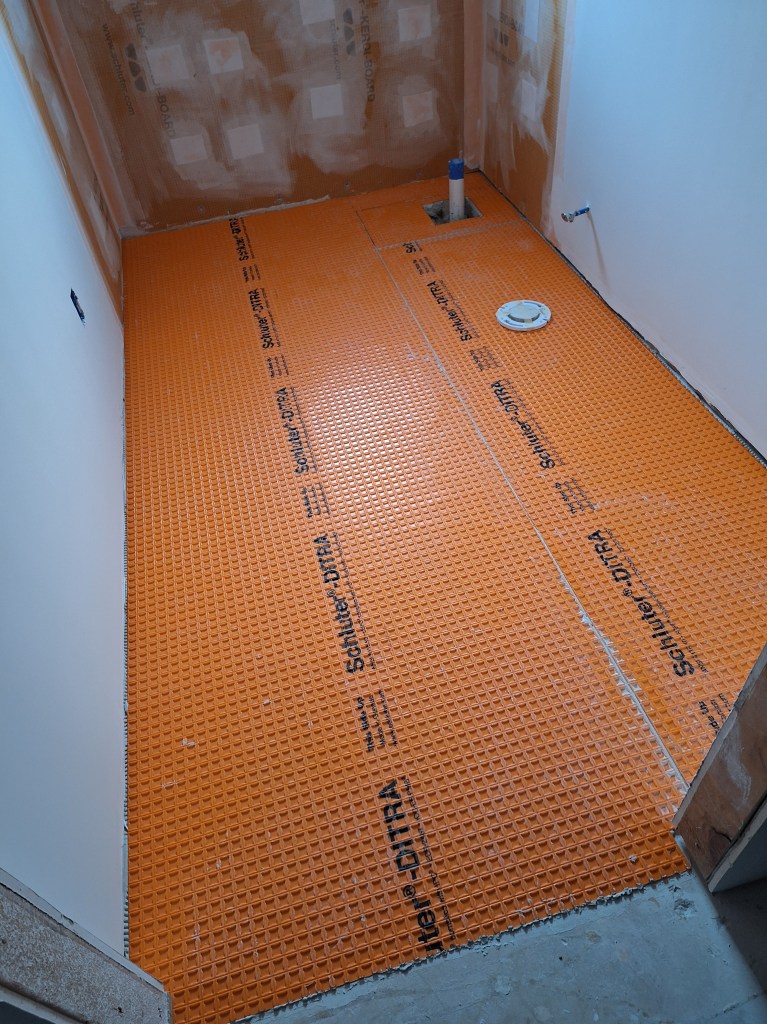
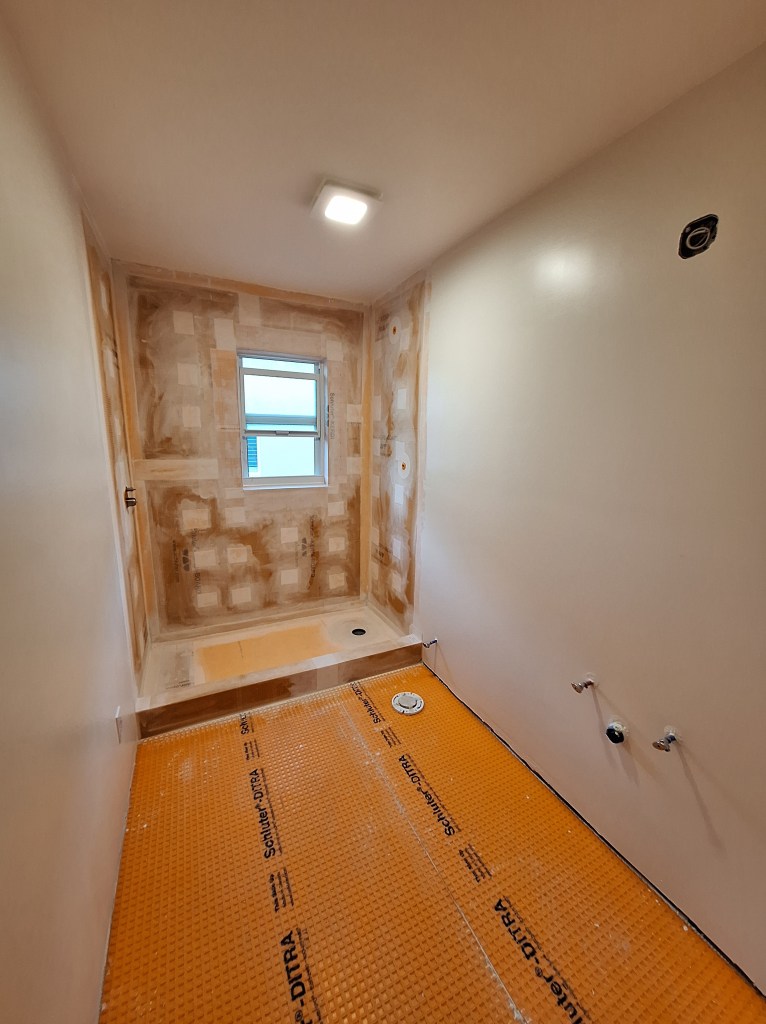
As you can see above, I put the A/C grate back in place after spray painting it to freshen it up, then put up the fan/light fixture. With the ceiling painted, I was ready to put down the DITRA underlayment for the tile.
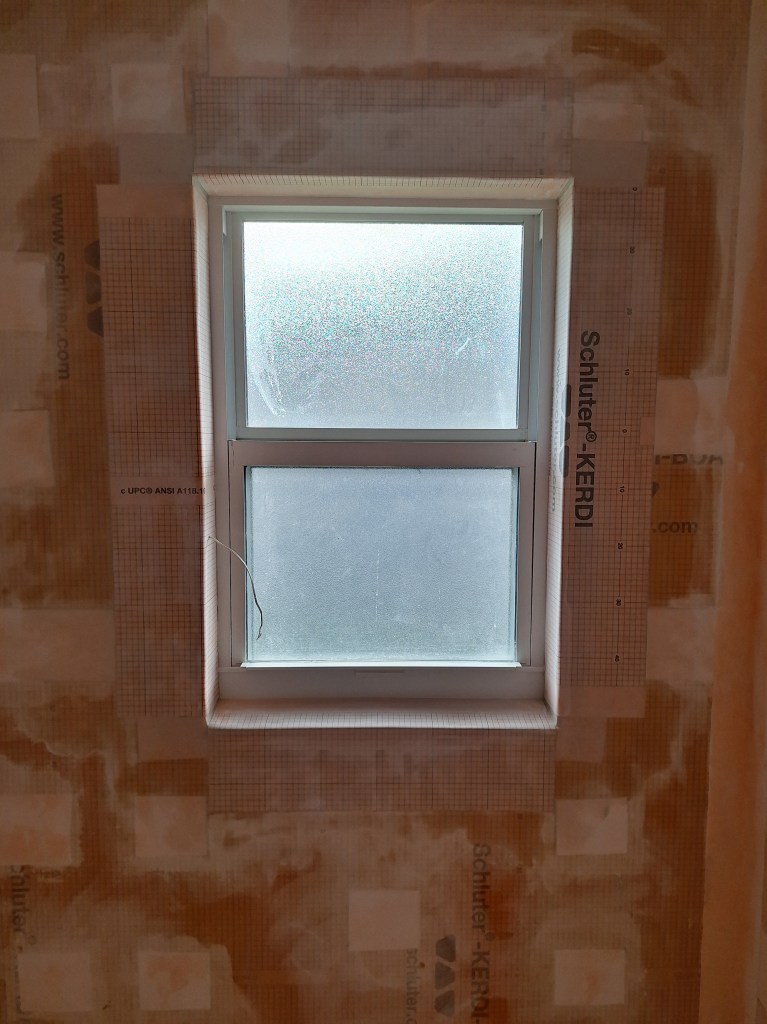
After that I returned to the shower area to waterproof around the window. I figured I would use Kerdi board around the window, but ran into the same problem I had when I put it up on that exterior wall; namely, I needed to build the area out to accommodate the 1-5/8″ screws. Unfortunately, I didn’t have the space around the window to do that, so I had to come up with an alternative solution. Rather than use Kerdi board, which would have added an extra 1/2″ of thickness, I used Kerdi membrane, which added virtually no extra thickness. Let me show you.

In the image above, you can see that I added drywall all around the window to provide a flat surface on which to attach the Kerdi membrane. At the bottom, I needed to add some wood so the drywall had something to screw into. Previously there was a marble slab attached directly to the concrete block. Here’s a closer look.

And here it is with the Kerdi membrane added.
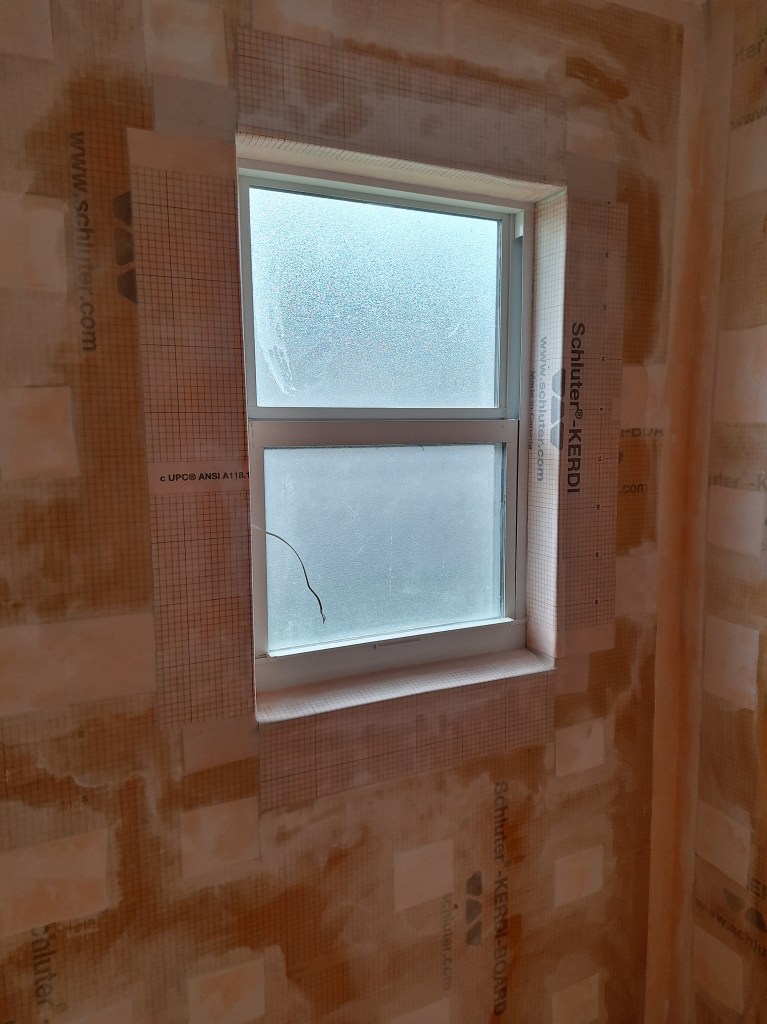
The wire you see sticking out on the left side is for the security system.
The thing to pay attention to is the space around the membrane and the window frame. It is sufficient to accommodate the thickness of the tile. Had I used Kerdi board, which would have added another 1/2″ of thickness (needed for the 1-5/8″ screw length), I would have had no room for the tile. So this worked well.
With the walls of the shower waterproofed, I turned my attention to the shower pan. I started by cutting the preformed shower pan and setting it in place with thin-set mortar. This served as a reference for putting the Schluter curb in place. Like the pan, it too was set in place using thin-set mortar. The curb did not come in a long enough single piece, so I had to buy two and butt them together. The seem between the two pieces will be wrapped with Kerdi band, as you’ll see shortly.
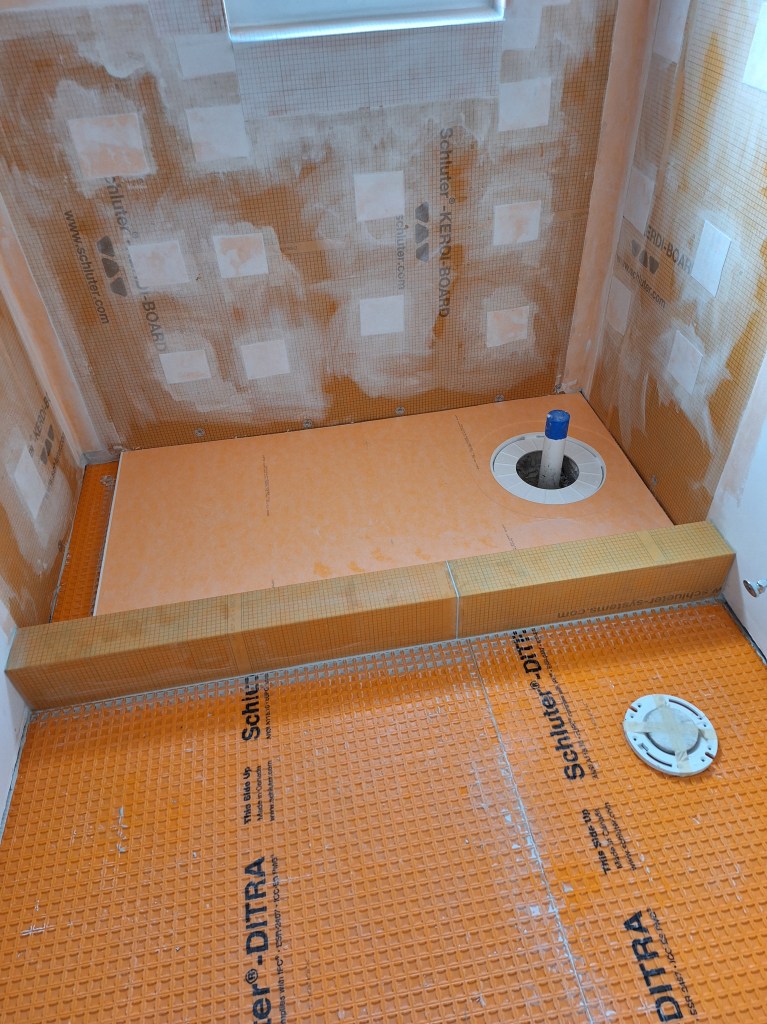
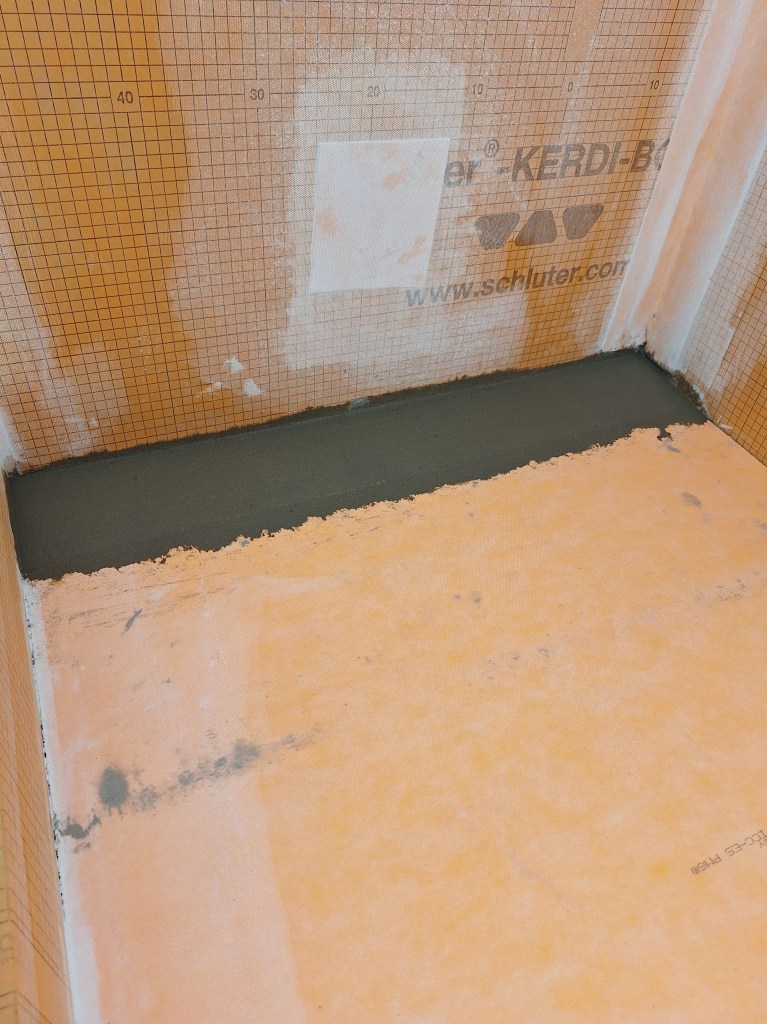
The pan was not long enough to fit the space, so I filled in the gap on the left with drypack mortar. Once dry, it will be covered with Kerdi membrane to make it waterproof.

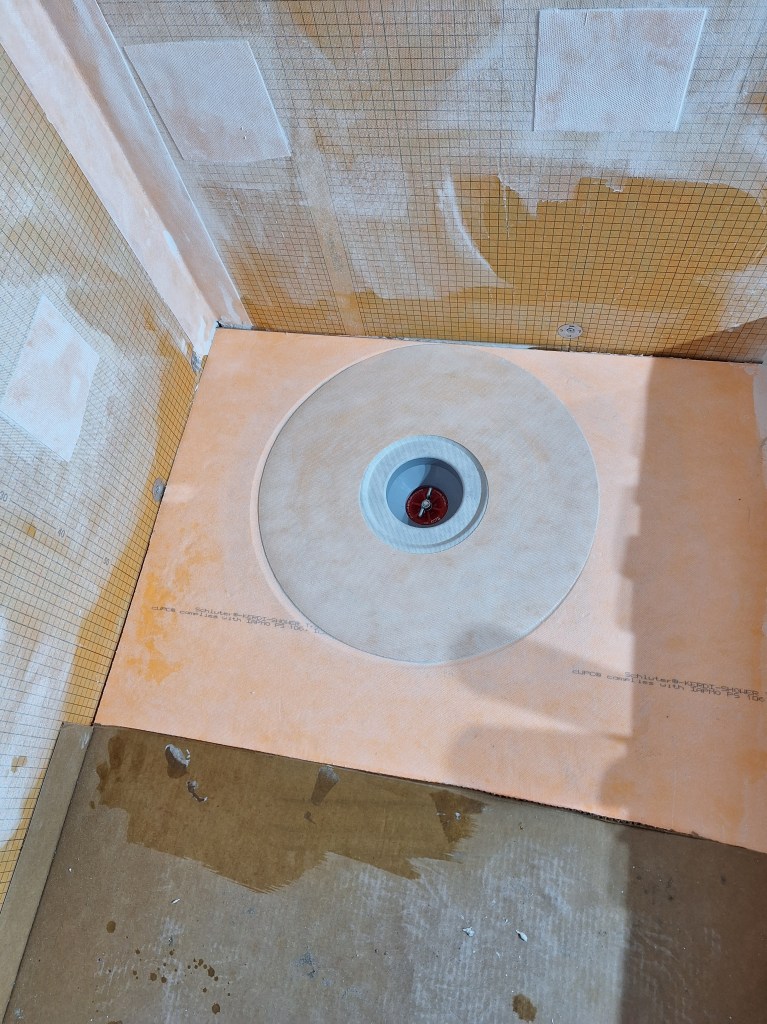
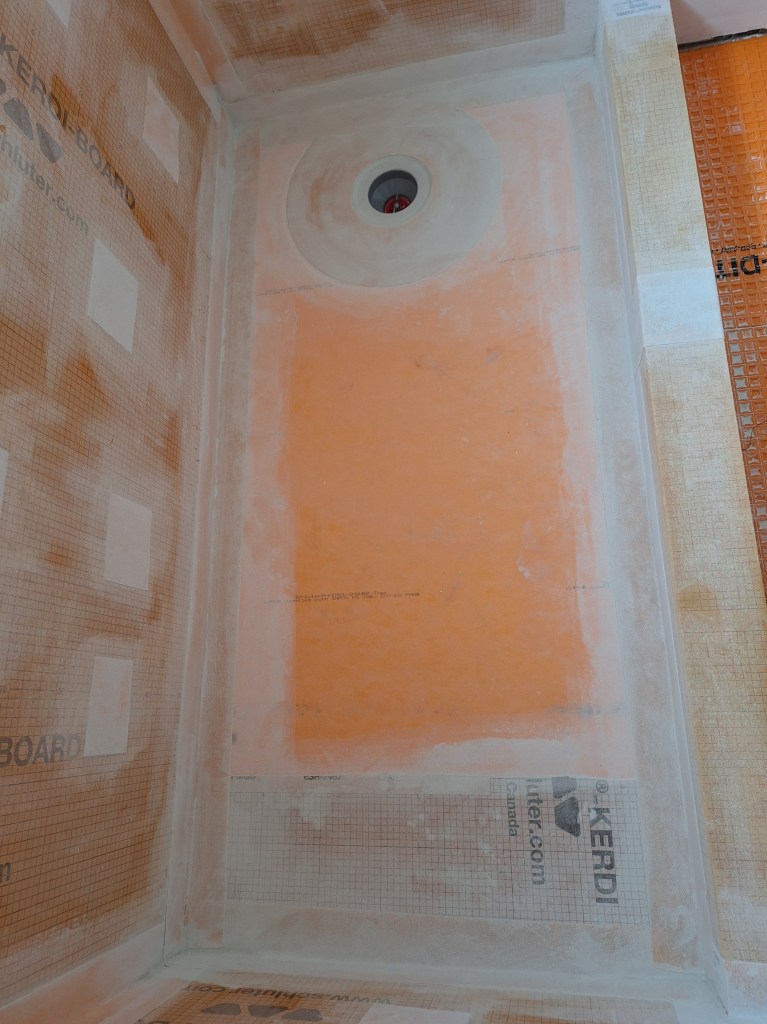
I actually made a mistake by putting the pan down first. What I should have done was set the drain flange in place before setting the pan. In the end it wasn’t a big deal, but it got in the way as I was setting the drain flange. When I did the master shower, I set the drain flange first. For this shower, I simply forgot the order of operations. Another thing that caused me some grief, was that the p-trap needed to be lower than it was. This was a rookie mistake. Although I did check the depth and was comfortable that it was low enough, I did not give myself enough room for error. Without intervention, it would have left the drain flange about 1/2″ above the shower pan. I should have placed the p-trap low enough that there would be no question of the drain flange sitting too high. To sort this out, I had to completely remove the riser pipe (the one with the blue tape covering the opening), then cut off some of the flange where it connects to the riser pipe to bring it down to where it needed to be. I used a 1″ length piece of 2″ diameter PVC to join the two. This was long enough to bring the two pieces together and still have sufficient “bite”, but I was lucky. Anything less, and I would have had to undergo a much more severe operation. This stressed me out. I was relieved to be able to sort it out without any major surgery. Here is the drain flange installed and waterproofed.
After that, I added Kerdi membrane over the drypack extension and over the remaining seems.
The seem between the two sections of curb was also wrapped.
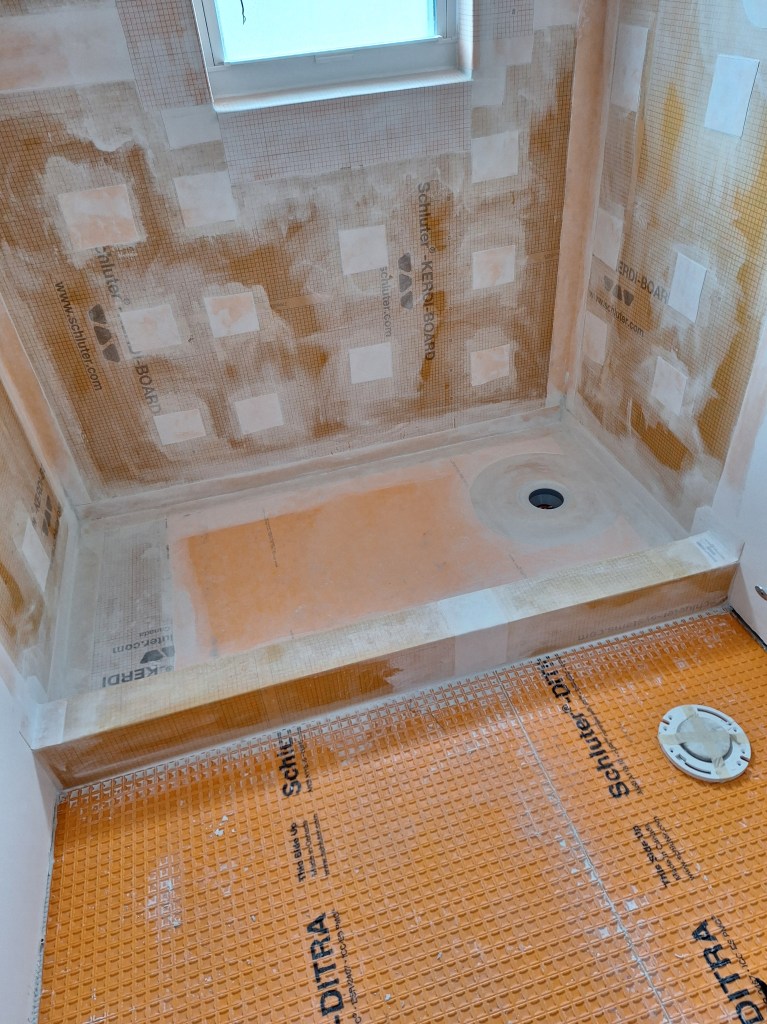
Once the thin-set used to set the Kerdi band was dry, the shower should be waterproof. To ensure this is the case, I filled the shower pan with water and left it overnight.

After I was confident there were no leaks, I scheduled another inspection so the inspector could witness that this had been done, which went without issue.
With the water test inspection done, I was free to tile away. However, I had yet to select the tile I would use. I spent some time exploring this, but in the end decided to use the same scheme I used in the master bathroom. I know that is not very adventurous, but I really liked that scheme and did not want to risk introducing something I might regret later. So I placed the order and then had to wait for them to arrive. In the meantime, I decided to paint the walls and install the switches and outlets. As in the master bathroom, I used the Behr equivalent of Sherwin Williams’ Alabaster with a satin sheen.
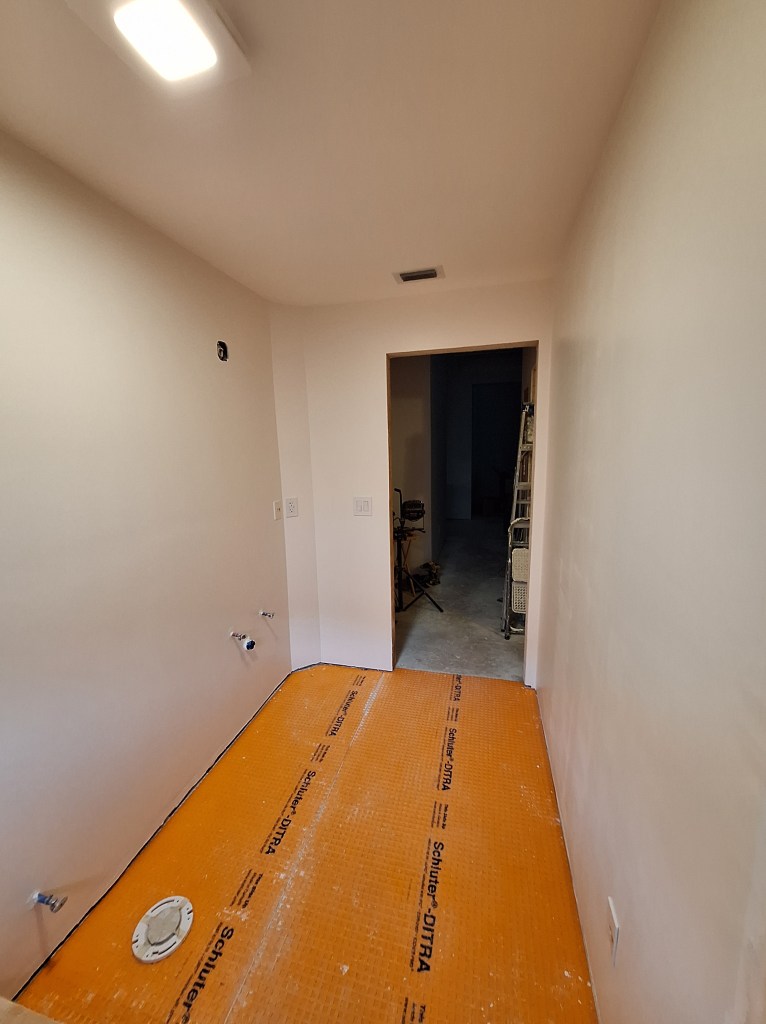
With the switches installed, I can now illuminate the room with the light from the vent fan. The vanity lights have yet to be chosen, so that junction box remains exposed. I also added the face-plates for the Ethernet cables.
I had intended to continue this post with at least the floor tile and shower floor tile installed before I stopped work for the holidays (mid-December), but tiles took longer than expected to arrive and I got extremely busy with social commitments. Fortunately, this down time worked to my advantage with respect to the social commitments, giving me the time I needed to attend to them. At the time of writing, I have just over a week before I go away for the rest of the month, returning after the first week of January. With more social commitments upcoming (it’s the holiday season, after all) I’m not confident I will be able to do anything more before I leave, so I will end the post here. If I do manage to do anything before I leave on vacation, it will appear in my next post.
