Returning my attention to the master bathroom, the objective was to make it a functioning bathroom. This did not mean it would be fully finished; only finished enough that I could use it if I was living in the house. So I did not intend to go so far as have the baseboard done and entrance door installed.
I began by painting the previously primed walls. I used the paint recommended by my designer and was very happy with the choice. It was a color match of Sherwin Williams Alabaster. I got it at Home Depot under Behr Dynasty with a satin finish.
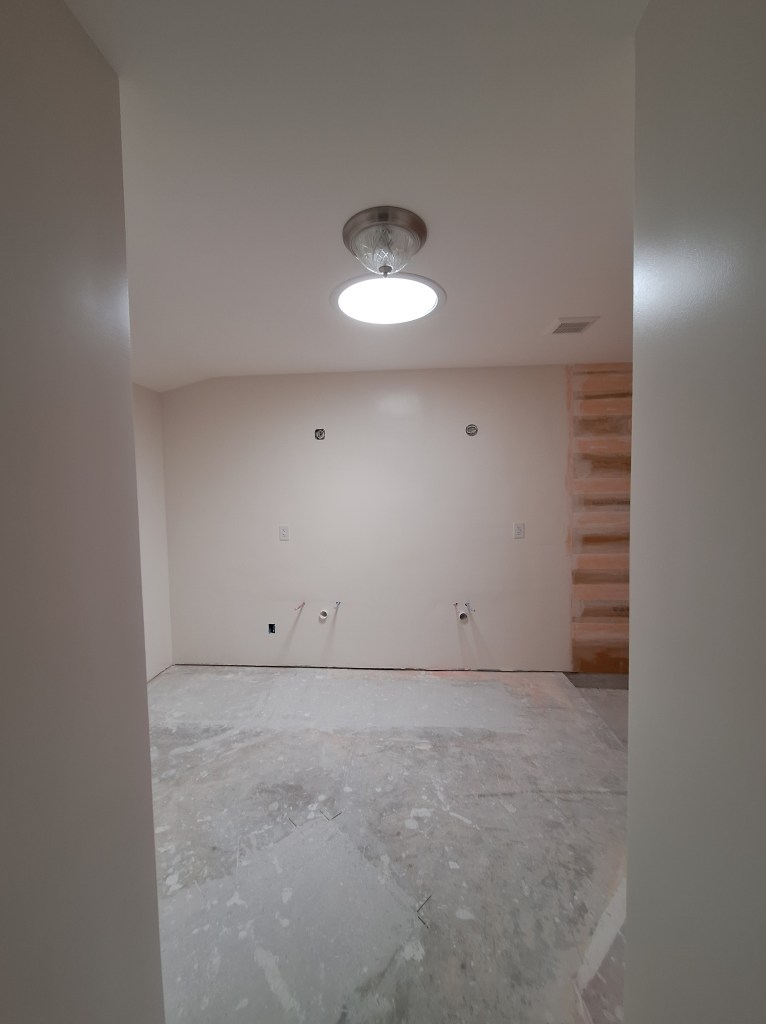


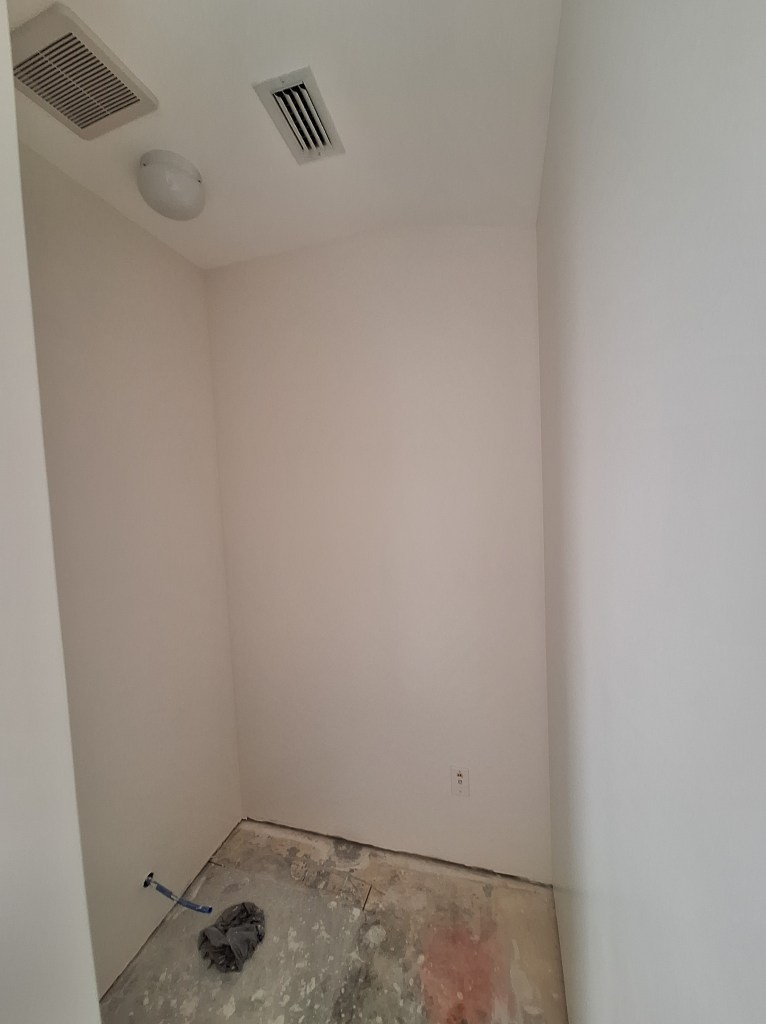
You’ll also notice from the pictures above that I installed the outlets, switches, lights, fans (toilet and shower), and A/C grates. All are new, except the light in the toilet alcove and the A/C grates. They just needed a bit of cleaning. I thought the original light fixture I installed in the toilet alcove was perfectly fine for that location.
Another thing I did was reinstall the sun tunnel. This took a bit of work. In an older post I mentioned that I wanted to relocate the sun tunnel to be centered on the entrance hall. After making the required changes for that, I just left it dangling, to deal with another day. To be perfectly honest, I was not looking forward to putting it back together in the new location. In the new location, the tunnel part only just reached, leaving some gaps in the reflective foil part on the inside of the tunnel. So I was going to have to come up with a way to patch it. Furthermore, the face-place (the part that surrounds the diffuser) was a bit yellowed, so that would have to be addressed. After scuffing up the surface of the face-plate with some sand paper to prepare it for primer, I gave it two coats, followed by two coats of clear satin. I was very pleased the result. It looked brand new. In between coats, I worked on the diffuser, cleaning it up.
With the faceplate dry, I installed it. That went better than expected. A little widening of the existing opening and it went into place nicely. I then pulled the tunnel part into it and fastened it in place. I used heavy aluminum foil and some foil tape to patch the gaps, which worked like a charm. You’d never know it was patched. I then put the diffuser in place and it looked just great – as if it had always been there. Sadly, I didn’t take any pictures of the process. I was too focused on solving the problem to think about documenting it, so you’ll have to settle for this description and the final result you see in the pictures above.
I originally thought I’d set the shower pan next, but after some thought I decided it would be better to first put down the underlayment for the tile flooring in the main part of the bathroom. The plan was to create a curbless shower, which meant that the shower pan would have to align with the surface of the main flooring. By putting the underlayment material down first, I would have an actual target to shoot for rather than a theoretical target where I’d have to calculate the height of the shower pan including the additional height of the underlayment and thickness of the thin-set mortar. So I started on that.
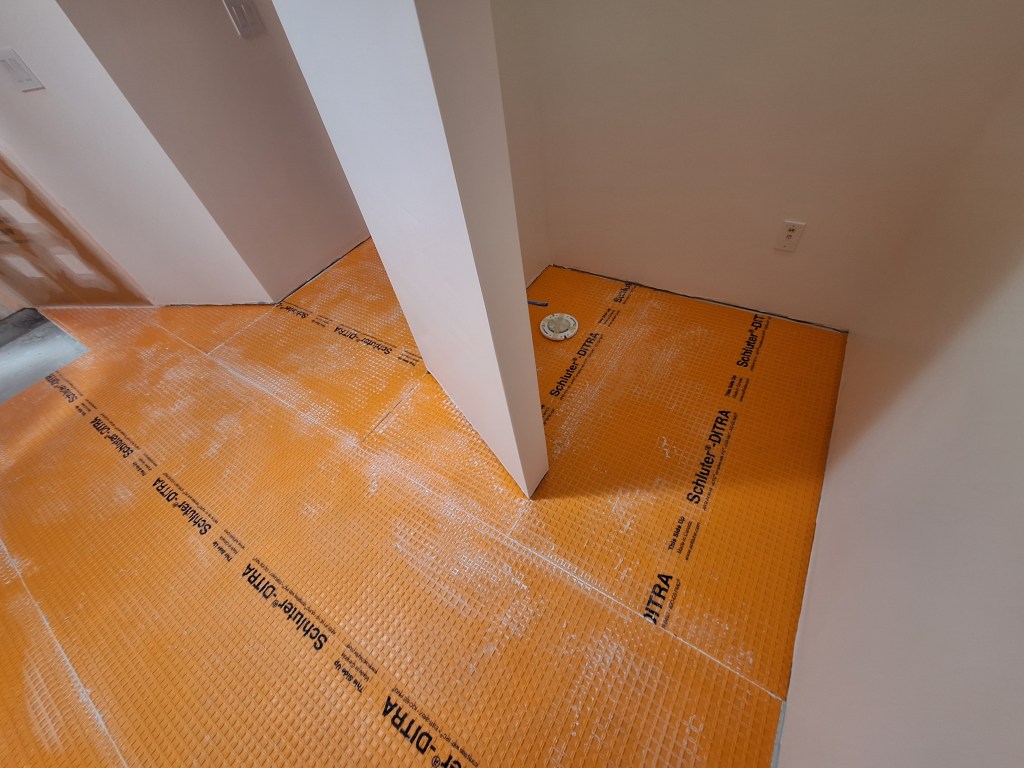
The underlayment material is a product by the company Schluter, and is called DITRA. It is a polyethylene membrane with a fleece on the bottom. It serves to separate the tile that will go on top from the concrete slab beneath. By separating the tile from the slab in this way, you reduce the likelihood of the tile cracking as a result of minor slab movement. The DITRA membrane is installed directly to the slab using thin-set mortar.
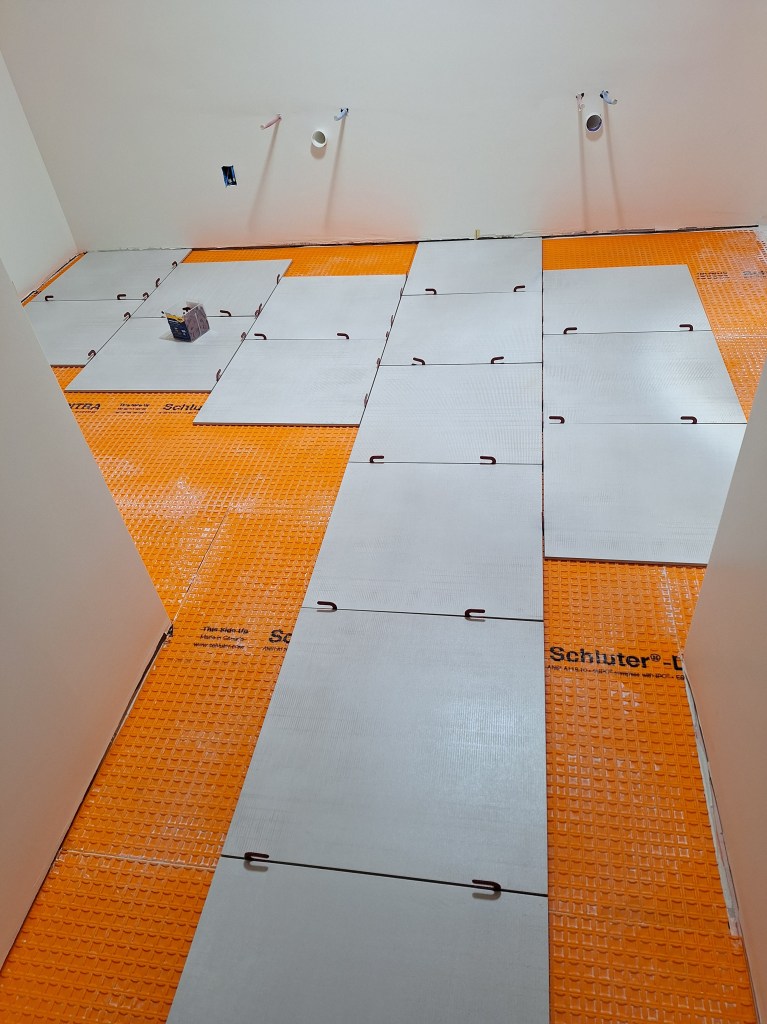
Before mixing up the mortar, I unrolled sections of DITRA and used scissors to cut it to fit the floor.
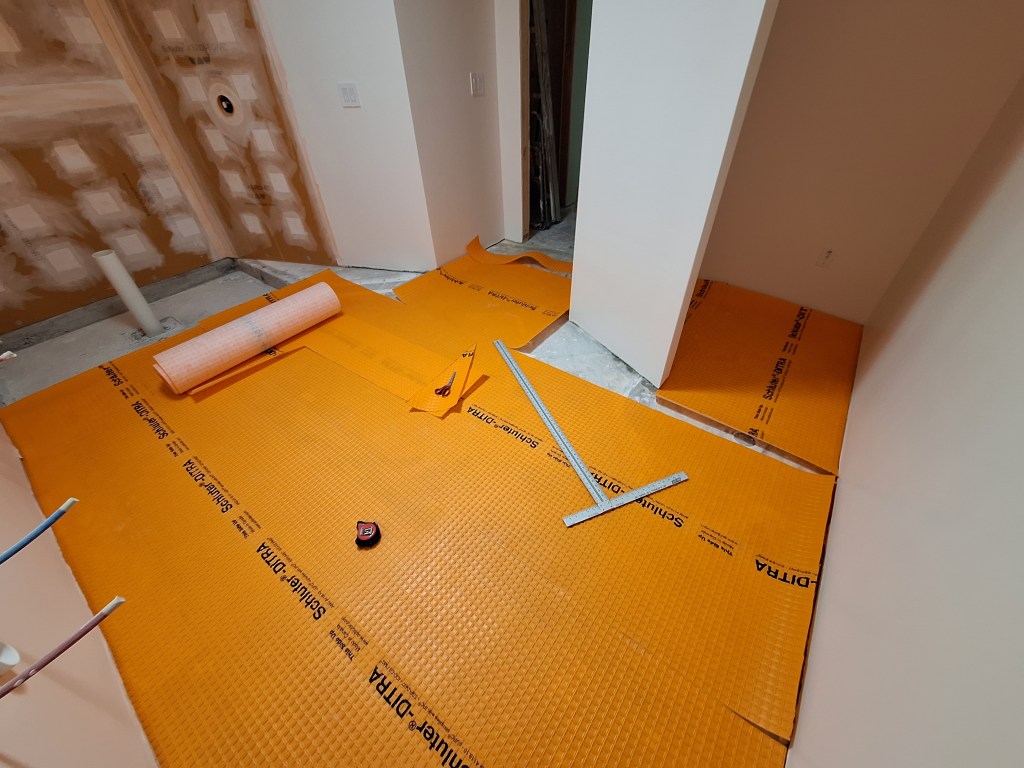
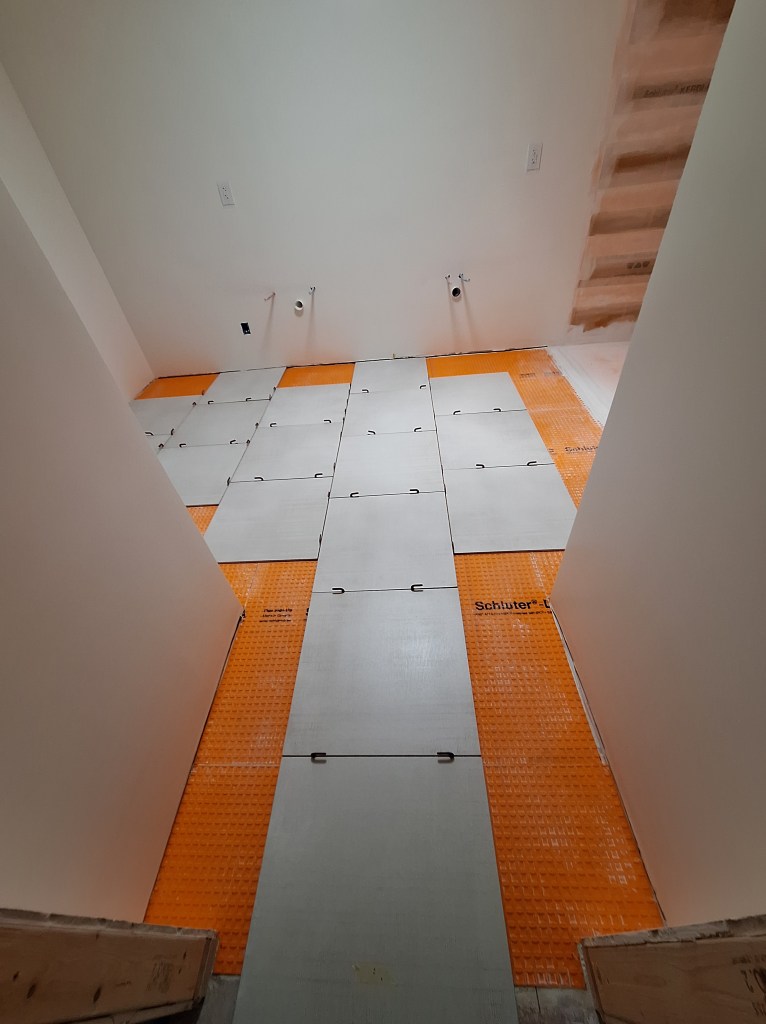
I cut two large sections first before tackling the more fiddly bits. Here are a couple of shots after the dry fit was complete.
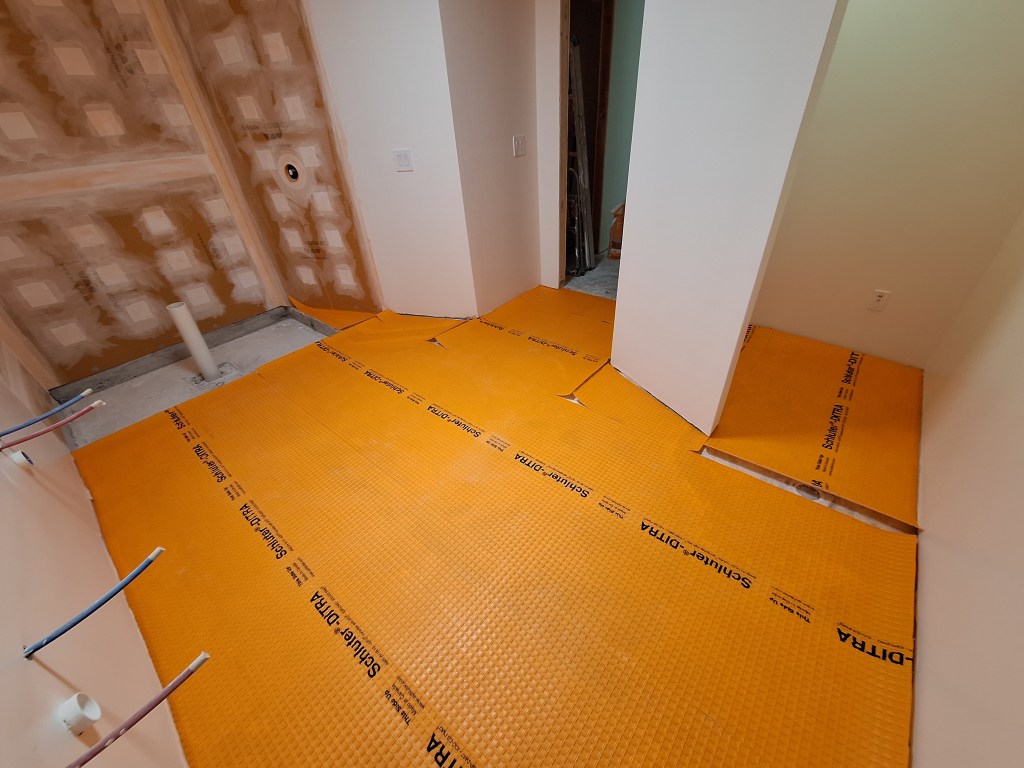

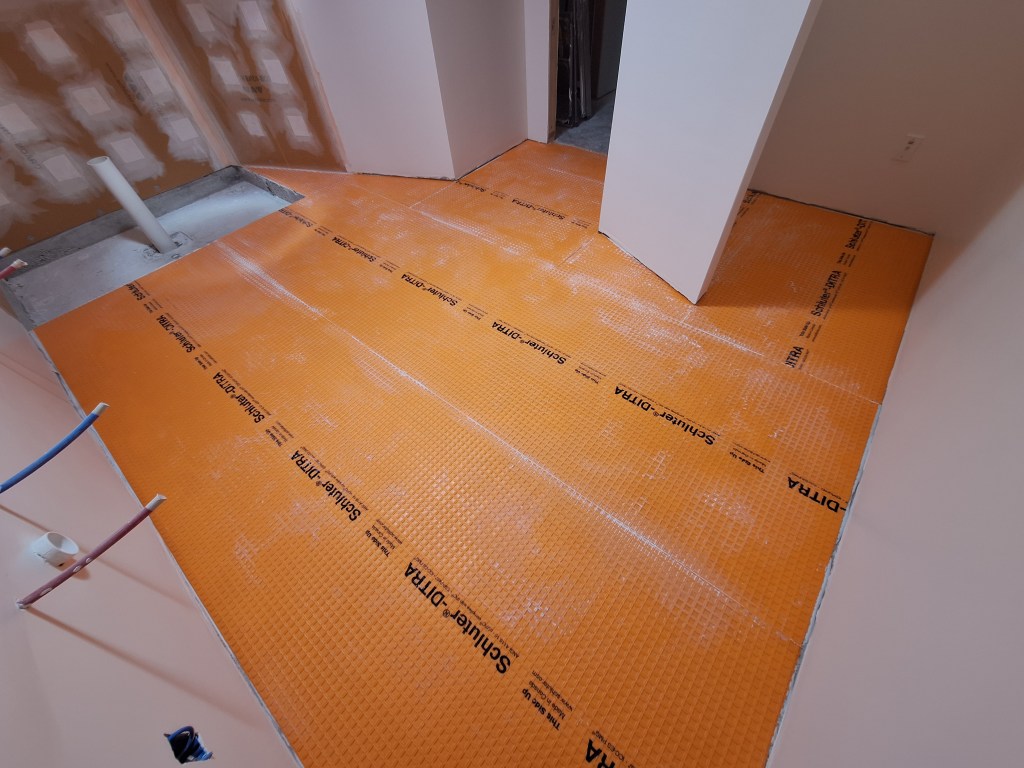
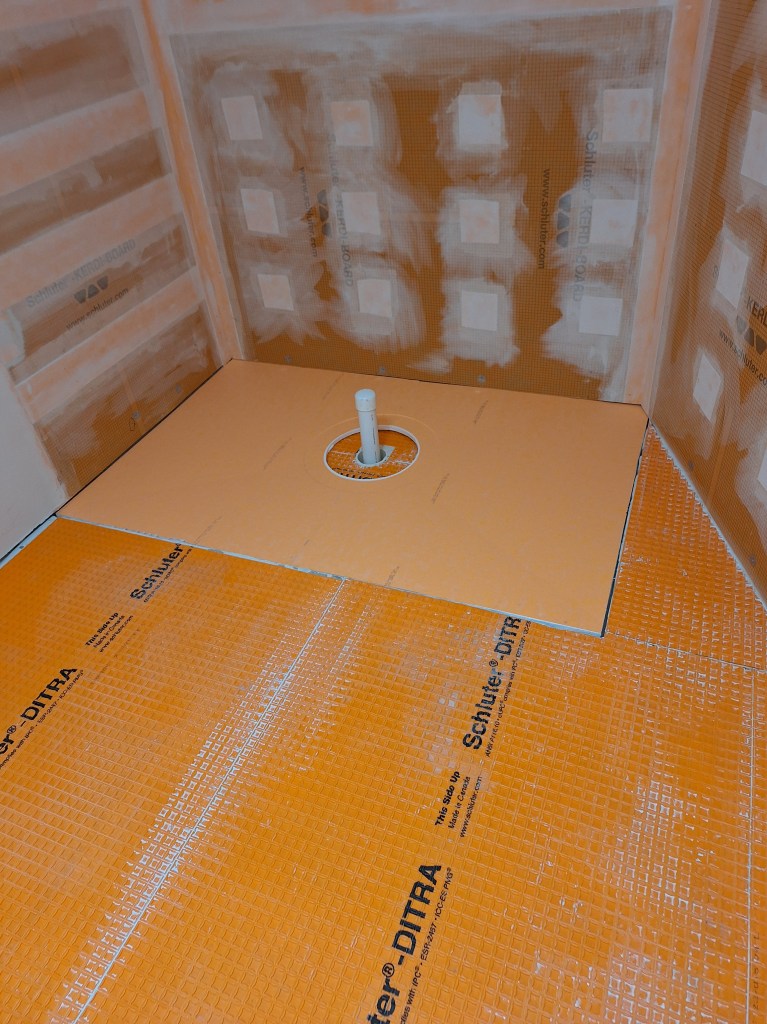
With that done, I mixed up the thin-set and adhered it to the floor. Here are the results.

With that done, I turned my attention to the shower pan. The shower area is recessed about 4-1/2″ below the bathroom floor. I will be using a Schluter preformed shower pan that provides a consistent slope from the edge to the drain. The preformed shower pan is 1-1/4″ thick and is to be placed on top of a flat surface. This means that I must raise the recessed shower area by about 3-1/4″ so that when the preformed pan is placed on top of it, it aligns with the bathroom floor. To do that I used dry-pack mortar, which is a 4:1 mix of sand to cement. It is mixed with just enough water to make it like wet sand you would play with at the beach when building a sand castle.
I mixed the dry-pack in buckets and dumped them into the shower area one at a time.
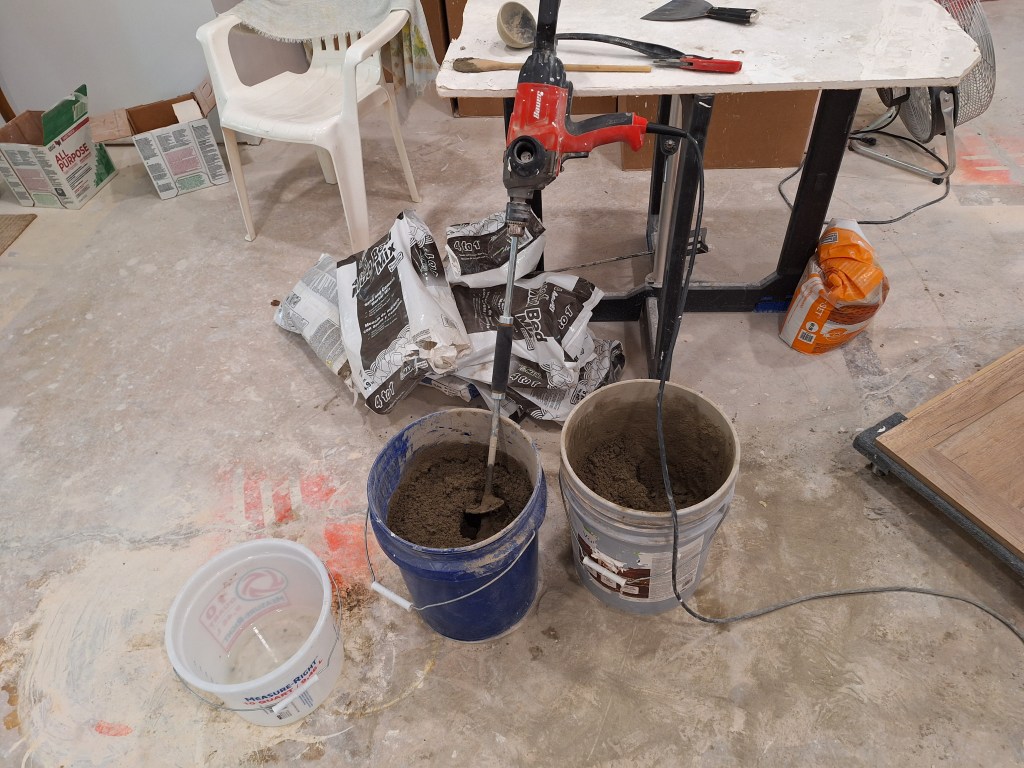
I ended up using 13 55lb bags. When I started this, I was using a single bucket, but switched to using two buckets and dividing the contents of a single bag between them. The contents of the bag almost completely filled a single bucket, making the mixing precarious. It was difficult to avoid spilling some of it onto the floor. Also, that full bucket was really heavy. By using two buckets, I was able to mix the contents more aggressively and each bucket was easier to lift. I used a dolly to move the two buckets from where I did the mixing to the bathroom, so I only had to carry each bucket from the entrance of the bathroom to the dumping area. Still, at the end of the day, I was feeling it.

After dumping the contents of the buckets, I used a small garden hand trowel and concrete float to spread it out. After 13 trips, I brought it up to this level.
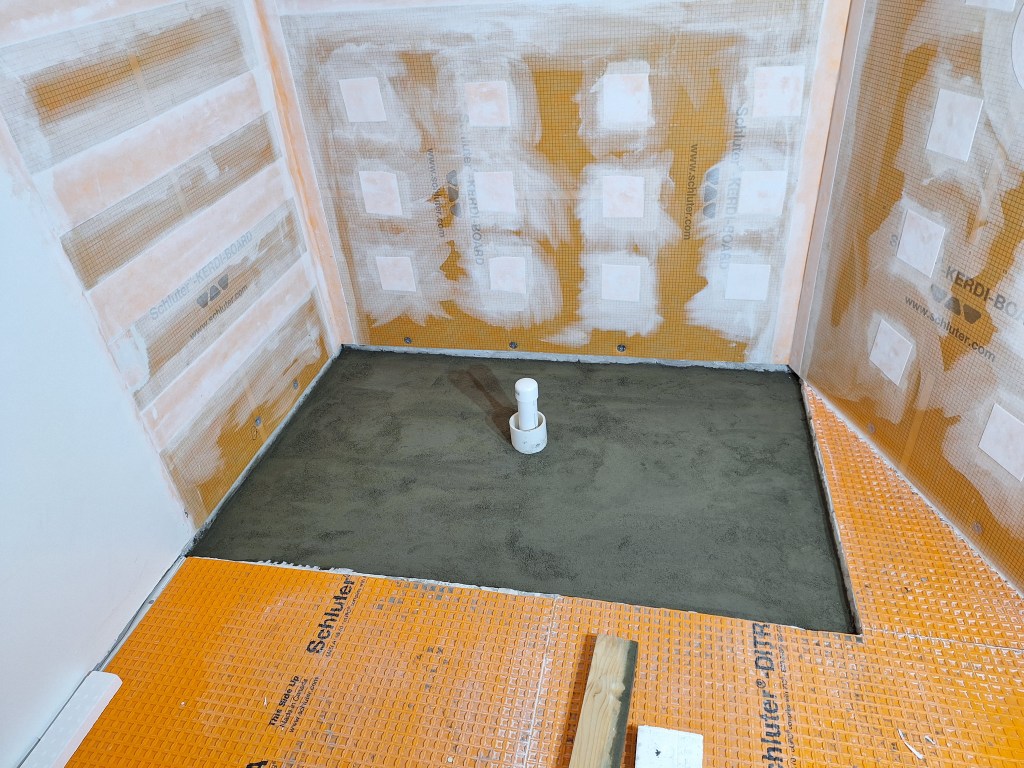
I used a 2×4 as a screed, a level (of course), and the concrete float to smooth it out. It is just shy of the desired height, but it is pretty flat. Once cured I thought I’d use a self leveling compound to bring it up just a bit more, but after thinking it over I decided not to do that. The bed was pretty flat and level and I only needed to bring it up a tiny bit, so I decided to use the left over DITRA I had to cover it. Also, note the 4″ collar I have around the drain, that proved to be a mistake, which I’ll discuss shortly.
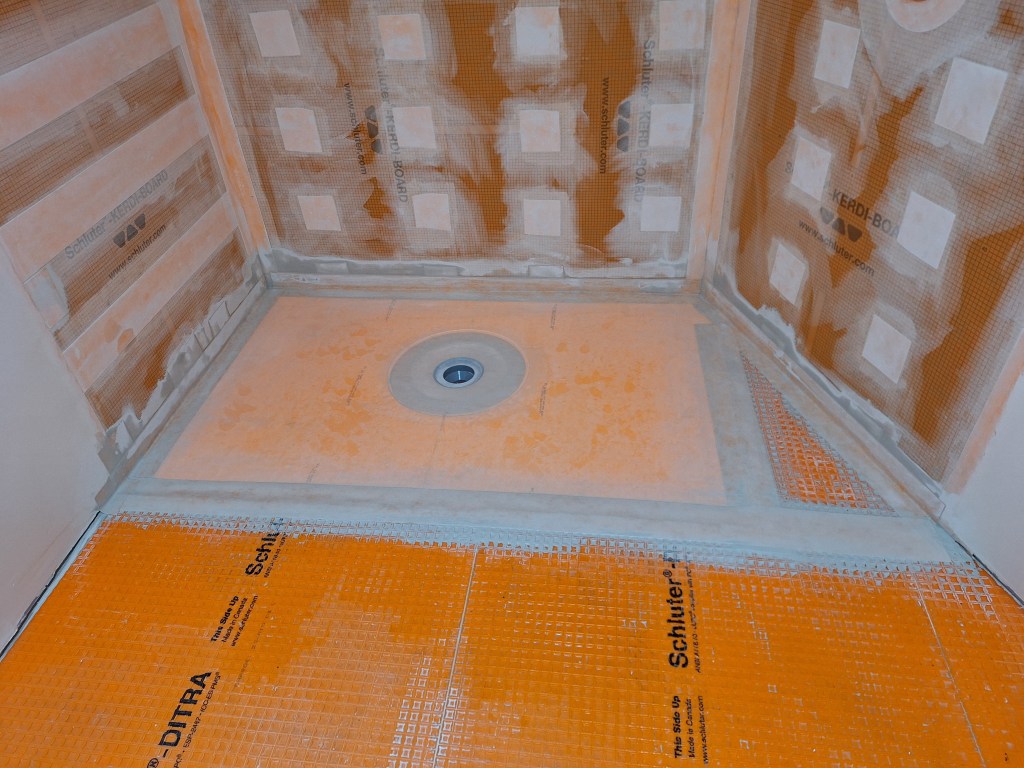
The next day, after the thin-set used to set the DITRA membrane had cured, I placed the preformed shower pan in place just to see how it looked and lined up with the edges of the bathroom floor.
This is about as tight a fit as you want, so I was happy with that. It remains a bit lower than the bathroom floor, but better that than high. Also, I think I know how I’m going to transition from the floor tile to the shower floor tile, so having the shower pan a little lower should be okay.
Back to the 4″ collar issue I mentioned. I made a silly mistake when I put that in place. Instead, I should have used 5″ PVC pipe as the collar. This is because the Schluter drain widens from the 2″ opening that connects to the drain pipe to just over 4″ near the drain opening. This means that it will not fit into the space I created around the drain pipe you see above. Fortunately, if I remove the 4″ collar, I should have just enough room to make it fit. The issue then became, how do I remove the collar. It is well secured within the dry pack mud bed. After some thought I realized that once I cut the drain pipe down to its final level, it will be below the collar by enough to allow me to use my inside pipe cutter to take off just enough of the collar to make room for the drain. So that was how I proceeded.
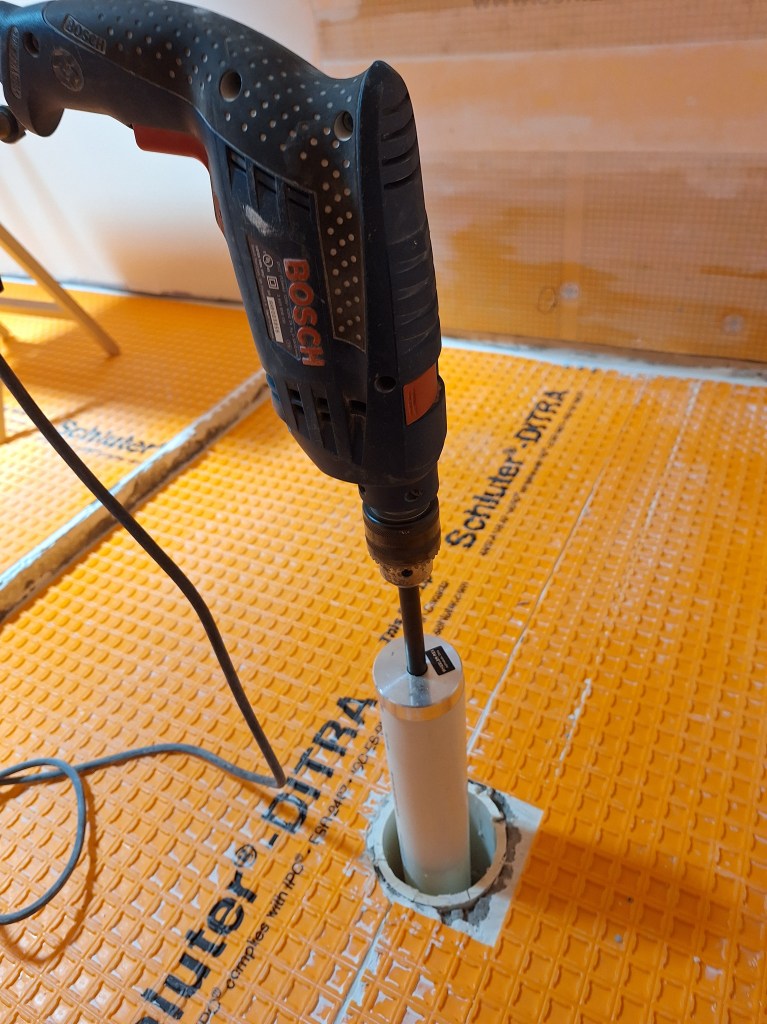
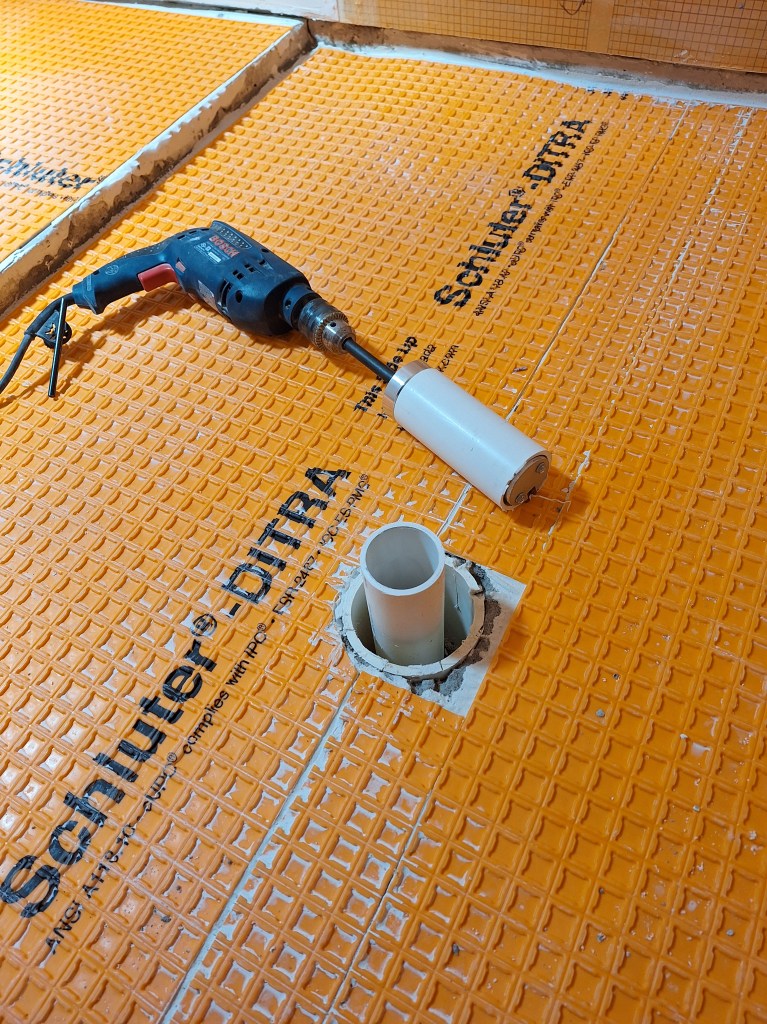
To cut the drain to the desired height, I purchased a new inside pipe cutter specifically for 2″ PVC. Unlike my current cutter, which is like a mini saw blade that you slowly move within the pipe, this one removes the section of pipe in one swift motion. More importantly though, it makes a straight cut, which is helpful when trying to ensure the drain is level. Before cutting the drain down to final height, I tried it out by first removing a section to make sure it worked as expected.
After that I did it again, but this time to the final height, which was a couple of inches below the floor. The entire drain installation was dicey and had my full attention, consequently I forgot to take pictures of the intermediate stages. So my description will have to suffice.
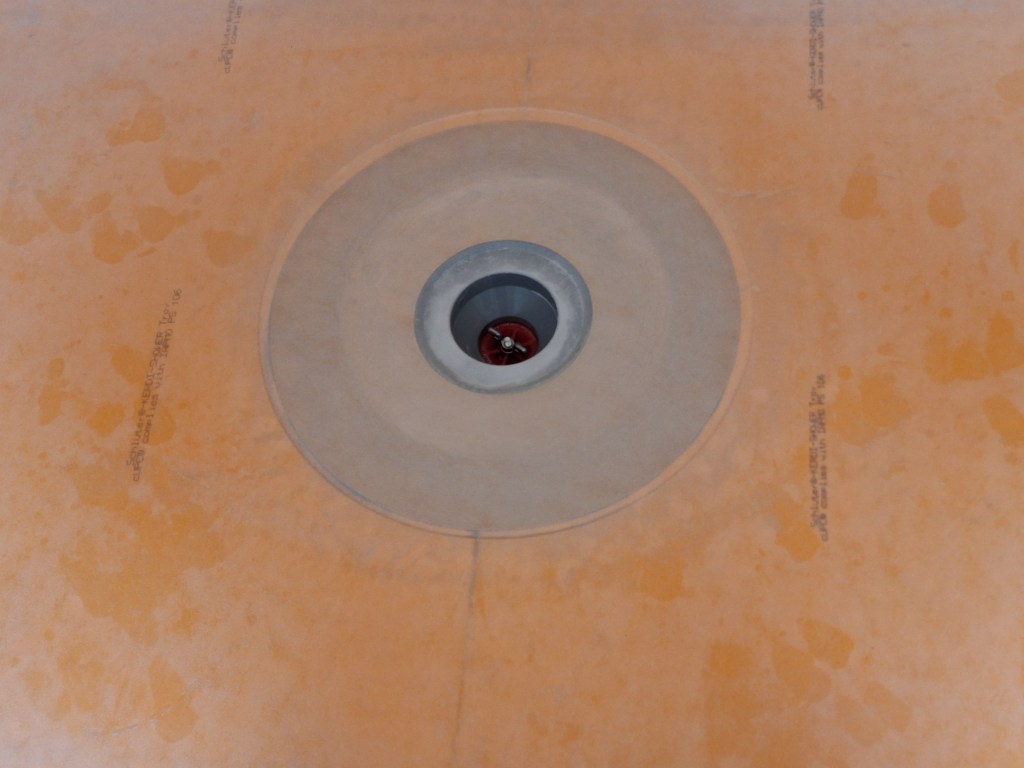
After cutting the drain down to final height, I cut away the outer collar to about the same height as the drain pipe. This worked, but was not as simple as that. The drain pipe was not perfectly centered in the middle of the collar. Because I was not expecting it to be a tight fit, I didn’t give that much thought when I put in the mud bed. Although cutting away the collar provided most of the room I needed, one side was still too tight, so I had to grind away at the hardened mud to open it up a bit. This was very time consuming and frustrating. I managed to get the drain level, but it’s not perfect. I’m sure it will be fine, but this is why experience is so important. It shouldn’t have been this difficult. I’ll do better next time. Here is the drain after it was glued into place.
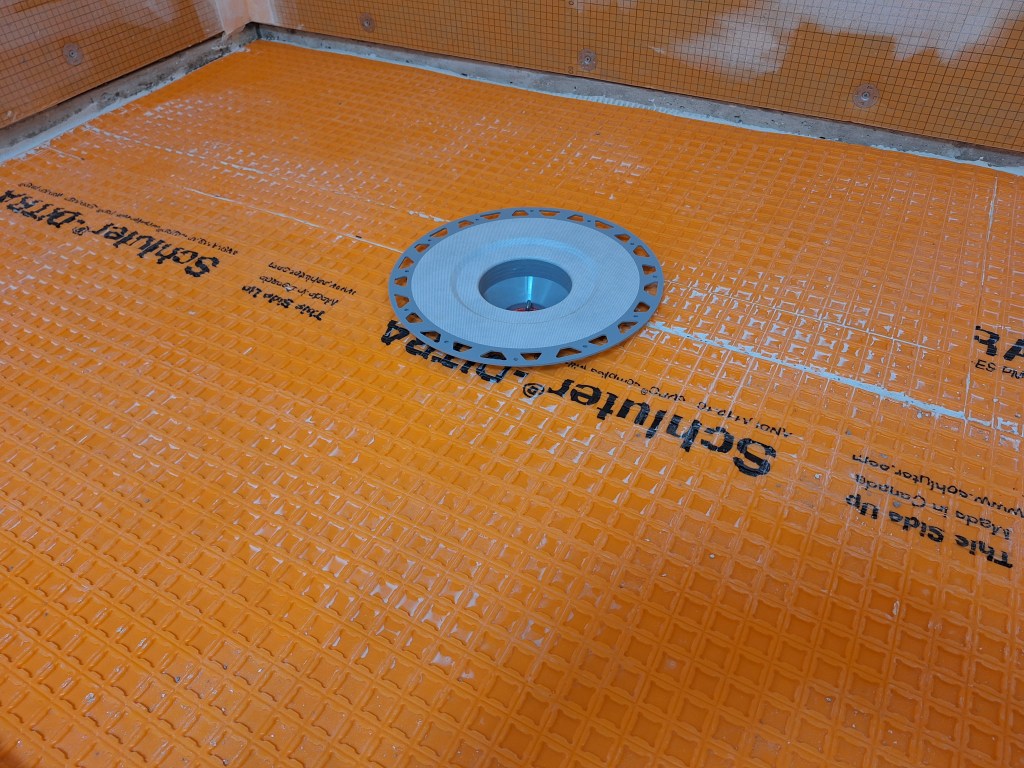
The drain flange is supported by a Styrofoam ring that is placed under the flange and packed with thin-set.

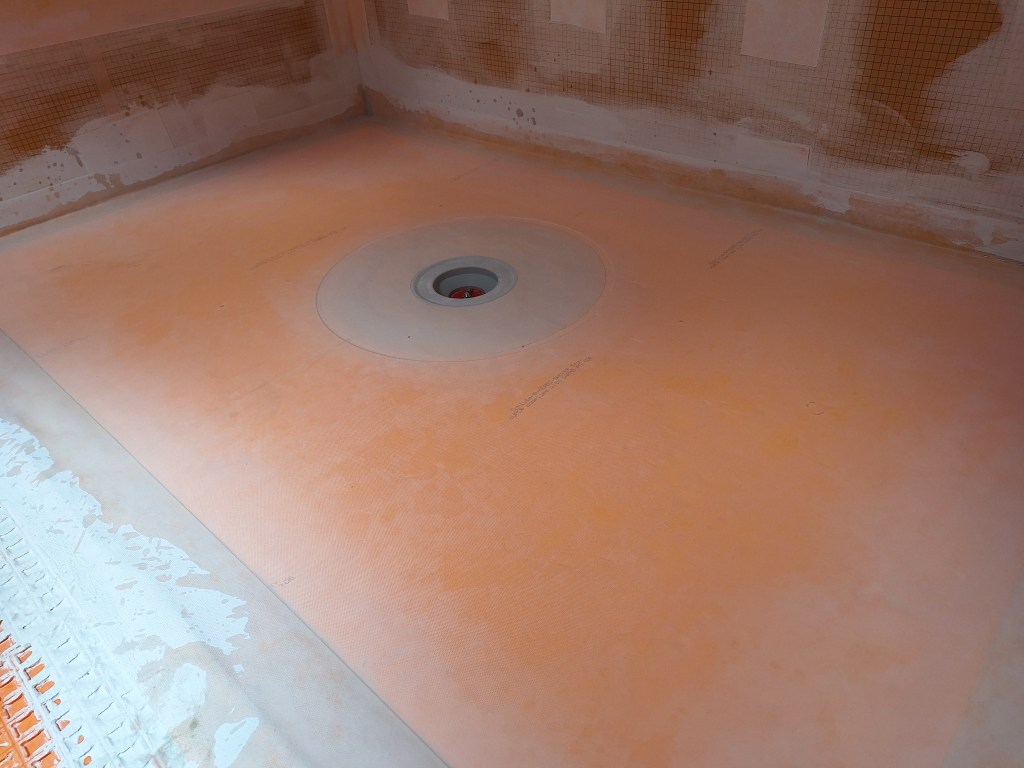
This was left to cure overnight. To complete the waterproofing, I put down the preformed pan and sealed all remaining gaps and seems using Kerdi Band.

The drain flange is completely surrounded by the preformed pan, but the interface between it and the pan only becomes water tight once the donut shaped Kerdi membrane is fixed in place using thin-set.
Once all the thin-set is cured, the shower pan was filled with water to make sure there are no leaks. You can see the red plug in the drain that will be used for that. The pan was filled as high as it could be without water flowing onto the bathroom floor, as shown below. Although hard to see, there is water in the pan.
It was left for 24 hours and the water level checked to make sure it remains the same. I scheduled an inspection and it was approved.
With the shower waterproofed, it was time to start putting down the floor tile in the main bathroom area. Before doing this, a lot of thought needed to go into how to lay it out. I used SketchUp to try several approaches. The first attempt was to simply lay them out right beside each other, as you see below. I thought it looked pretty good, so it remained a contender.

In the first try I made no attempt to clean up the layout to match the floor plan, which is why there are tiles extending outside it. In my next few attempts I played around with shifting the columns. I tried a 50% offset (not shown), followed by a 1/3 offset, shown below.

In this layout, I have a full tile at the entrance and the tiles are offset by 1/3rd with a stair step pattern from right to left. I didn’t go with this because it introduced too many small tiles as you can see at the top and by the entrance.
So I modified it slightly to have the stepping go up from the center row to the left and also go up from the center row to the right. Look closely and you’ll see what I mean.
Also notice that I flipped the center row so that the full tile is now on top. This made better use of the tiles, reducing the number of small tiles. I played around with several other layouts, but liked this one, so I decided to dry fit it to make sure it worked as modeled. Unfortunately, it did not.
As you can see, this would lead to a 2″ sliver along the west (left) wall. That would not do. The reason for this discrepancy between the dry fit and the model was that the model assumed the tiles were 24″ square. In reality they were 23 3/16″ square, which over several columns produced the gap at the west wall. I thought about simply shifting the entire thing over to close the gap, but then I’d lose the nice centering of the center column on the entrance. So I went home and updated my model to account for the true tile size. I also accounted for the 1/8″ grout lines. This is shown below.

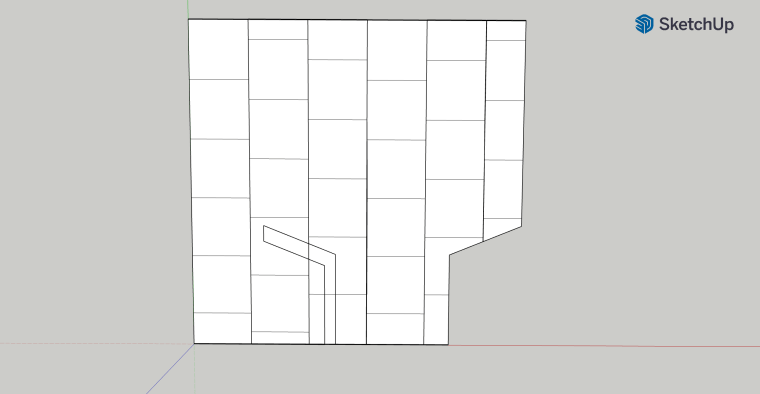
In the model shown above, I abandoned the step up pattern and instead used an alternating 1/3rd offset. This made even better use of the tiles, with virtually no small tiles. I also shifted it over a bit to close the gap, and to my surprise it didn’t look bad. So I decided to try dry fitting this layout.

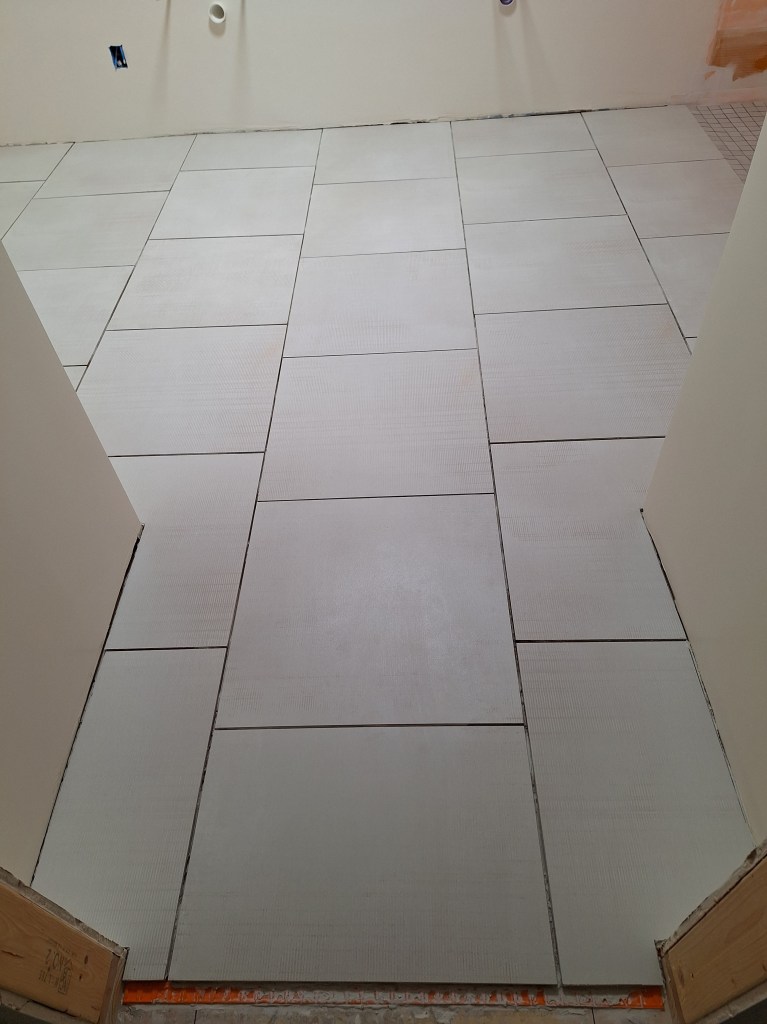
Yes, the center row is not perfectly centered on the entrance the way I wanted, but it is pretty darn close, and perfectly acceptable as far as I am concerned. There will be a door on the left side as you enter, so this will make it even less of an issue. Laying out tiles often requires compromises, and this is one of them. Another that came about during the dry fit was that the column against the west wall that leads into the alcove did not quite reach the wall inside the alcove, leaving a gap. To account for this, I changed the offset from 1/3″ (essentially 8″) to 7″, which is what you see above. I think it looks fine, so I decided to use this layout.
I began setting the tiles by establishing the center row, using 1/8″ spacers.
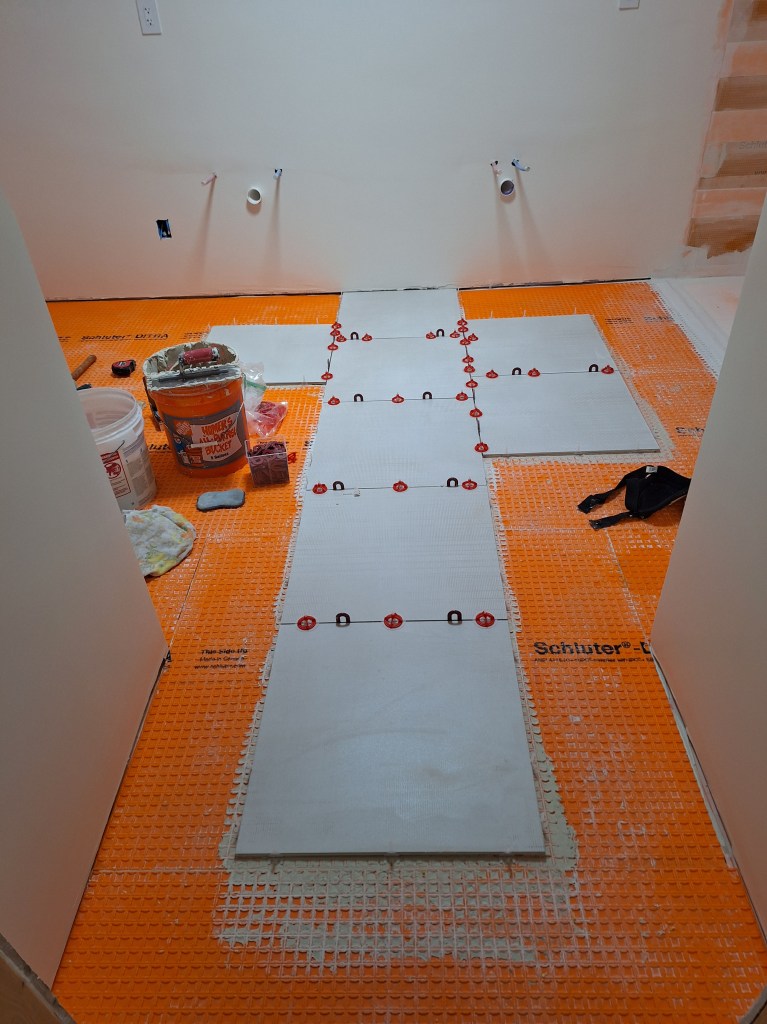
I then continued by setting only the full tiles after that. Only after most of the full tiles were set (all but a couple to go down in the alcove) did I start making cuts.

In the image above, the full tiles are actually set and the others that required cuts (those surrounded with with the spacers) were just dry fitted. I used both a wet saw and a score and snap tile cutter to make the various cuts. In this shot, I had not yet gotten to the area around the entrance to the toilet alcove. Before this I realized that I would not have enough tiles to finish the entire area and would have to order another box of tiles. There are 4 tiles per box, and I was shy about 2 tiles. Since one cannot guarantee a perfect color match when placing a subsequent order, I made sure that the tiles from the new order would be in the area surrounding the toilet, making them less conspicuous if there was a noticeable color difference.
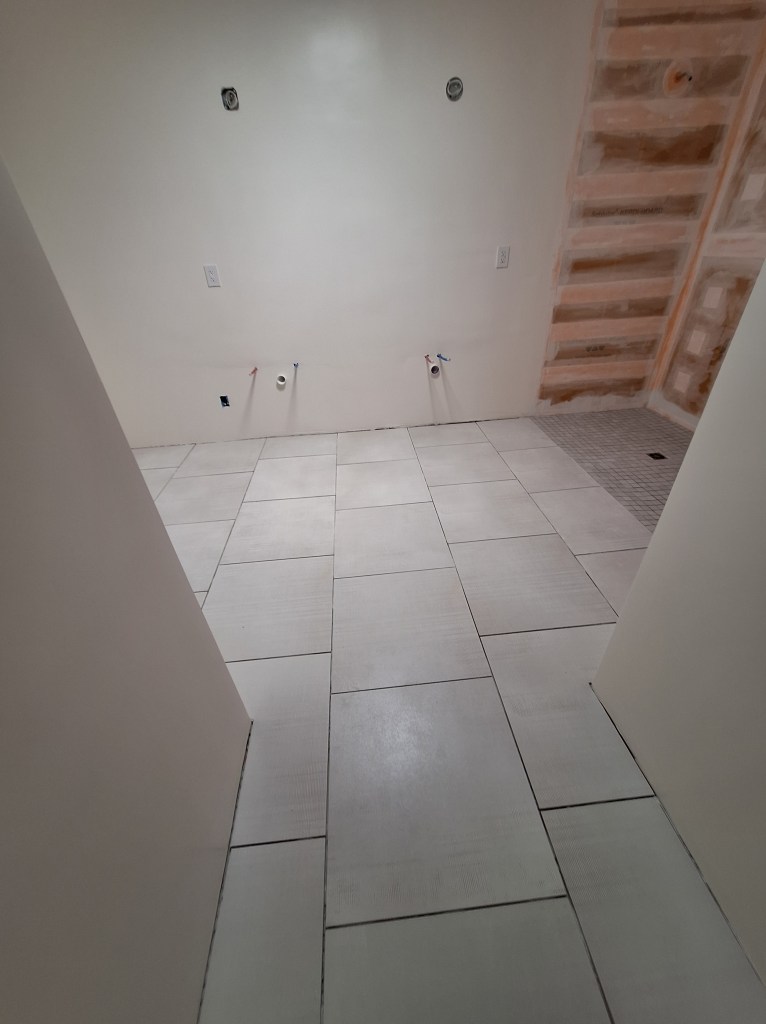
Here are the tiles set before I ordered the ones required to finish in the toilet alcove.
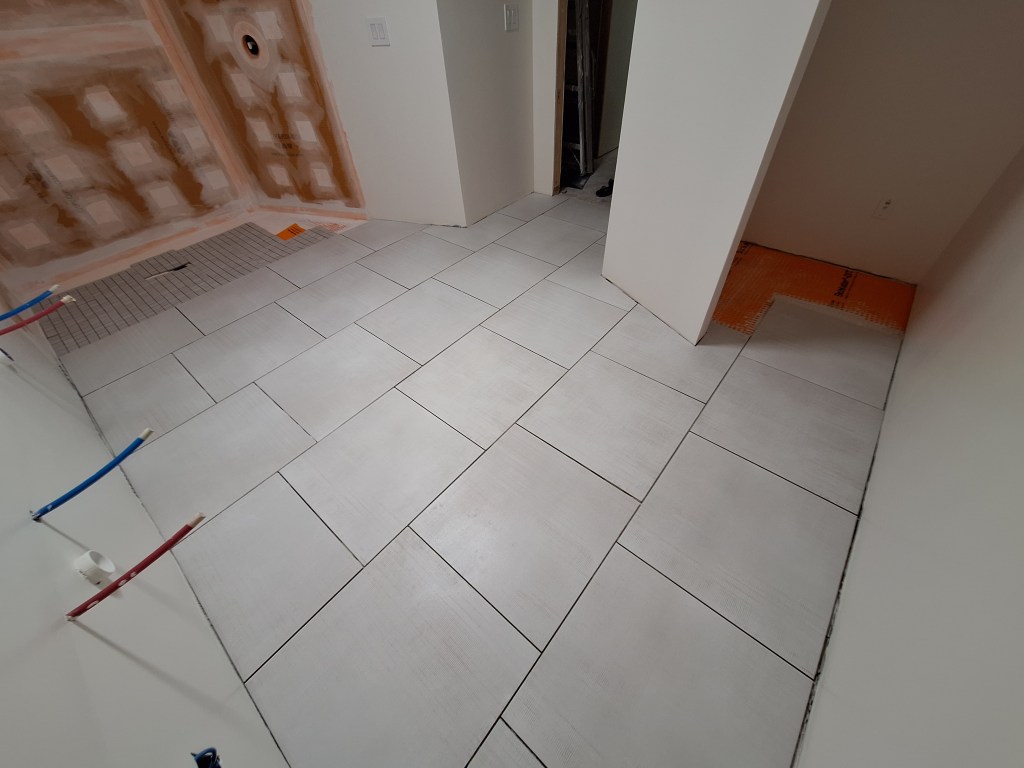
In the image above you can see I have one tile that extends into the toilet alcove. I actually have another from the original order that will take it right up to the wall, but I did not set it because I ran out of thin-set. Rather than mix up a small batch of thin-set for one tile, I would set it when I had some left over thin-set while setting the shower floor tiles. So the only area that will receive the new tiles will be left of that row – not very much!
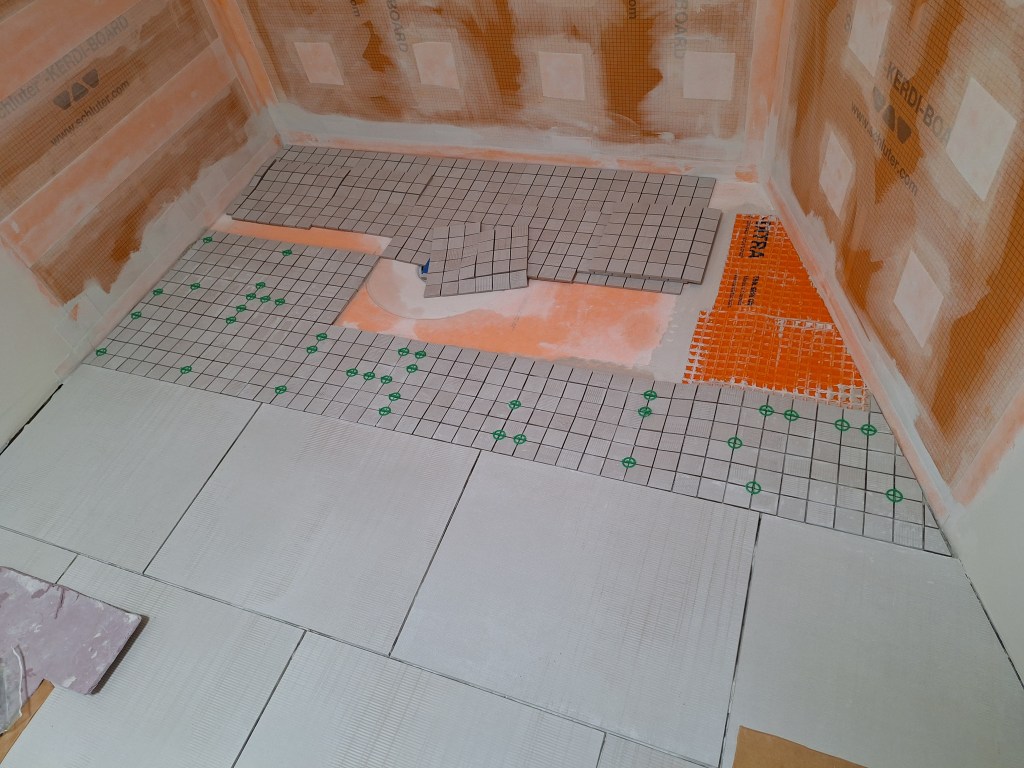
You can also see in the images above that I started arranging the mosaic tiles for the shower floor. Since I would have to wait for the additional floor tiles to arrive, I began working on that area next.
I started by cutting and dry fitting the tiles.

The dry fitting process helps me decide exactly where I will start my tiles. Originally I had the tiles starting right up against the left wall (no partial tiles). With this arrangement, when I encountered the drain grate (covered in blue tape in the image above to protect it) I would have to cut the tiles on all sides to accommodate it. By moving the tiles over a bit (what you see above) to align with the grate, I’d only have to cut the tiles approaching from the top and bottom. Unfortunately, it meant I’d have only partial tiles against the left wall. Another compromise.
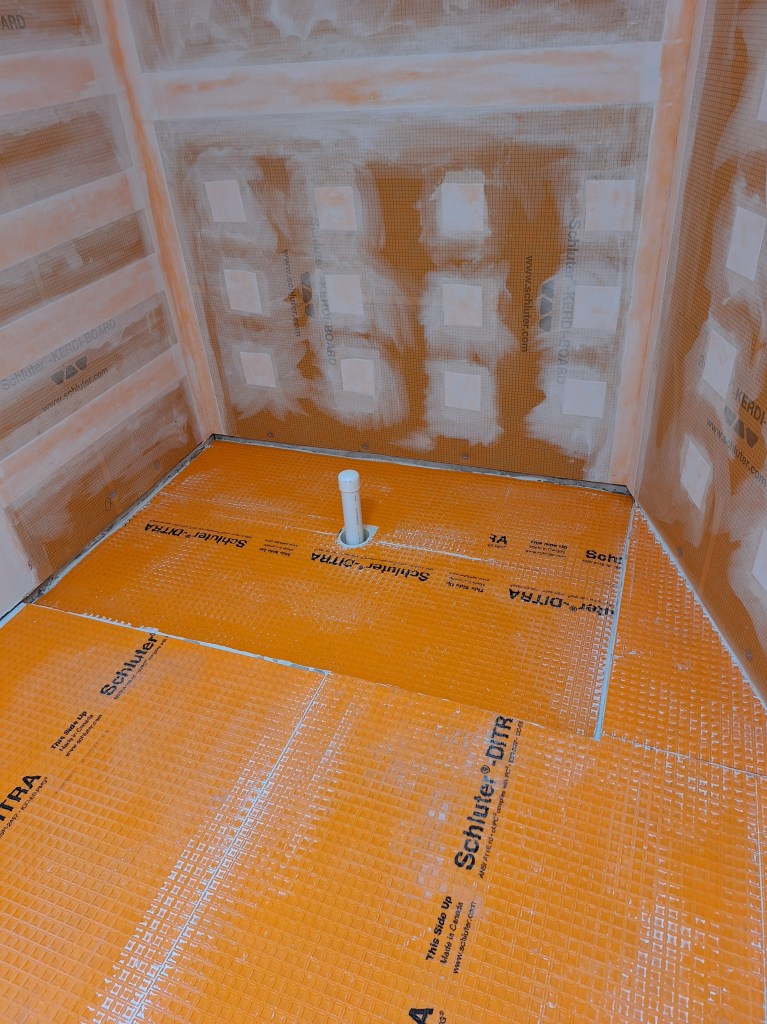
With that decided, I cut out the tiles to complete the dry fit and was pretty satisfied with the look. However, before I could set them in place, I had to build up the transition areas so that they would meet up with the bathroom tile and provide a more gentle slope down to the shower pan. I did this by building up those areas with some left over DITRA.
I then started setting the tiles, beginning with the front edge. Normally one would start from the back and work forward, but the most critical part of this process was the transition from the bathroom floor to the curbless shower floor, so I decided to set that first and let it cure over night before pressing on.
I kept the dry fitted tiles in place where possible as I was setting the front row to use as a visual guide to ensure I remained on course. The added DITRA was very necessary and it, along with the thin-set, allowed me to get the mosaic tile to meet up nicely with the large format tile. That was the biggest challenge met. The next would be getting the grate set to the same level as the tiles that would surround it.
I was a bit nervous about setting the grate and tiles that surround it. I really needed to get this right, otherwise I’d be dealing with drainage issues forever. The grate itself needed to be set first (using thin-set), then the tiles after. Once the tiles were placed and while the mortar was still malleable, I could press down on the grate to ease it into alignment with the tiles. After that, I could add the four smaller tiles (two above, and two below in image below).
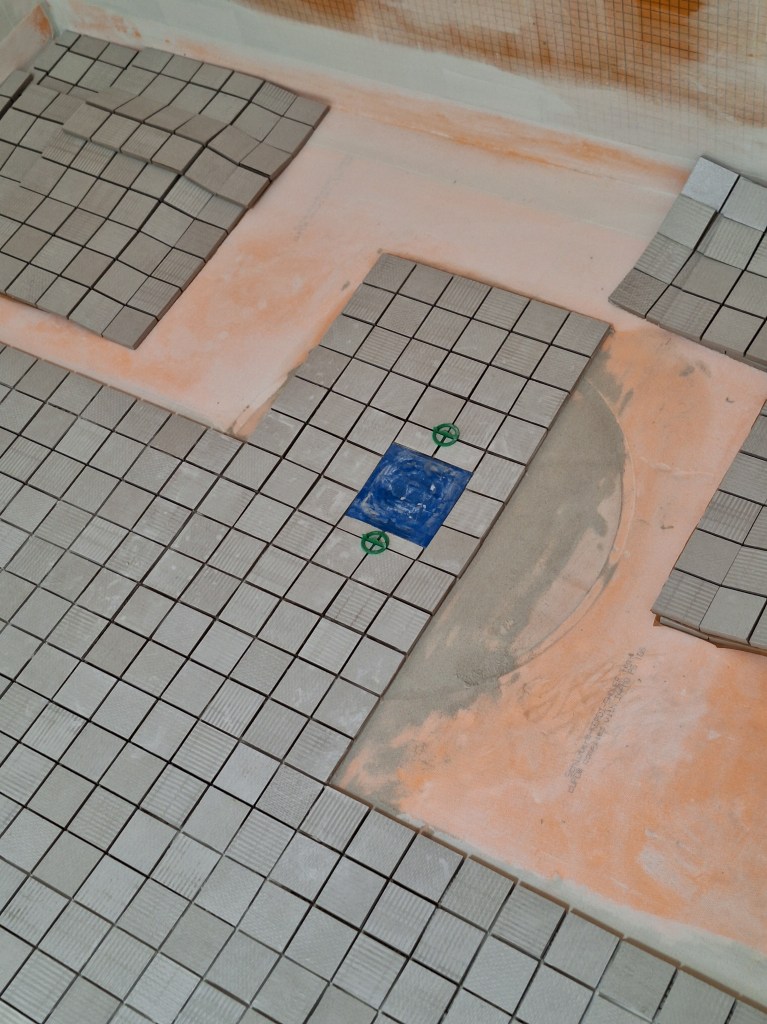
I was happy with the way it turned out. I had intended to continue setting tiles, but decided to stop and let it set up overnight before proceeding, to ensure this area would not be disturbed. I used the remaining thin-set I’d mixed up to set the remaining large format tile in the toilet alcove.
I then pushed on to complete the setting of the mosaic tiles for the shower floor. It’s not perfect, but I think it’ll be fine. From what I understand, grouting helps disguise many of the minor issues. I hope I’m pleasantly surprised.
I learned a lot from this, my inaugural tile installation. Tiling is a real skill. This took me way way longer than someone with experience, and many lessons were learned. I hope to improve in my future attempts.

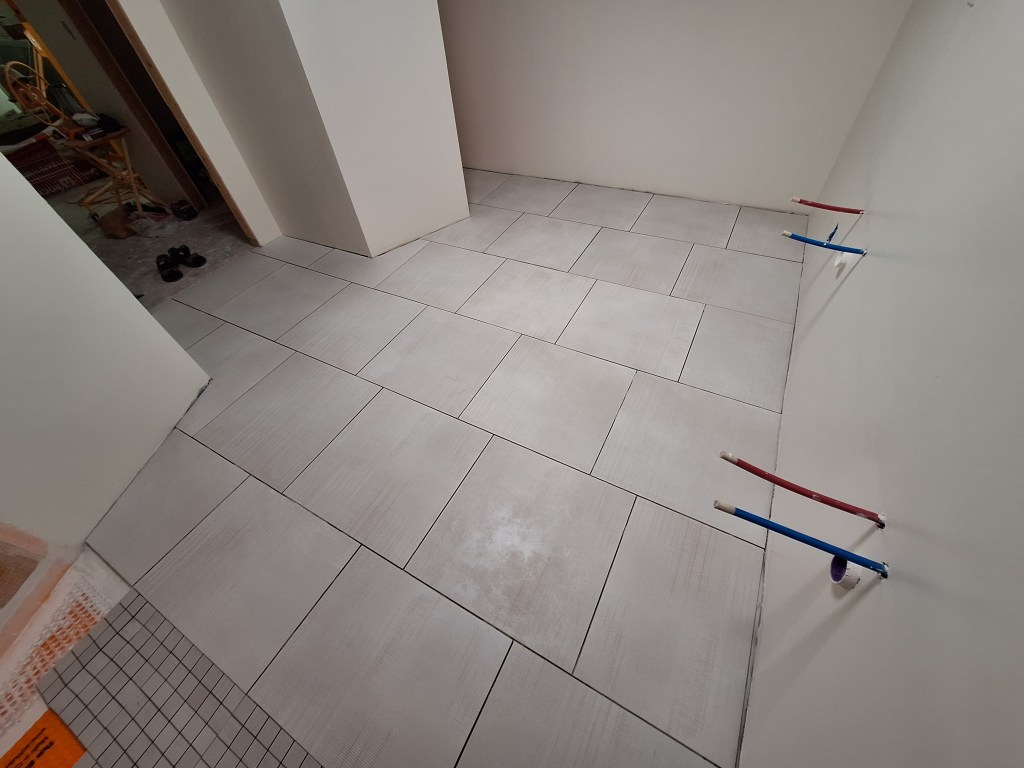
I removed the blue tape from the grate just so I could see how it looked. I’ll cover it again when it’s time to grout.
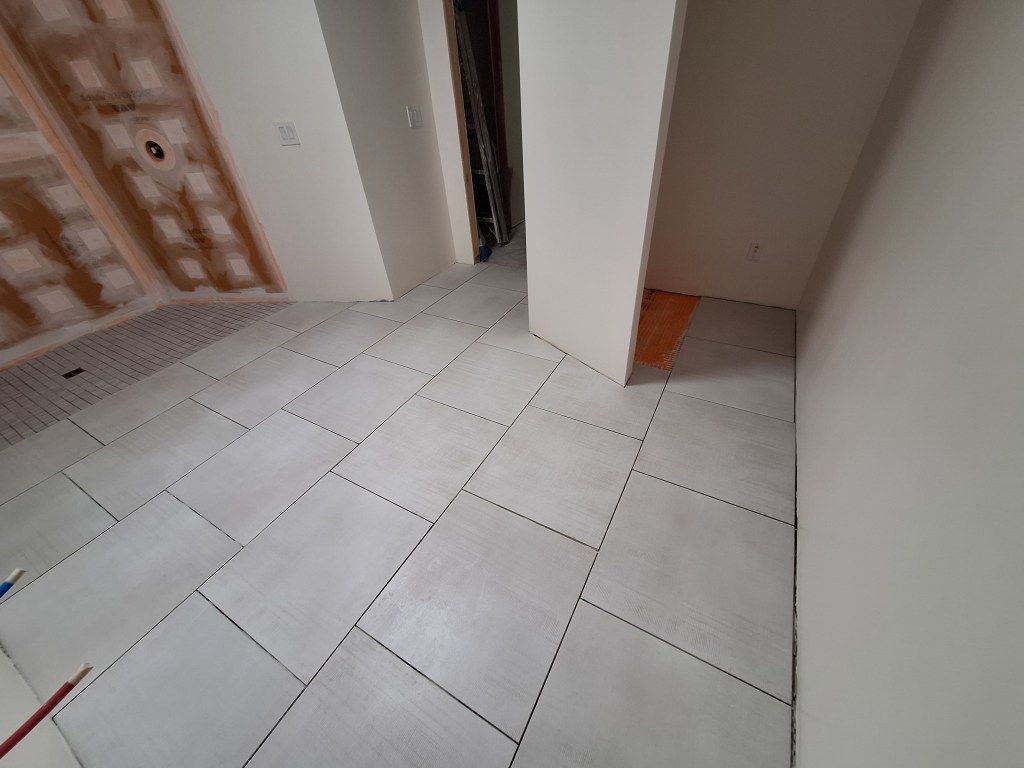
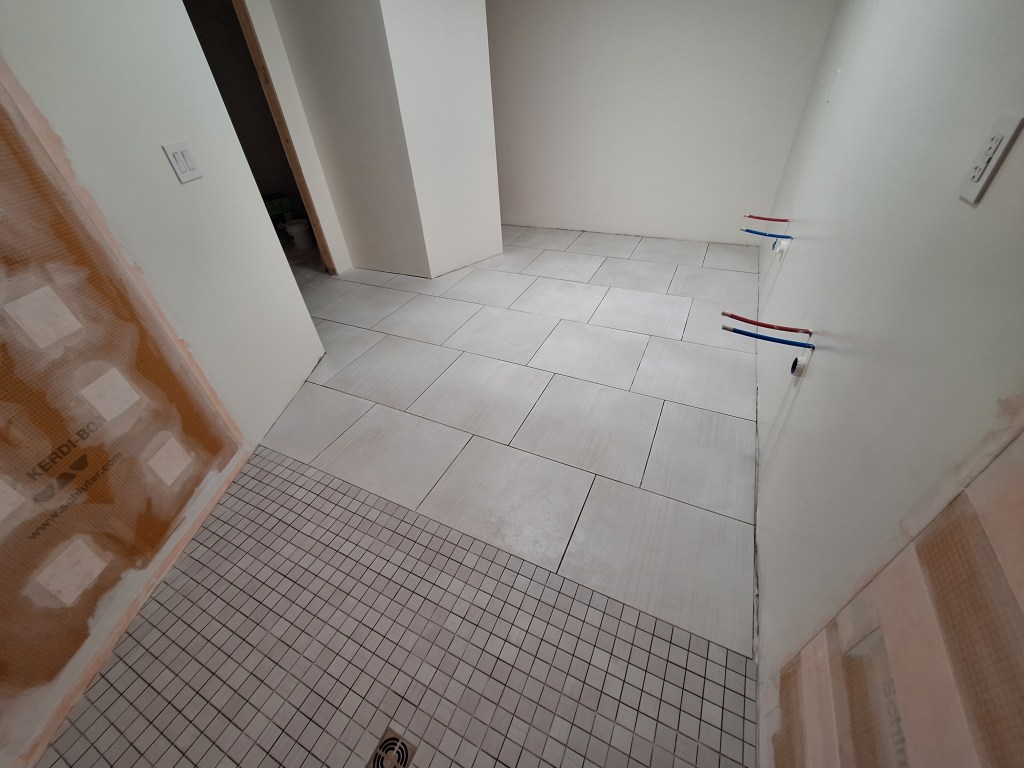
Following are images of both the floor and shower tiles set. I will not grout until the walls tiles in the shower and the remaining floor tiles in the toilet alcove are set. I don’t want to be standing and working on a freshly grouted surface. Those tiles have been ordered and I await delivery at the time of writing. I had intended to post this only after the grouting was done, but since I may be waiting a few days and it is the end of the month, I figured this was a good place to end this post.