As I did in April 2023, I divided my time between work on the master bathroom and kitchen. Just like last month, I’ve created two separate posts. The work in May started in the kitchen, so it’s best to start with that post. Within it I’ll mention when I switched to working in the master bathroom, which you can choose to jump to if you wish to follow the sequence. I also mention in this post when I switched to working in the kitchen.
The vanity arrived as expected and was deposited in my garage.
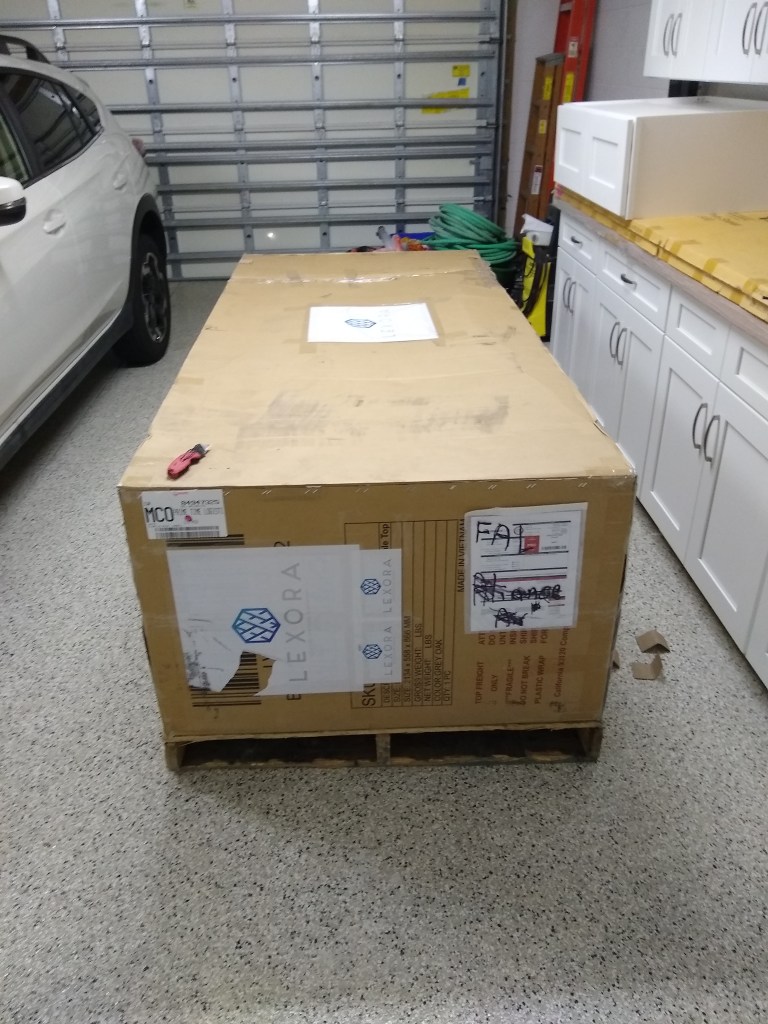
It was a really large box, requiring two skids to transport it. I left it sitting for a day as I was still working on the kitchen drain and water lines in the trench. When I finished with that and had a day to wait for the inspector, I turned my attention to this. I started opening it and discovered this defect right away.
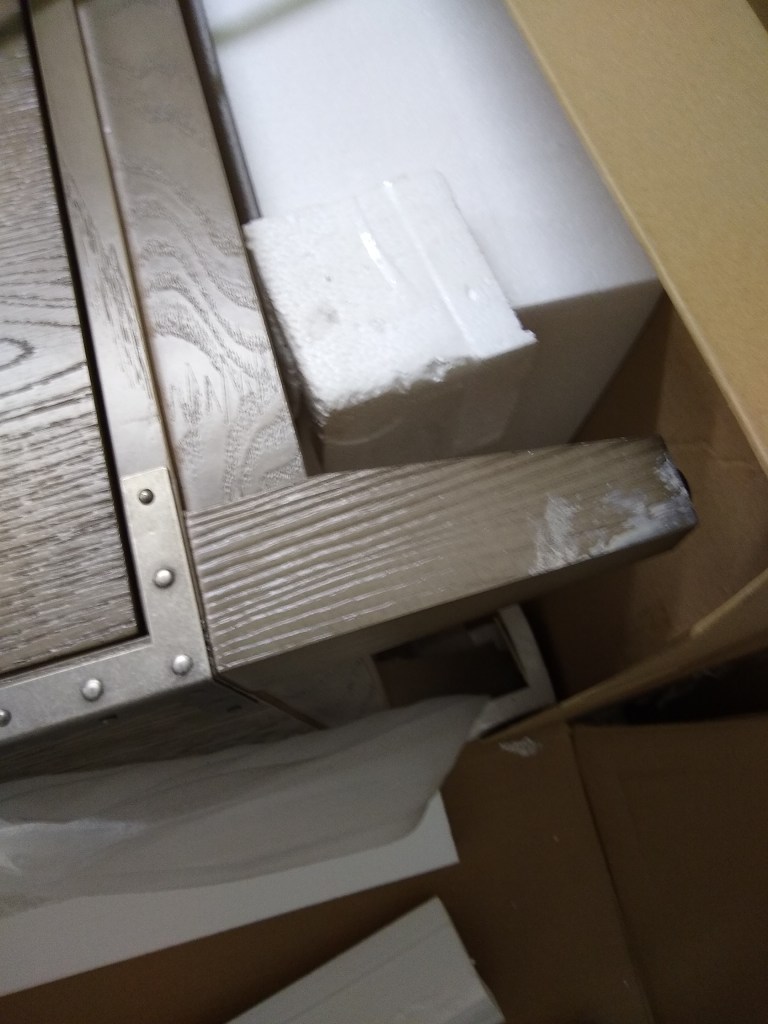
I immediately stopped unpacking it due to the possibility for the need to return it. I sent the picture you see above to the place I ordered it and waited to discover how they wish to deal with it. My preference was to have someone come out and refinish that part. That this was damaged was not a major concern for me because I won’t be installing it in the bathroom for a long time. What I was really after were the measurements, which I was able to get with the vanity sitting where is was.
With the knowledge of where the sinks were with respect to the center of the vanity, and the size of the opening in the back I had to work with, I was able to relocate the drain for the left sink (the drain for the right sink was fine as it was). This required I cut off the drain that needed to be extended and cut notches into the studs in the wall to make room for a longer drain pipe.
Here is the drain before cutting began.
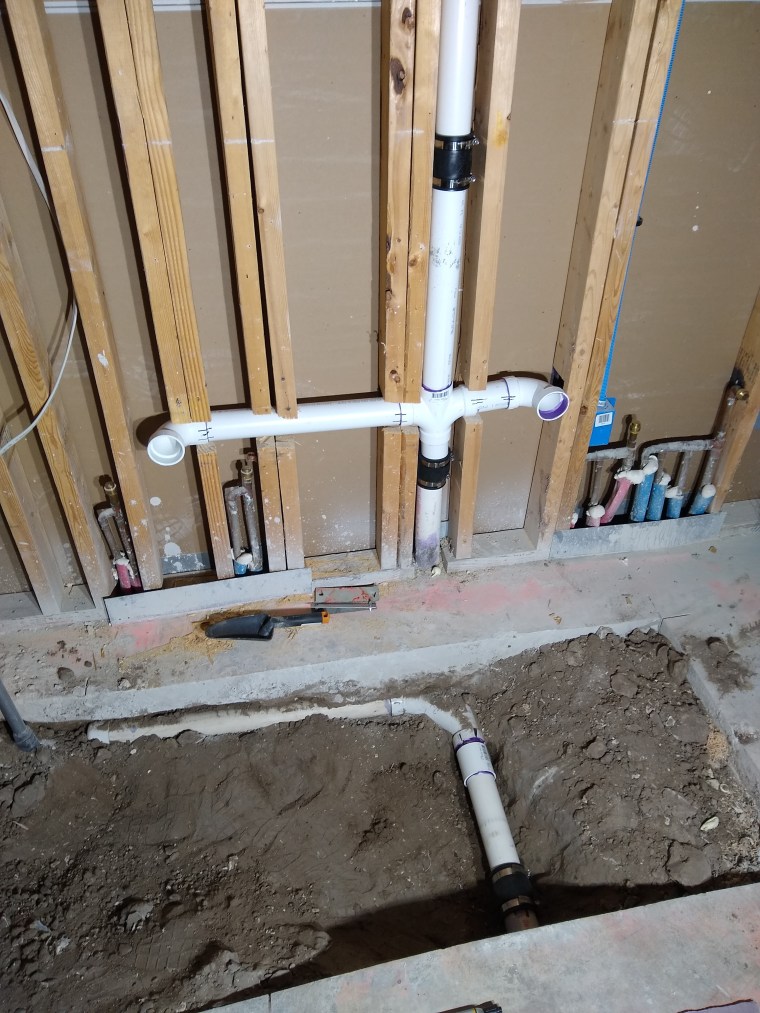
And here it is after cutting.
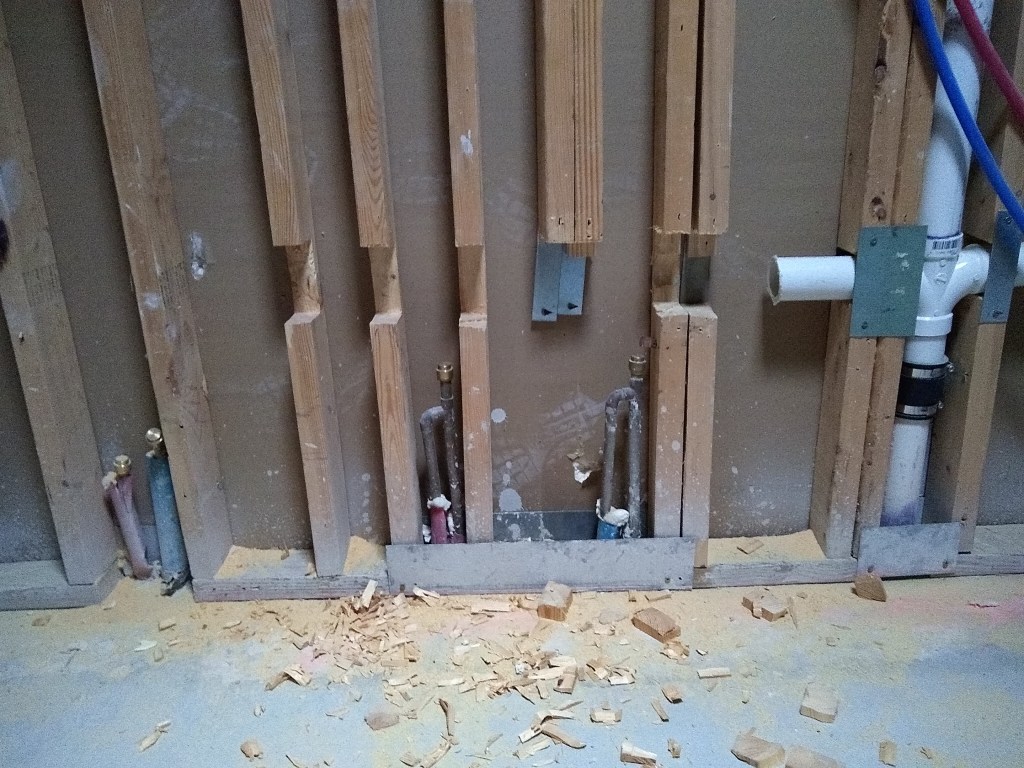
You can see that there are a lot of studs in this wall. I’m not entirely sure why so many were added. I suspect it was due to the fact that many of them have great big notches in them to make room for the drain, so they added more for reinforcement, but this is not a load bearing wall, so it seemed like overkill. Nonetheless, I had to add more notches to make room for the extended drain pipe. I used my SkilSaw and a hammer and chisel to create the notches. In the process, one of the lower sections below one of the notches no longer had any support to I just pulled it out.
I added the new section along with nail plates to protect it.
With that done, I returned to working in the kitchen. The inspector gave the thumbs up with respect to the drain placement in the trench and gave me some advice regarding how to run the electrical wires, so I got to that next. I continued work in the kitchen until after the trench was refilled with dirt. I then had to wait for the pest control guy to spray for termites, so I returned to the master bathroom and began pulling the water lines down from the ceiling.
This required some rerouting of the PEX in the ceiling and I had to move some of the support clamps I fashioned. Here is the setup in the attic before I decided to relocate the vanity.

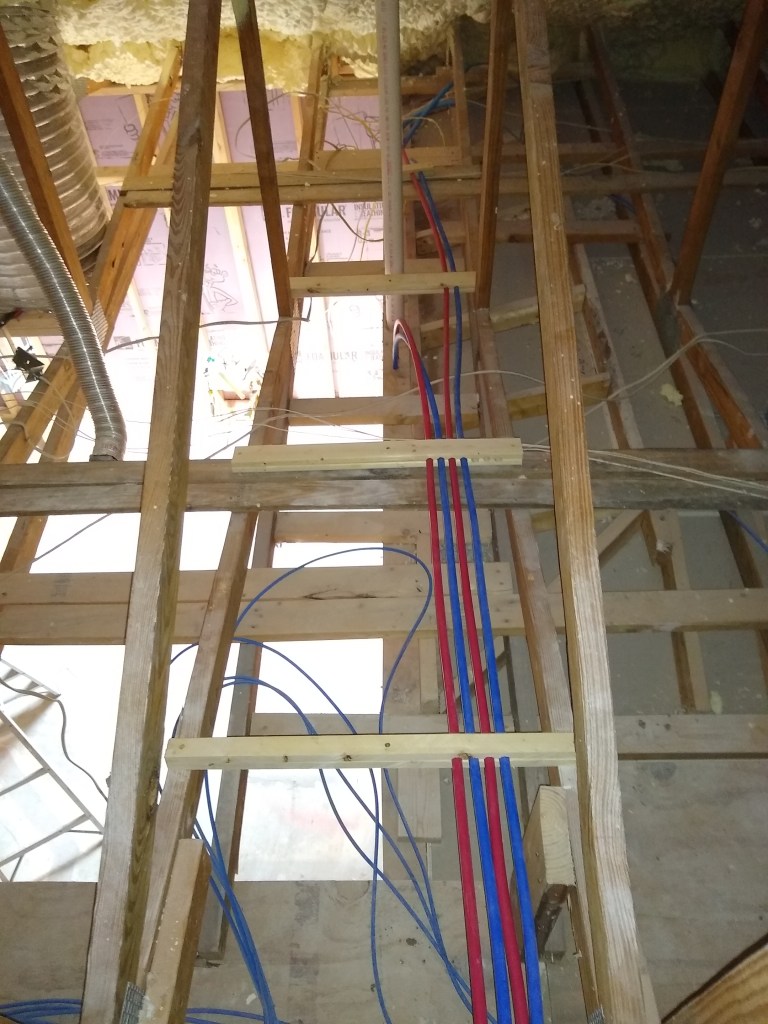
And here it is now.
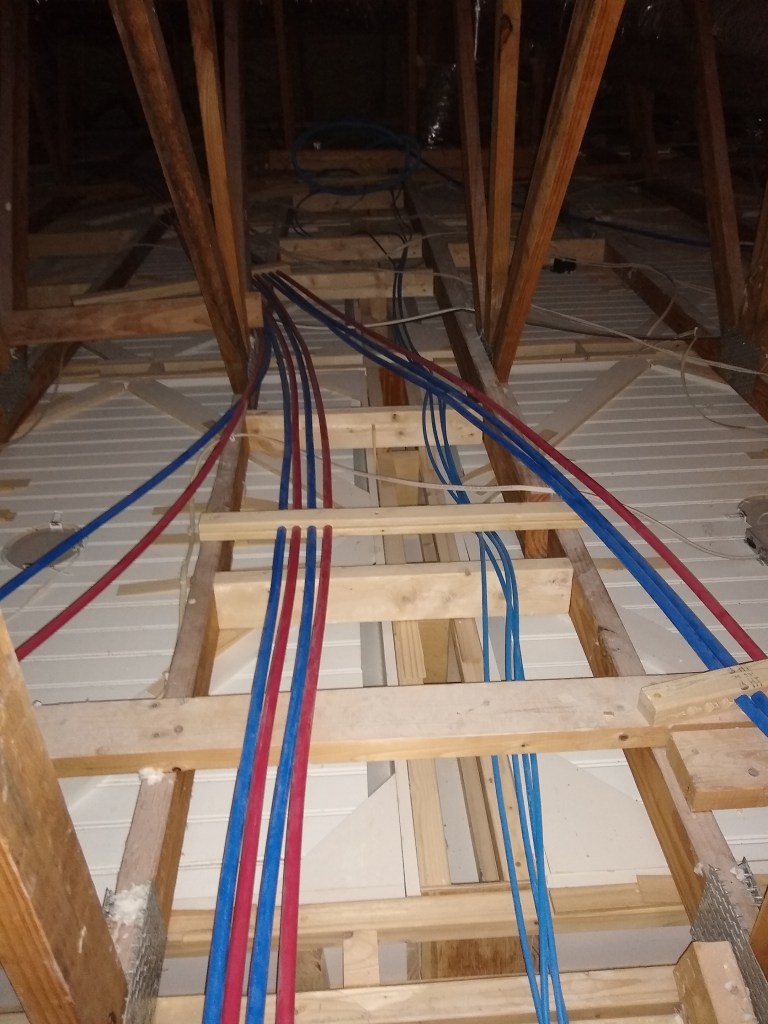
In the image above, the two lines on the far left are what were originally intended for the bathtub. Since they are no longer needed, they are just pushed off to the side where they will not be in the way when I need to move around up there.
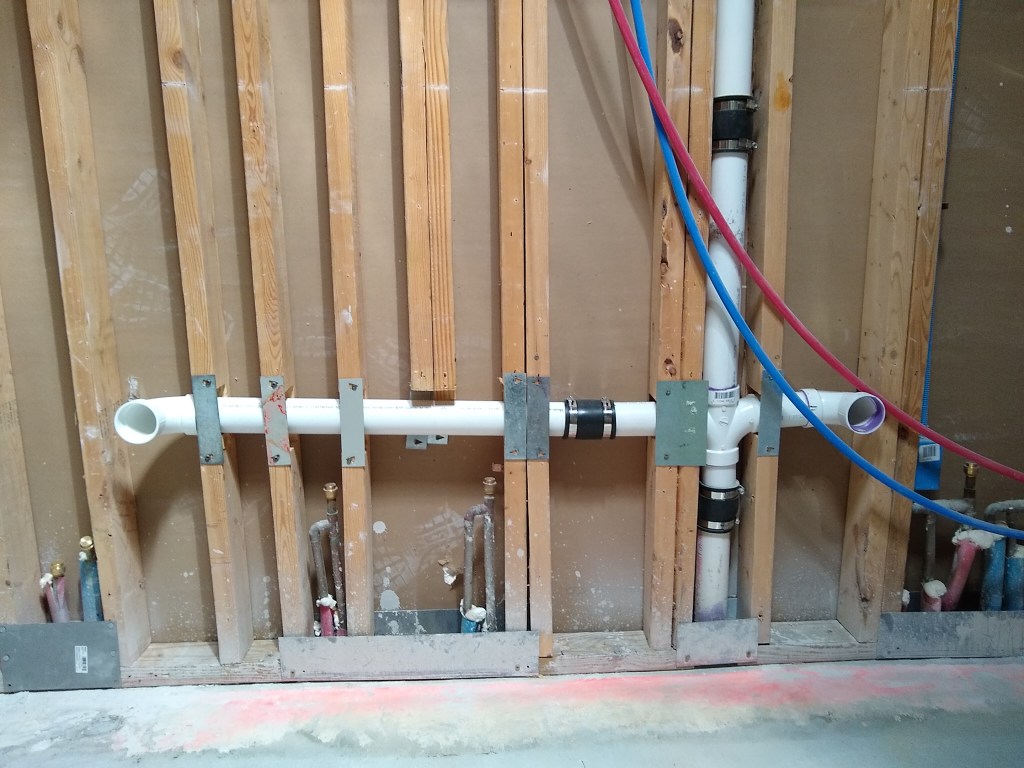
Below I am showing the where this run of four lines head down into the wall where the vanity will be located.
And here they are at their final destination. These four lines will enter the back of the vanity and be hooked up to the faucets.

After preparing the trench in the kitchen for the pre-pour inspection, I unpacked the vanity. I was asked to fully unpack it by the vendor in order to determine if there were any other issues with it. There was another problem, which I’ll get to in a moment. Having unpacked it, I moved it into position, which you see below.

I put the marble top elsewhere because it is so heavy and was not needed to give me a sense of how the vanity would look in place. I will use this to help me decide where to place the electrical boxes.
With the vanity in position, I discovered a problem with the door under the sink on the right.

I notified the vendor and recommended they simply send me another door. This thing is very difficult to move, so I don’t want to have to move it out of the house and bring another one in. After some back and forth we decided to simply return this one and replace it with another, hopefully undamaged, sibling.
After filling the trench in the kitchen, I turned my attention to the shower in the master bathroom. I hadn’t yet decided what shower system I would be using. I first wanted to have a good look at the existing drain situation, so I cut out a section for the shower pan to have a look.
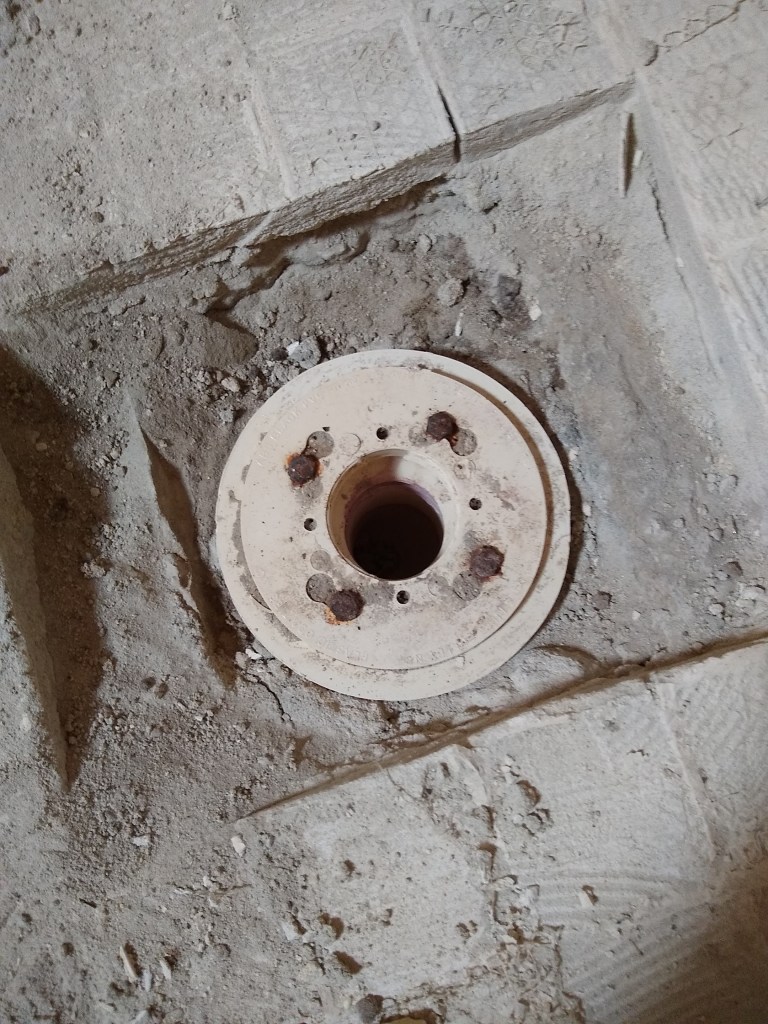
In the image above, I have already removed the drain that screws into the flange you see. Of note is how the screws are rusted. That tells me that water was getting in there, which is not what you want. So I decided to remove all the drypack mortar in the shower pan to get a closer look at what is going on.
The shower pan sits on top of a recessed portion of the concrete slab. The shower pan is then built on top of this recessed part of the slab using a much drier sand and concrete mix (mostly sand). This mix is often called deck mud or drypack mortar. It is much more malleable than the concrete used for the slab, so it can be shaped more easily to form a slope from the edges of the shower pan to the drain. It dries hard, but is not as strong and the slab. It is sufficiently strong for a shower pan. Because it is not as strong as concrete, removing it was not difficult, especially using my demolition hammer. It broke up easily. Here is what it looked liked after I removed it.
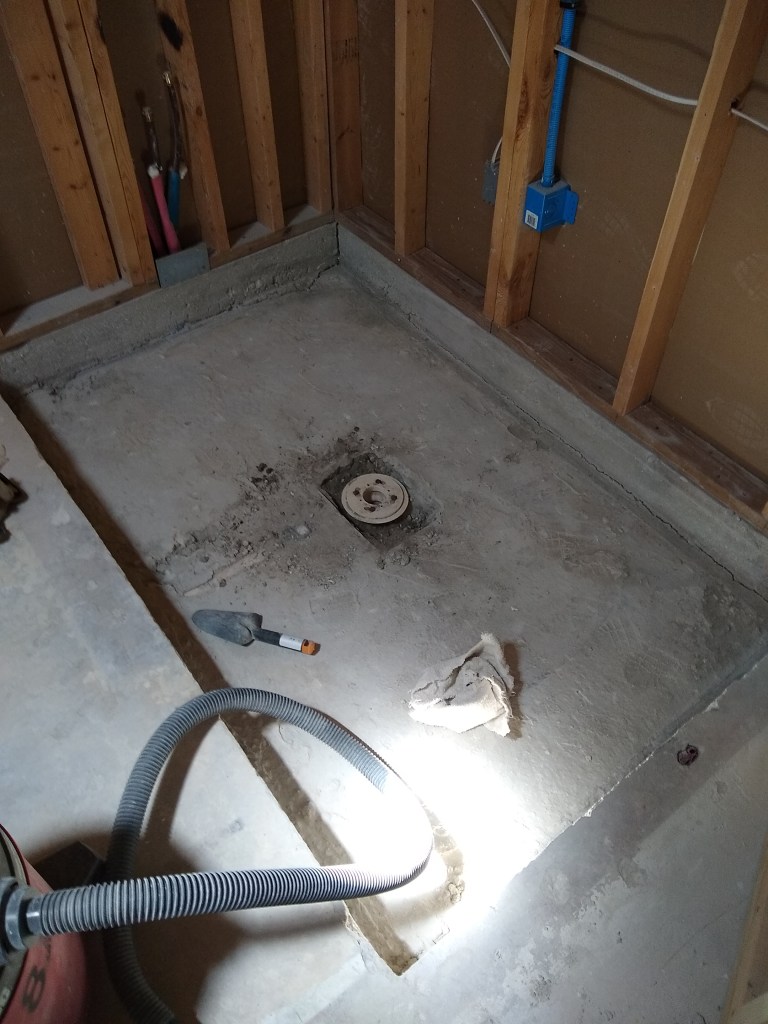
What you see above is the concrete slab and the section I cut out around the drain to have a look. Also notice the drain pipe coming in from the middle left. Until I removed the drypack, I didn’t realize that was where the drain connected.
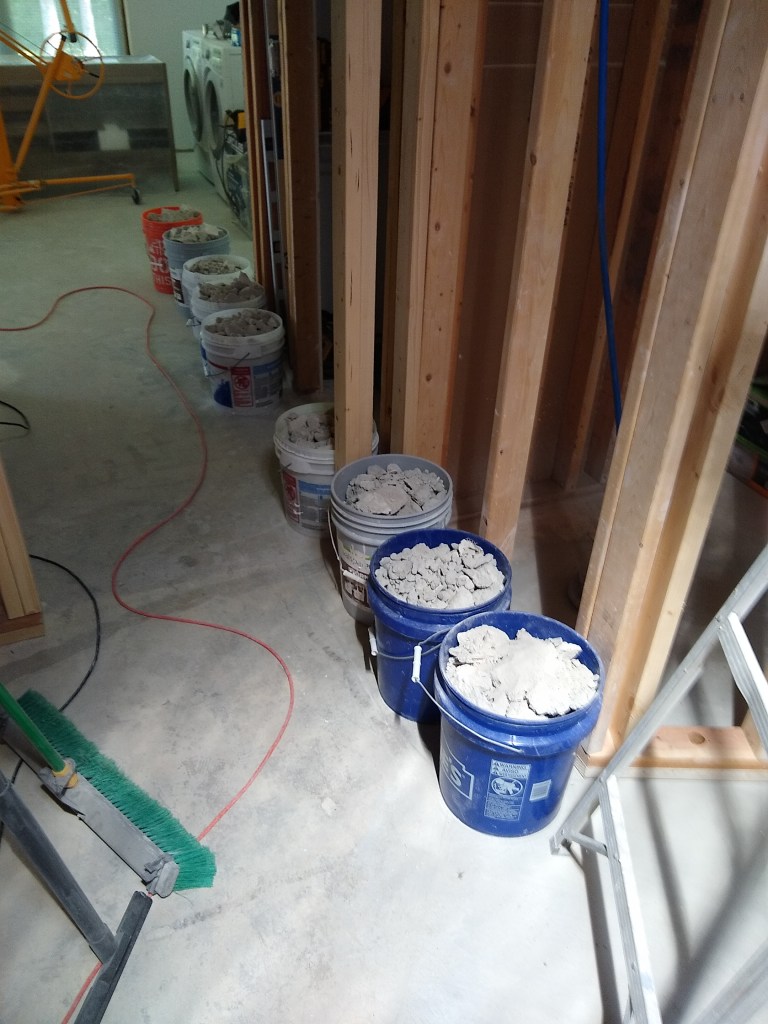
Below you can see the nine buckets full of the mortar I just removed, ready to be taken to the dump for disposal. I managed to get them all in the back of my vehicle, avoiding the need for multiple trips.
Although I had not committed to the shower system I would use, I did know that it would be a curbless shower, so the shower pan would have to be built up to meet the floor of the bathroom, so I cut out the flange and installed a riser pipe that will be cut down once the final height is known.

Note that the drain pipe below the flange I removed connects to the pipe on the right side of the image above via a p-trap, which means it flows down and then up again to meet the drain that takes the water to the street (sewer system). The p-trap provides place for water to reside, preventing sewer gases from flowing back into the house.

The cap on the riser is not glued. I just placed it there to prevent any debris from getting into the drain, especially after having just vacuumed it out.
The next step was to start filling in the shower pan, but I would need an inspection first and I didn’t want to schedule an inspection until I had the shower valve installed so that could be inspected too, and I didn’t have that yet. I’d have to decide what fixture (aka trim kit) I wanted for the shower first because that would dictate the shower valve I would need. So some research was needed. That required a lot more work than I expected. It was very confusing because different manufacturers do things differently. After some frustration at not getting a clear answer online, I ended up sending an email to Moen support to help me understand what valve was compatible with the trim kit I wanted. They got back to me and gave me the answers I needed, so I ordered the valve and trim kit. Since that would take several days to arrive, I started on some miscellaneous tasks that needed to be done.
I needed to put the water lines for the shower where they needed to go, including the one that will go from the valve up over the ceiling then down to the shower head on the opposite wall.

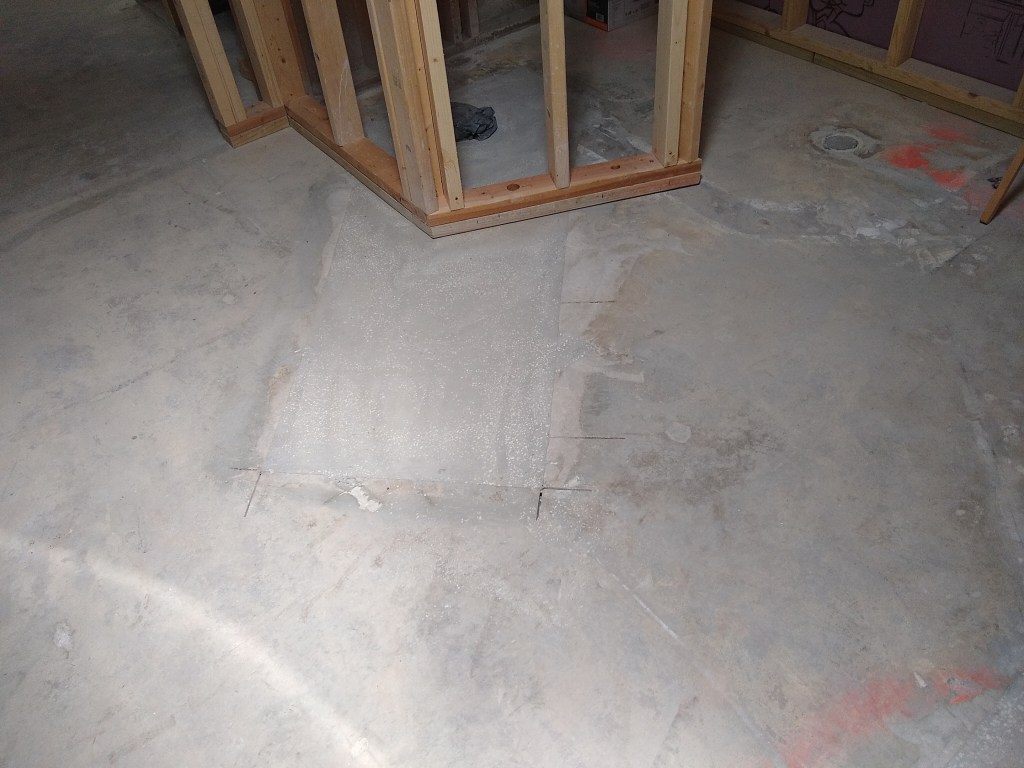
After that I decided to grind smooth the concrete I poured in the trenches in both the master bathroom and kitchen. That was a messy job, but it was worth it.

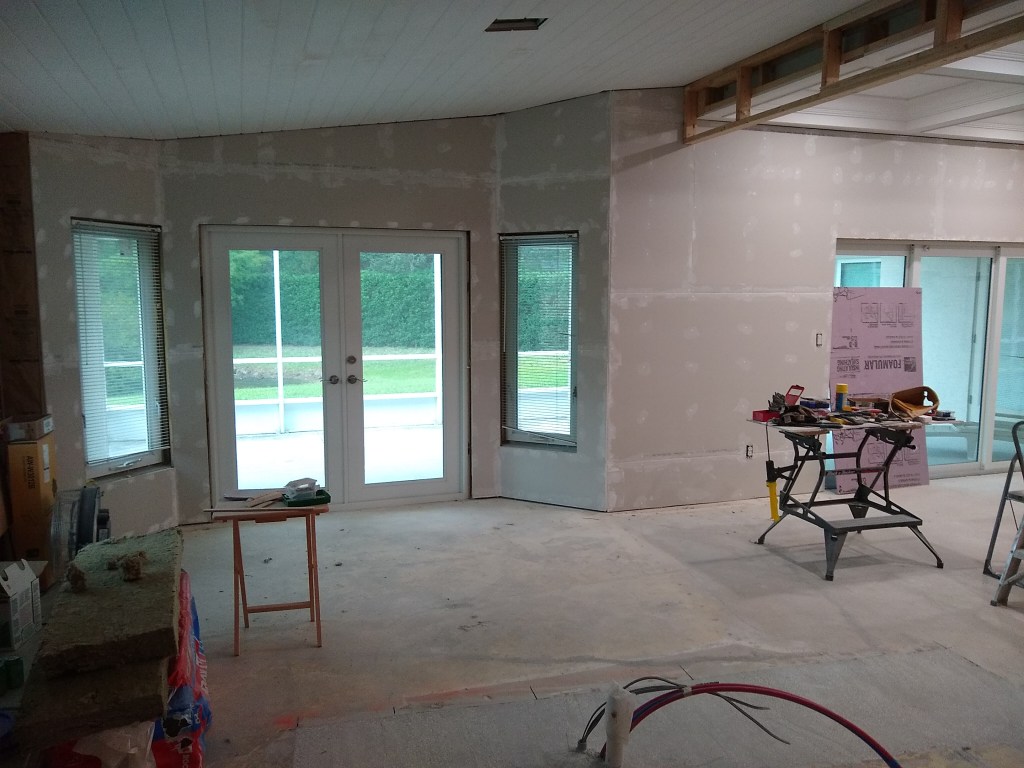
I wasn’t sure what to do next. I could just take a day off, but I was keen to keep making progress, so I decided to do some prefilling of the drywall in the great room. Even though this post is supposed to be about work in the master bathroom, I wasn’t about to create a separate post for work in the great room since this was likely to only be a brief diversion, so here is a picture of that.

Originally I was reluctant to do this because it meant relocating a lot of drywall off-cuts I had leaning against this wall, but I’m glad I did because, with the wall now accessible like this, I can come back to it (tape it) the next time I find myself having to wait on something or someone. What you see in the image above is all that I did, which is to say that the rest of the great room drywall was left for another waiting period, which turned out to be the next day.
The next day I received my shower valve for the master bath and installed it. That didn’t take long. I then scheduled an inspection for the next day so I stopped work on the shower for the day to wait for the okay from the inspector. I used the remainder of the afternoon to continue prefilling in the great room. I completed the south wall, extending into the kitchen.
The inspection went without a hitch. As usual I use the inspections as an opportunity to ask questions. One of them was what the next inspection would be, which I learned would be the water test for the shower after I’d water proofed it. Therefore, I was clear to start on that. So I had to figure out what materials I would use and order them. I decided to go with Schluter products. They are pretty expensive, but reportedly top notch, and I did not want to skimp on this. Making the shower waterproof is very important. Getting it wrong can lead to all sorts of problems, some of which may not appear for years. So I ordered what I needed.
The Schulter products would not arrive for a while, which gave me time to start putting the ceiling up, which was required before working on the shower. I picked up some special moisture and mold resistant drywall for the ceiling and the areas near the shower. Since this will be a curbless shower with no door, I wanted to make sure the drywall adjacent to the water proofed area was somewhat resistant to any splashing.
Before hanging the ceiling I put up the electrical boxes for the vanity lights and the GFCI outlets and ran the wiring to them.

I got started on the ceiling, beginning with the area above the shower. Notice the blue color of the drywall. This is how you can tell it is the moisture resistant variety.
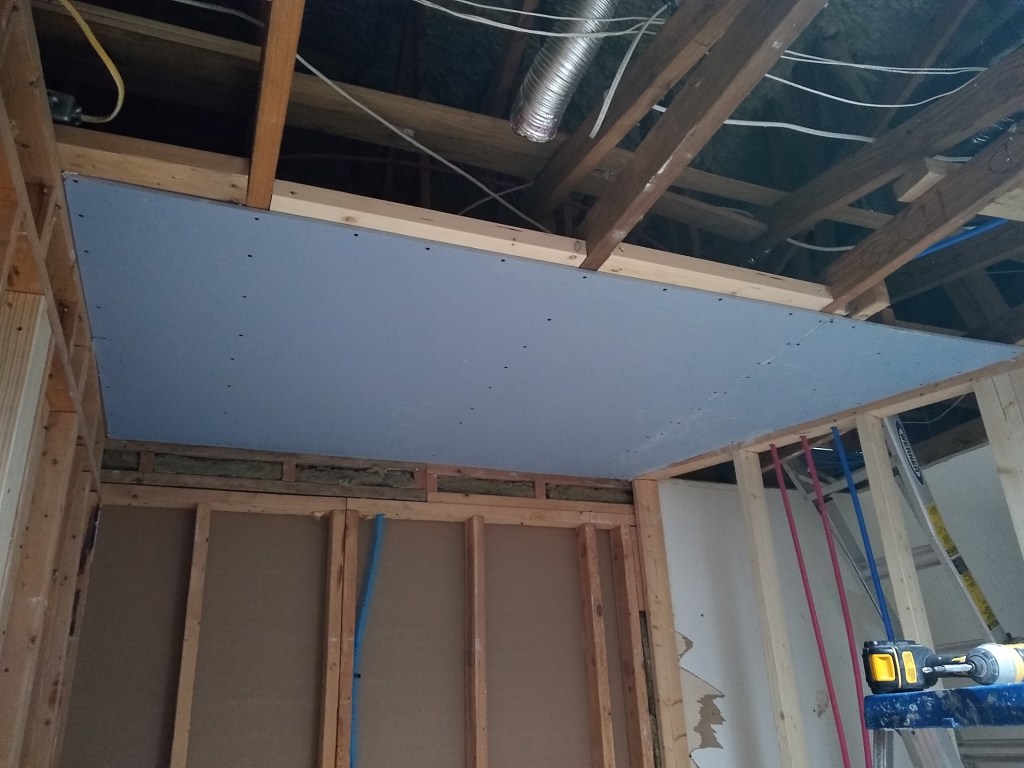
Hanging this area was surprisingly tricky. I could not use my drywall lift because the shower pan area is recessed (as shown in images earlier in this post), so I didn’t have a level surface for it to sit on. So I ended up cutting the drywall into a rectangular piece and a small triangular one so that I could manage it on the ladder with the aid of a couple of temporary supports (sorry, I forgot to take a picture of that). I also added some additional nailers between the joists, two of which you can see at the edge of the drywall. A lot of nailers were added to the ceiling to make sure I had plenty of places to secure the drywall.
I extended out from there toward the opposite wall.
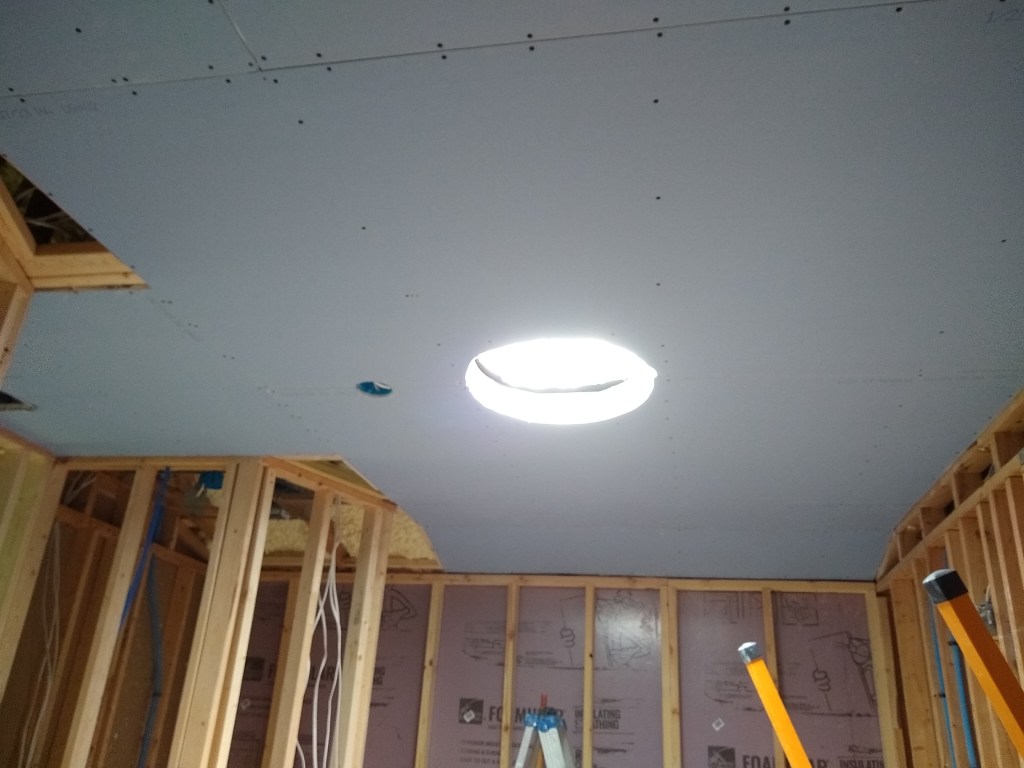
The sun tunnel fell right between two sheets of drywall, so I was able to get on the ladder and use my small router to cut out half the circle at a time. The cuts were a bit rough, but were good enough that the trim piece will hide the irregularities. I’m still not very good with that tool.
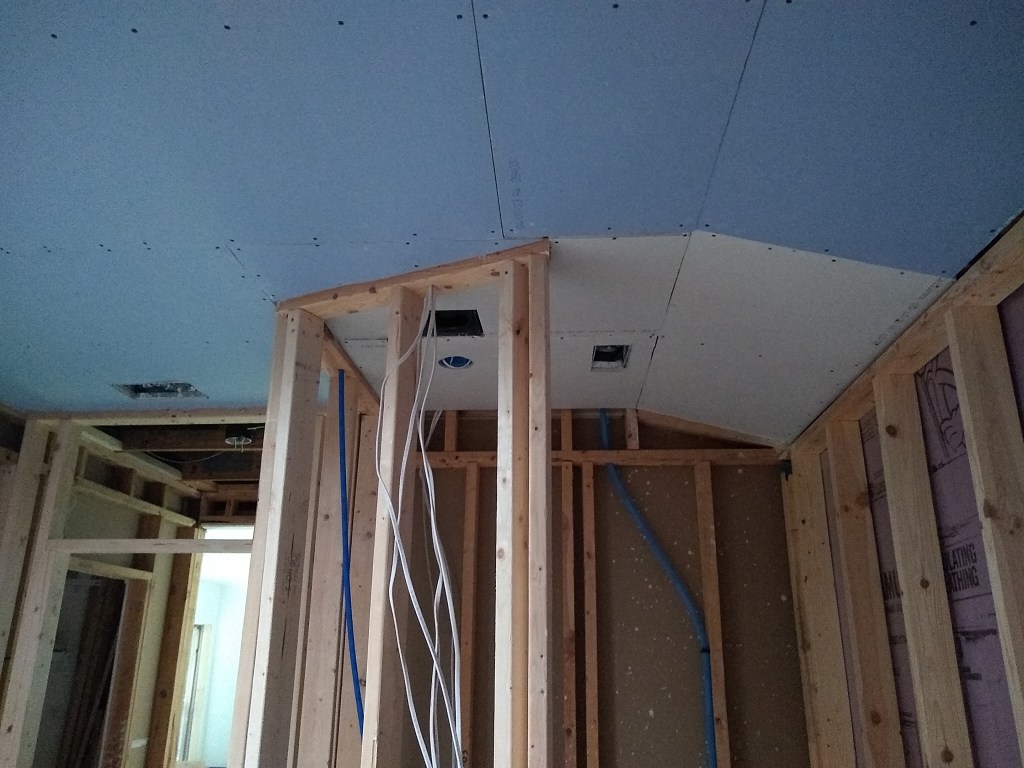
Next I filled in the small triangular pieces then worked on the area in the toilet alcove. I decided to use regular drywall there because it is far enough away from the shower and has its own vent fan, so I’m not too concerned about moisture issues. Also, I only have a limited supply of the moisture resistant drywall on hand, so I want to place it where it matters most.
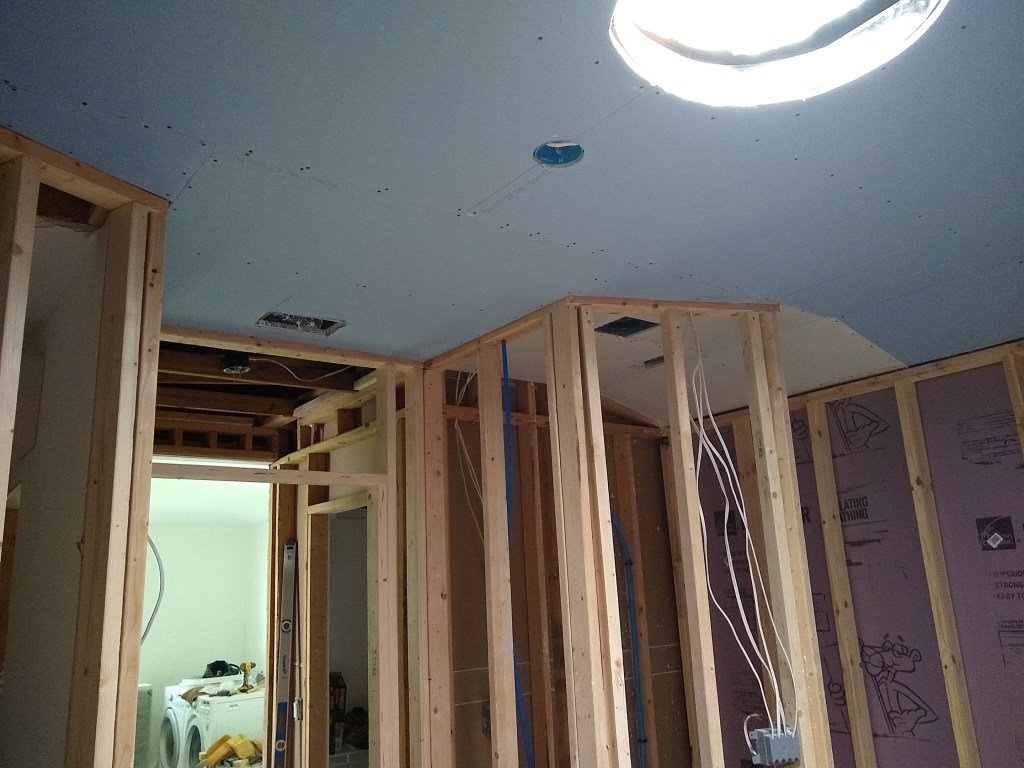
That was the last work I did inside the house in May. On the same day I also ordered a bunch of items, including the shower wall tile and shower floor tile, the master bath floor tile, and also the counter tops for the kitchen. These things will not be delivered for a while. Of them, the only one I am dependent on is the floor tile. I need that, together with the Schluter products, in order to move forward on the shower. While I wait for that I will push on with drywall work, hanging what I can on the walls of the master bathroom and also the entrance hall to the master bathroom. That will start tomorrow, in June, so will be part of a separate post. So for May, here endeth the post.
