The master bathroom is getting some serious changes made to it from what I originally intended. My initial plan was to include a tub, kind of like this:
But after some thought I decided not to include a bathtub. I originally purchased this tub:

This tub was acrylic. It looked nice, but was not substantial. A cast iron tub was more what I had in mind, which would cost a significant amount more. After some thought, I decided it didn’t make sense given the cost and limited use it would get. I haven’t had a bath is a very long time. It would sure look good as the center piece to the bathroom, but in reality it would not be used very often and would just be something I’d end up cleaning far more than I would use it. So I decided to pass on it. I sold the tub on Craiglist.
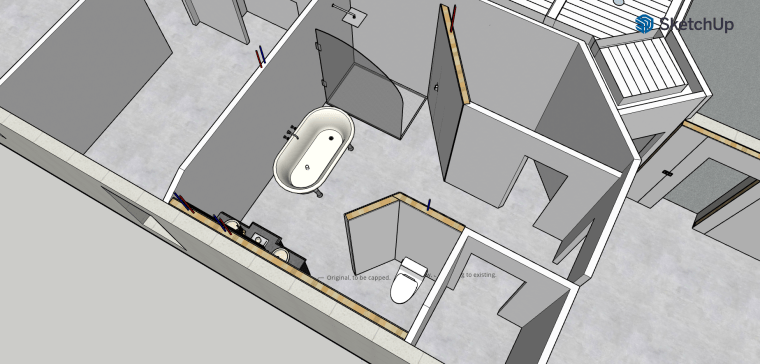
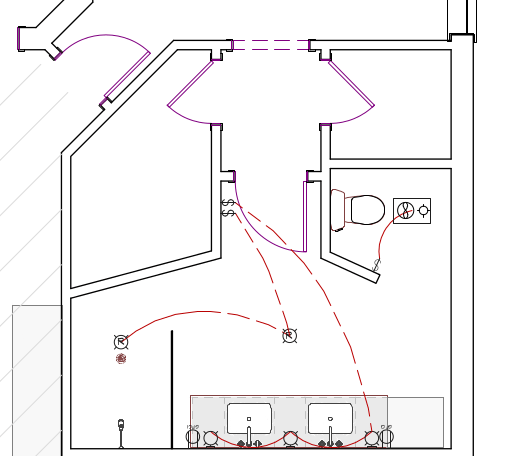
The new design without the tub will look something like this:
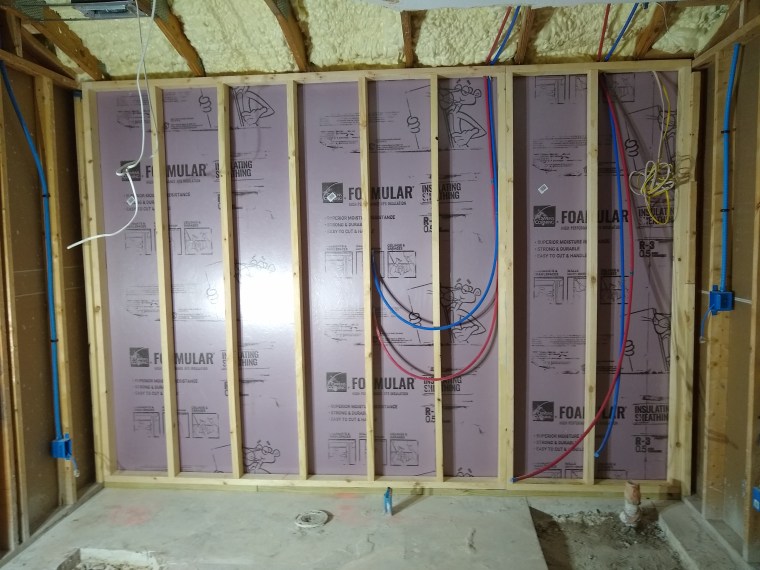
One of the first things I needed to do was remove the PEX lines I had for the two vanities that were originally going along the west wall (wall on the right in image above) and reroute the vanity wiring. Below you can see two blue and two red PEX lines, and to the right of them is wiring for the vanity.
Here is a shot after I removed them.

Notice that I’ve just pushed them up into the attic for now. I will eventually bring them down into the wall once I know what vanity I am getting. This is necessary because the vanity I choose will dictate where the lines need to go. I will pull the hot and cold lines originally intended for the bathtub up into the attic and just leave them there. Although I don’t have a use for them, I don’t see the point in pulling them out completely. They will remain routed to the Manabloc, just not hooked up. If, someday, I find a use for them, I won’t have to climb up there and run them (just reroute).
You’ll notice from the image above that the ceiling is no longer in place. I decided to pull down all the drywall on the ceiling in the master bathroom. This was primarily motivated by my desire to reposition the sun tunnel. It was installed in a position that was not centered on the entrance to the master bathroom, so I always thought it looked a bit odd. To fix this I would have had to create a round opening in the ceiling, maybe a foot or more to the right (as you look at the image below), then patch the original opening. That would be a tricky proposition.

There was also another other issue that contributed to my decision to pull down the ceiling.
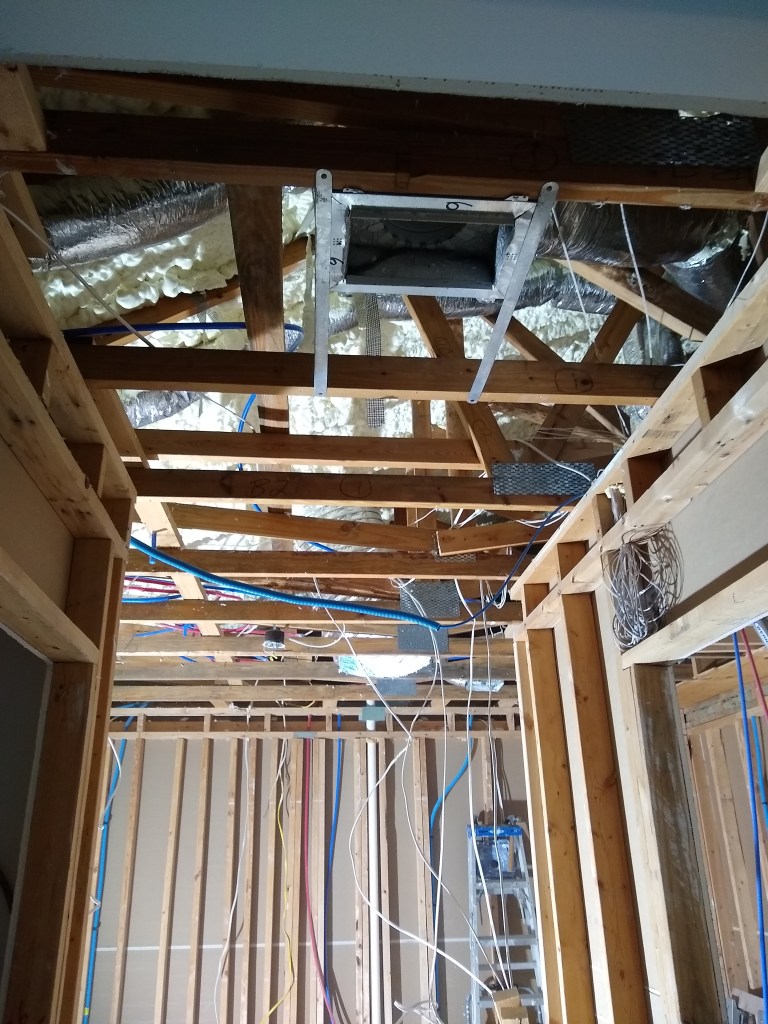
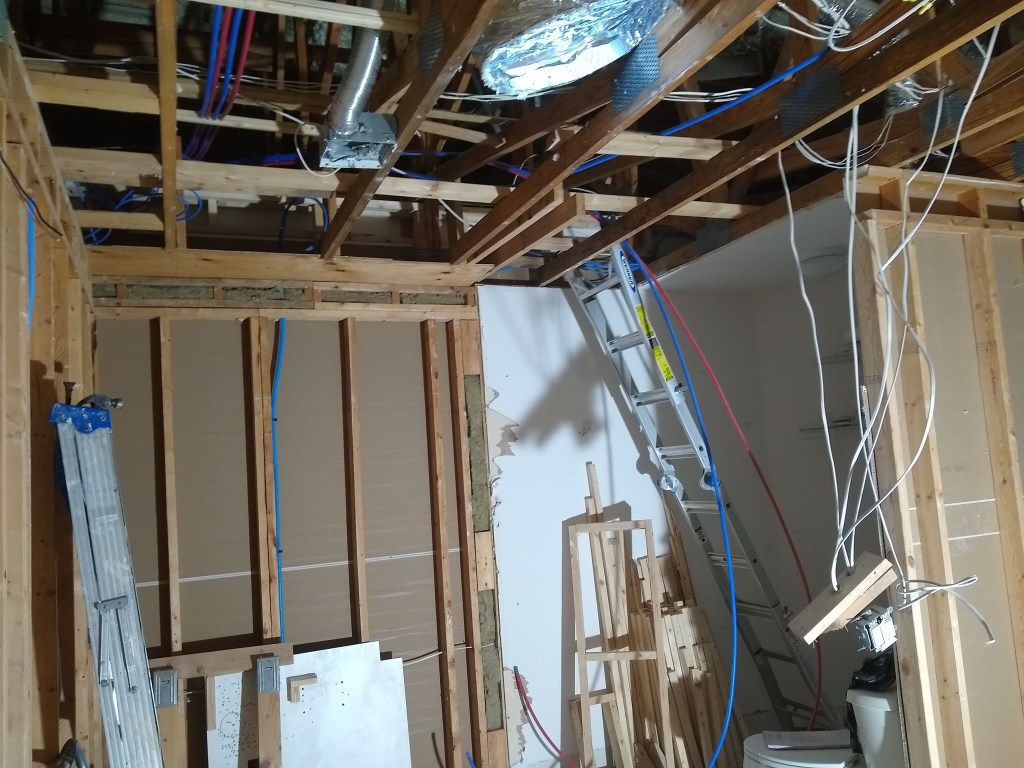
I also intend to move the attic access from where it is now in the large closet to the entrance hall to the bathroom. Having attic access in the closet would severely limit what I could do in the closet with respect to cabinets, so I needed a better location, and I think the hallway will do. That change required some ceiling demo too. I wasn’t entirely sure where to put the opening within the hallway. After demoing the ceiling, I was able to get a better idea of it. I decided I would put the opening near where the A/C vent is shown above. So I’ll reposition that vent to a more suitable location.
In doing this demo, I removed the wall that had been framed between the shower and the large closet. This wall was secured to the ceiling by sandwiching the existing ceiling drywall between the top plate and the joists. With the drywall removed, I that wall will be rebuilt and attached directly to the joists before the drywall is replaced (assuming I use drywall). Here is an image of that area after the wall was removed.
Below you can see the north wall and ceiling after the demo. You can still see the PEX intended for the bathtub, which, as I mentioned, I’ll pull up and store in the attic. You can also see where I rerouted the wires (yellow for outlets and white for lights).
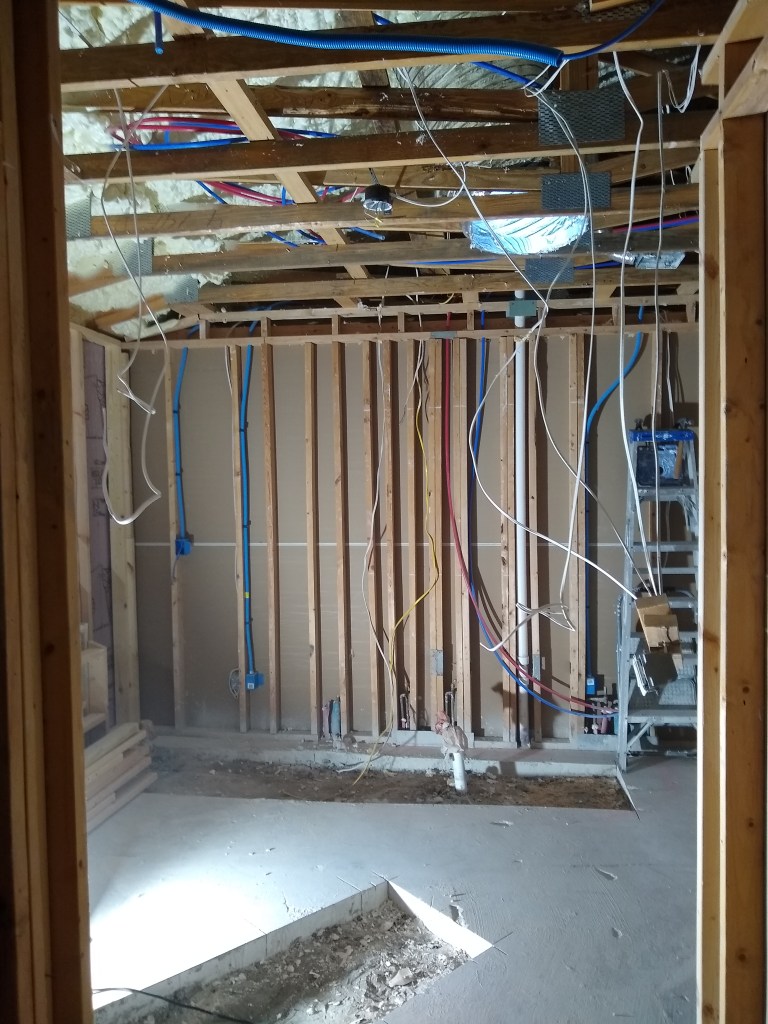
With the ceiling removed, I have much more flexibility with respect to positioning of ceiling lights and vents. Although I did not originally intend to remove the ceiling, I’m glad I did.
Following the demo, I got to work re-framing the wall I pulled down.
I also added nailers in anticipation of the drywall and ceiling work that would come.
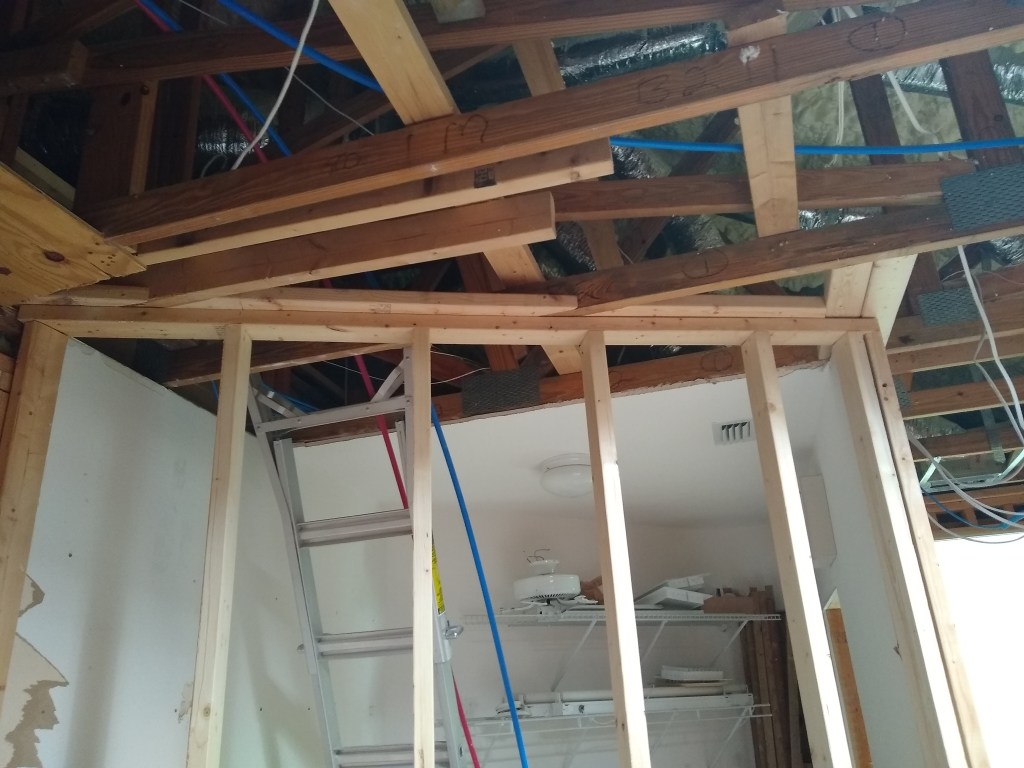
These were a bit tricky as it involved many very acute angle cuts. I attached 2x4s to the top of the top plate so that half of one of the 2×4 was overhanging on the outside and half of another overhung on the inside. This will provide a good amount of surface to attach the wall and ceiling covering.
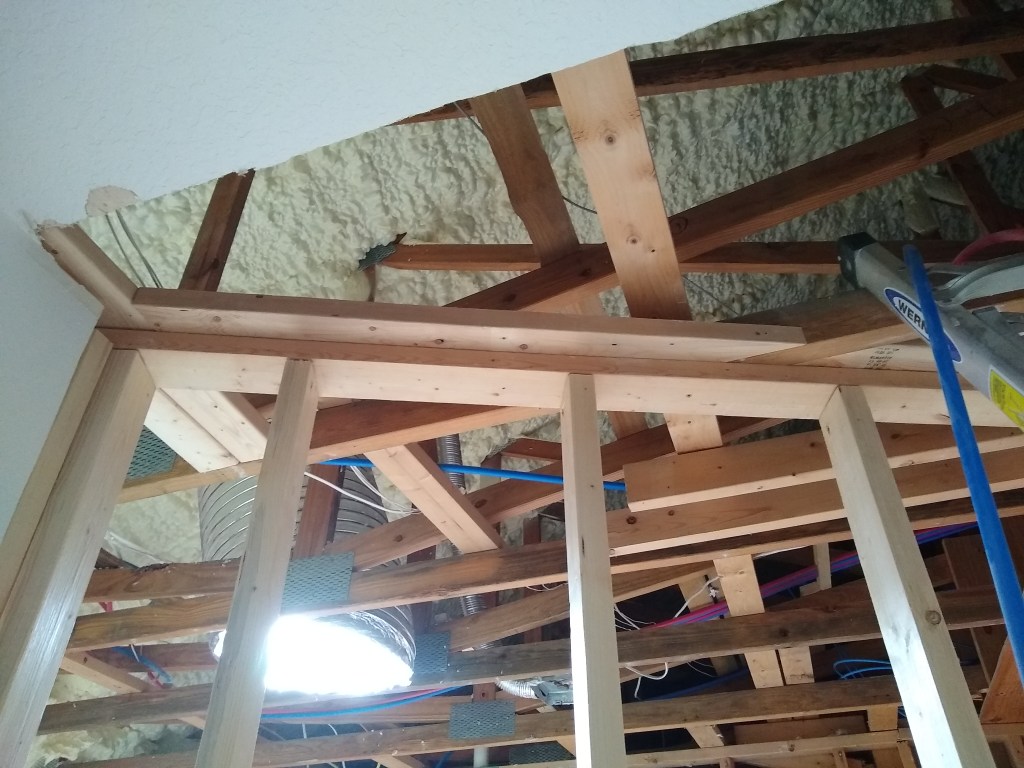
Next I moved the A/C vent and centered the sun tunnel, as mentioned above.
The A/C Vent will now reside on the other side of the door (when framed), providing more direct A/C to the bathroom. The sun tunnel required a bit of surgery, as I had to remove part of an insignificant board between the rafters that prevented me from putting it where I wanted. I then added a couple of nailers between the rafters to create a square to firmly capture the circle and provide something proper to attach to. In the image above, I have inserted the circular flange and used a couple of clamps to hold it in place until the ceiling is installed and I can attach it permanently.
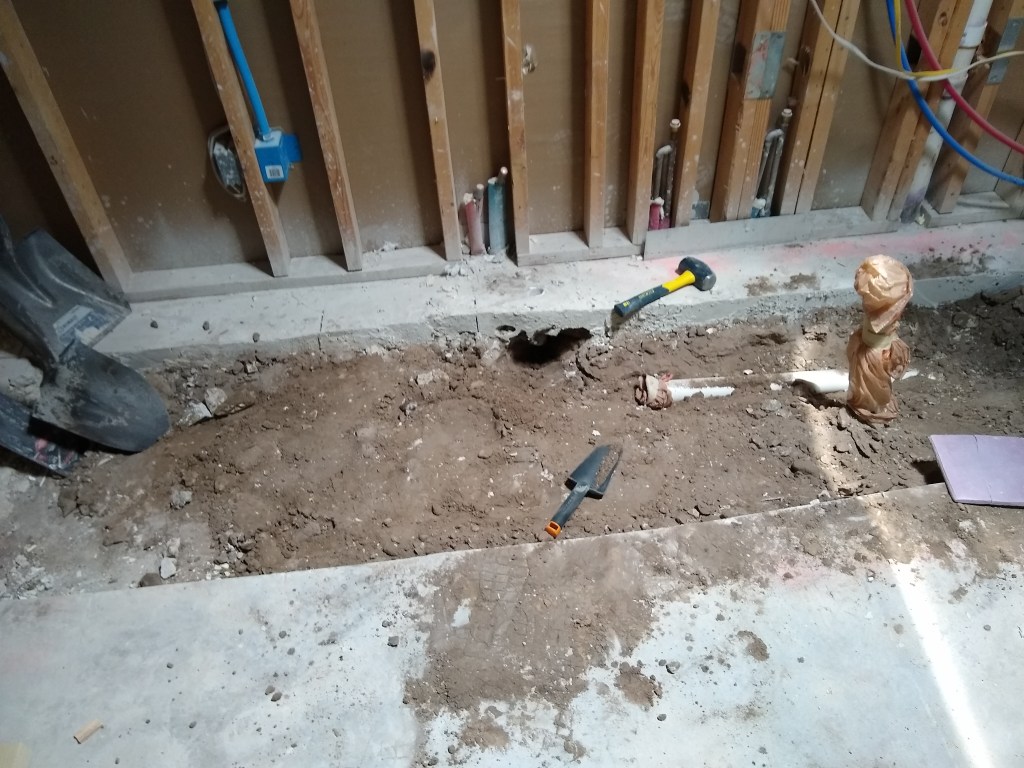
Now that I am no longer locating the vanity sinks on the west wall, the drain that leads to them is no longer needed, so I pulled out the shovel and started removing the dirt to get access to the drain. To my surprise, the pipe had several cuts which would have happened when I hired someone to cut out the concrete. Fortunately, I was pulling out this pipe anyway, but it made me look closely at the rest of the pipes. Although I didn’t take a picture of the cut pipe, here is an image of the area after I removed the cut portion. You can see the cut lines in the concrete on the left half of the image.
Having seen the damage to the pipe I removed, I had to check the drains from the toilet, where the same crew removed that concrete too. Sure enough, it was damaged.
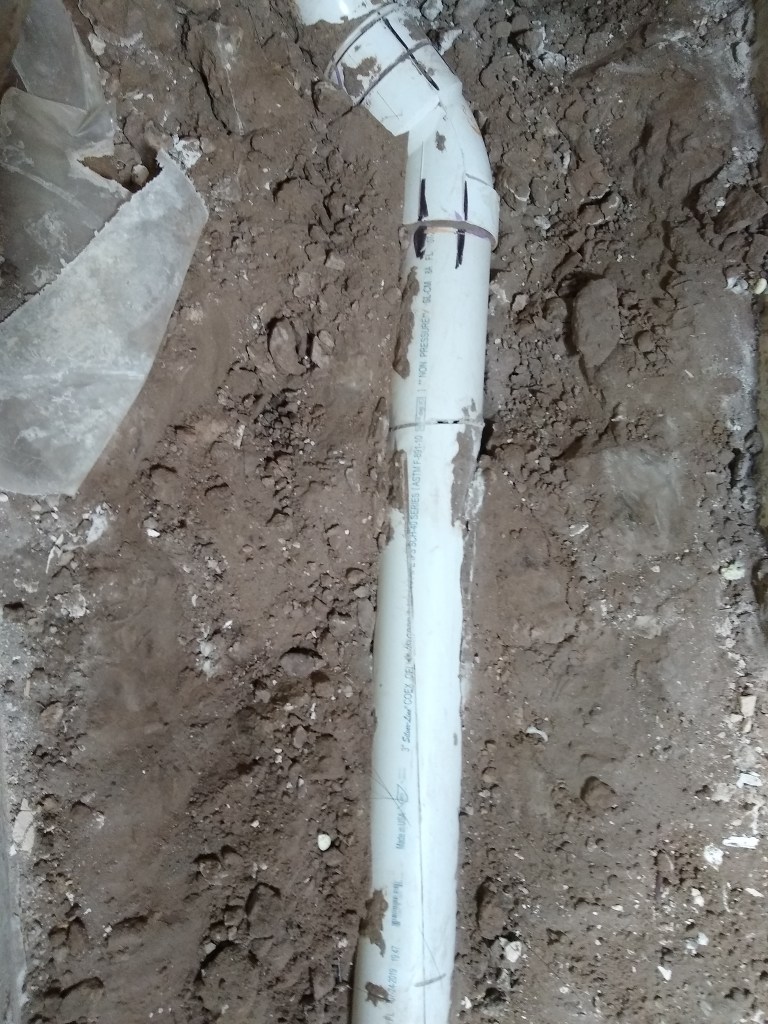
Notice the cut across the pipe in the top half of the image and the scoring near the bottom. There is also significant scoring from the concrete saw in the middle of the pipe along its length. So this had to be pulled out and replaced. I was planning to open all this up for the inspectors, so it’s not like it would have gone undetected. It’s just a nuisance really.
Below I show how I used my reciprocating saw to cut out the damaged section.
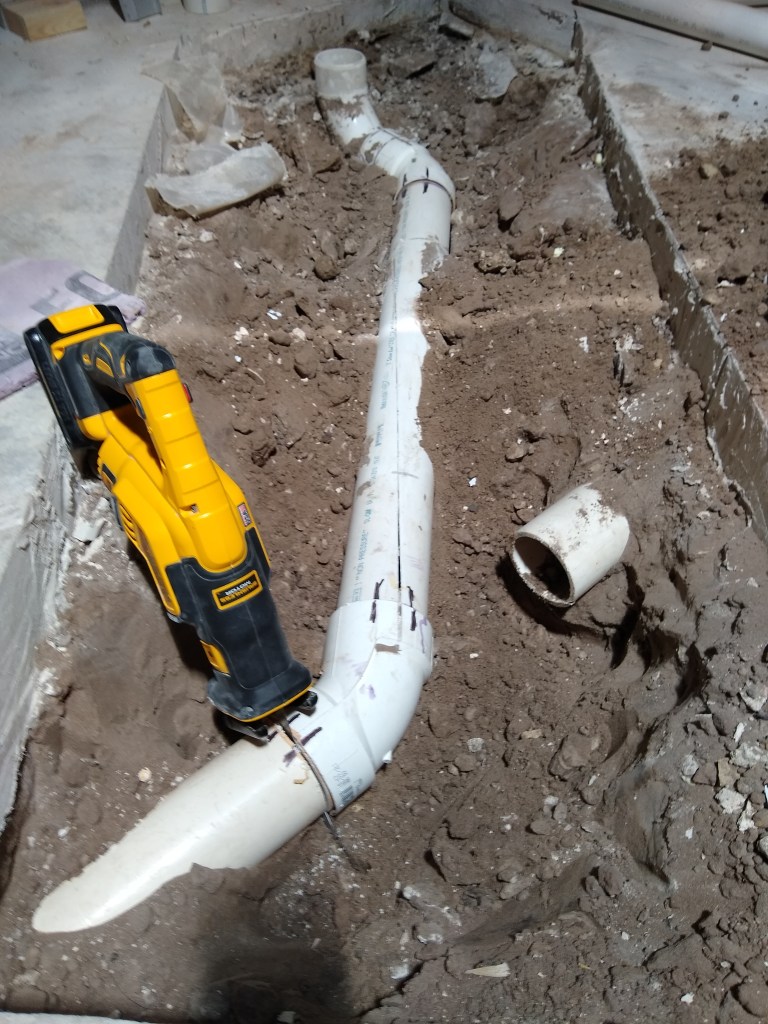
The pipe you see to the right is what was left of the drain from the original toilet location. That is now just a dead section of pipe. I capped the end, which was probably overkill. Here is the new pipe.

After this I called for and inspection to get the okay before filling in the trench. As I was waiting for the inspection, it occurred to me that the drain location for the vanity was kind of far from the wall. So I measured the distance and, sure enough, it was. After all, it was positioned to service a bathtub, not a vanity sink. Although the vanity cabinet would cover it, it would still be right there as you opened the door under the sink. So when the inspector arrived I discussed this with him and he agreed it needed to change. Essentially, what I did was restore the drains to what they were when the house was built. Here’s what I mean.
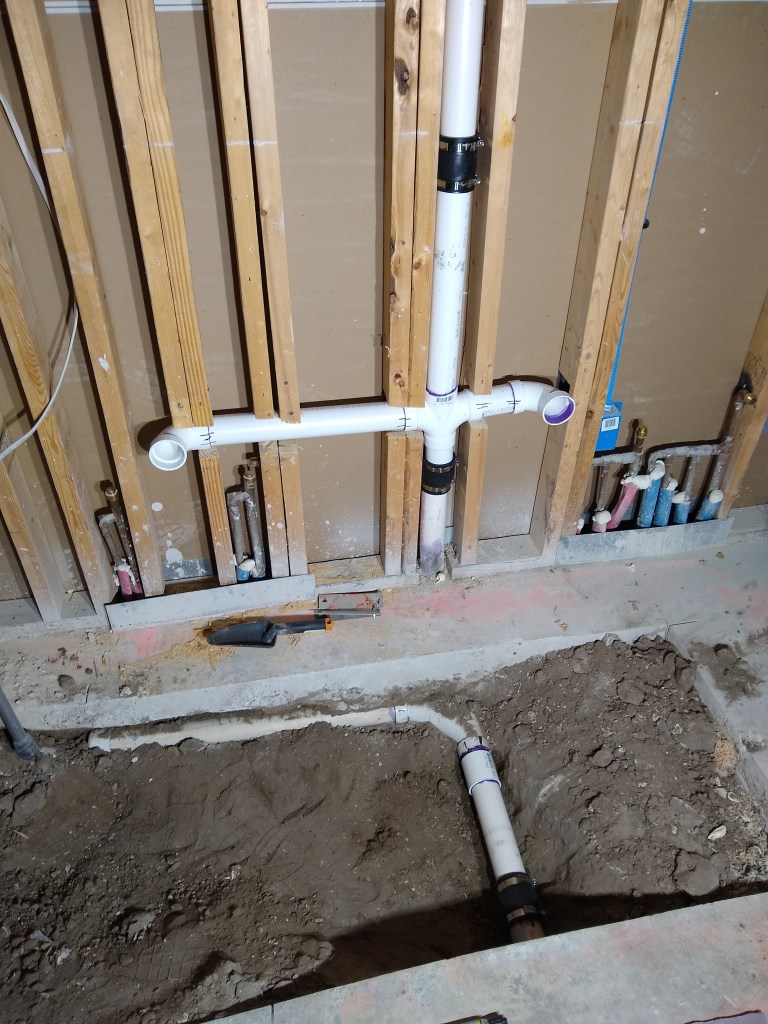
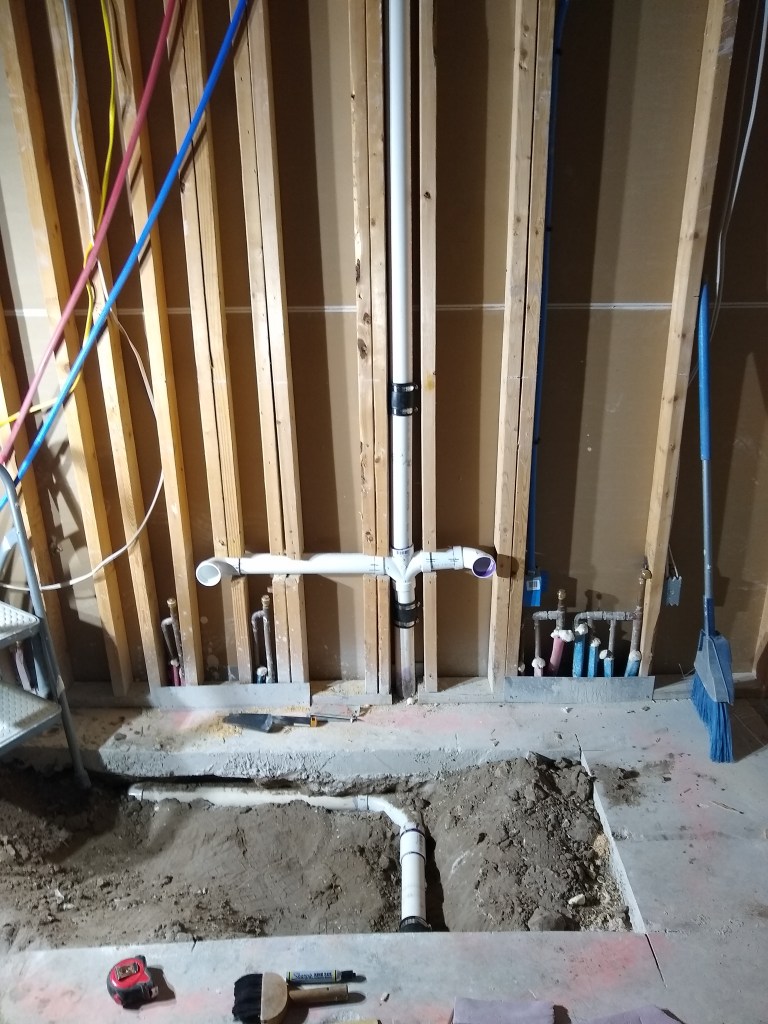
This is much simpler. The drain to the original tub remains capped, but that is the only extraneous pipe in the system. The inspector, who was a plumber for more than 30 years, recommended I use the black flexible rubber couplers you see. These made all the difference when trying to squeeze the pipes into position. The next day I ran water through the pipes with no evidence of leakage. Later that day the inspector returned and gave me the green light to fill in the trenches.
To fill in the trenches, I have to have the soil treated for termites, cover the soil with a plastic barrier, and install rebar before I pour the concrete. I called my pest control guy right away and arranged to have them come out. It would be a few days, so I got to work preparing the rebar. This meant drilling holes and cutting and arranging the rebar in a grid pattern. Here’s what I came up with.
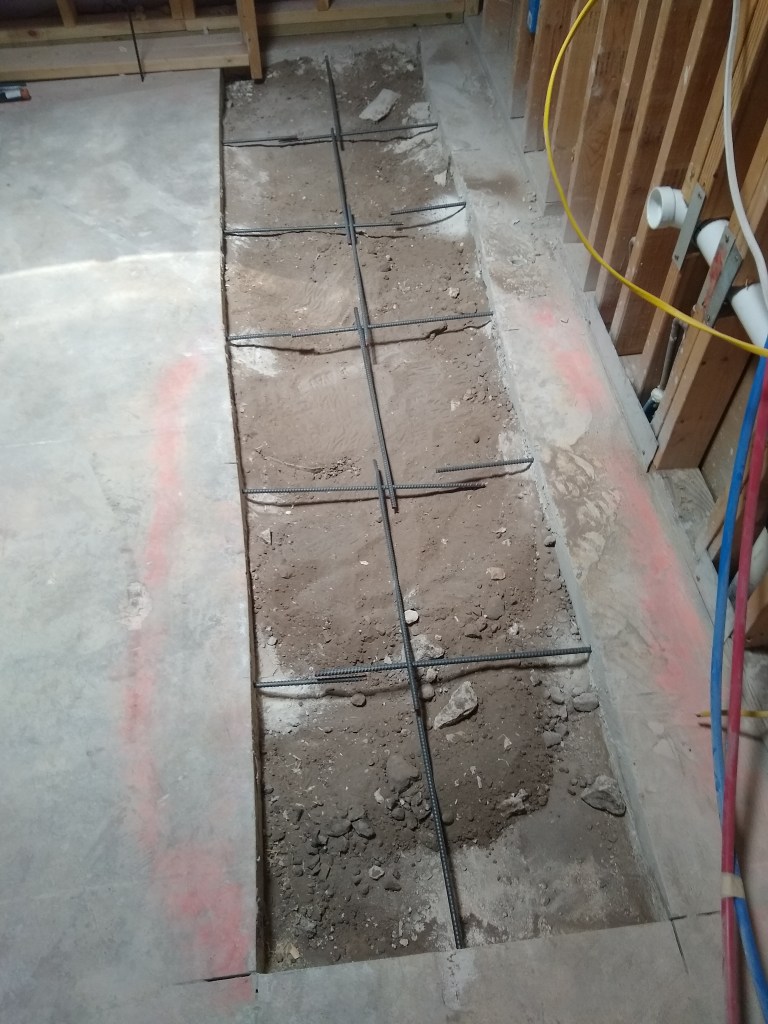

Note that in the images above, the rebar is not attached yet. That will happen after the soil has been treated and the plastic barrier has been put down. So I removed the bars and set them aside so they would not get in the way as the soil was treated.
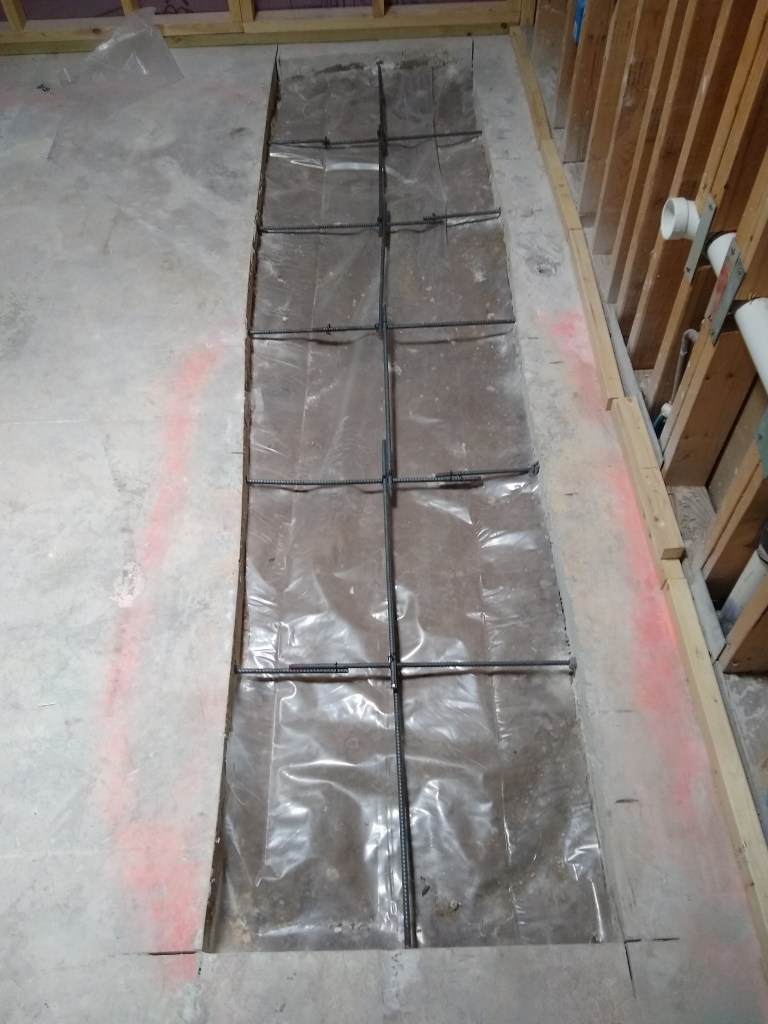
After the soil was treated, I put down the plastic and secured the bars, then summoned the inspector to give me the okay for the pour.

The inspector gave me the okay, so I mixed up the concrete and started filling in the trenches.
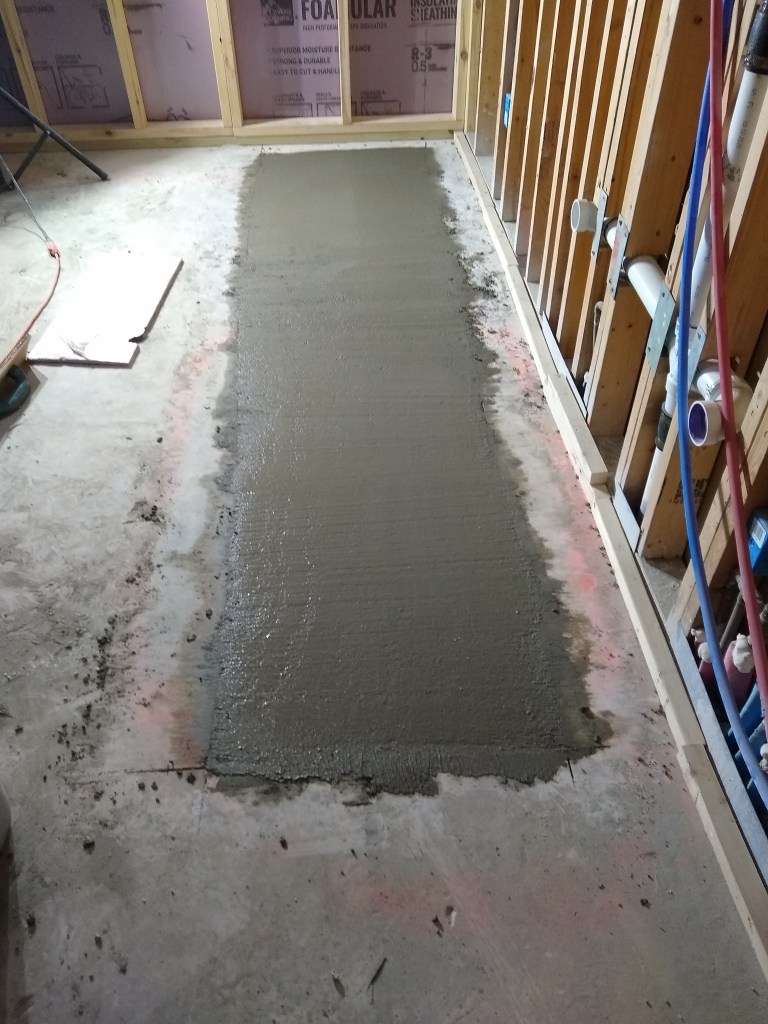
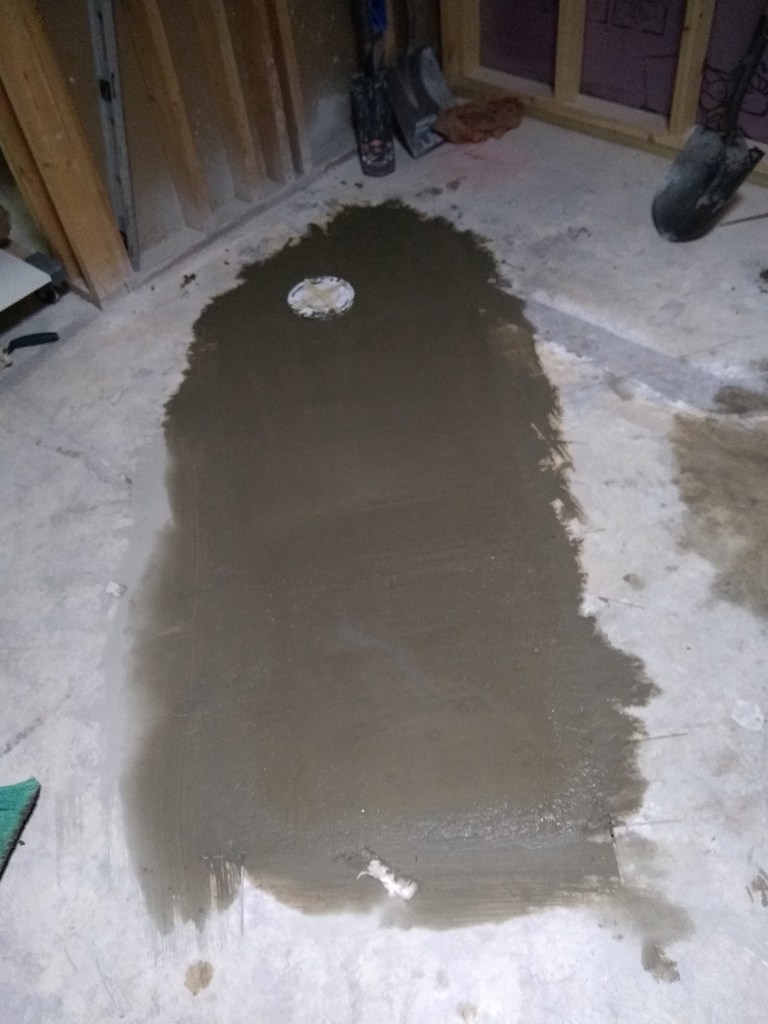
I used almost seventeen 60 pound bags of concrete mix, and mixed it together with water in a 5 gallon bucket. I gradually added the mix to the water at the bottom of the bucket and used a small trowel and a mixing drill (with appropriate bit) until the texture was right. This was a lot of work. A concrete mixer would have been ideal, which is what I used the last time I did this. But that required I rent a pickup truck in addition to the mixer because my vehicle is not big enough to transport the mixer. The inspector was the one who suggested I use the 5 gallon bucket, which worked just fine. It was a bit slow, but didn’t involve a long drive and the hassle of renting.
I left the concrete to cure for a week before I resumed work in the master bathroom. I would be drilling screws into some of it when I put up the walls around the toilet, so I wanted to make sure it was well set. I also needed to get together with Jennifer (the designer) to settle on the vanity, mirrors, and lights so that I know where locate the electrical boxes and make any adjustment to the drains (in the wall) while they are still accessible. She would not be available for a couple of weeks, so I turned my attention to the kitchen while I waited (you should jump to Kitchen – April 2023 now if you want to follow the April 2023 time line).
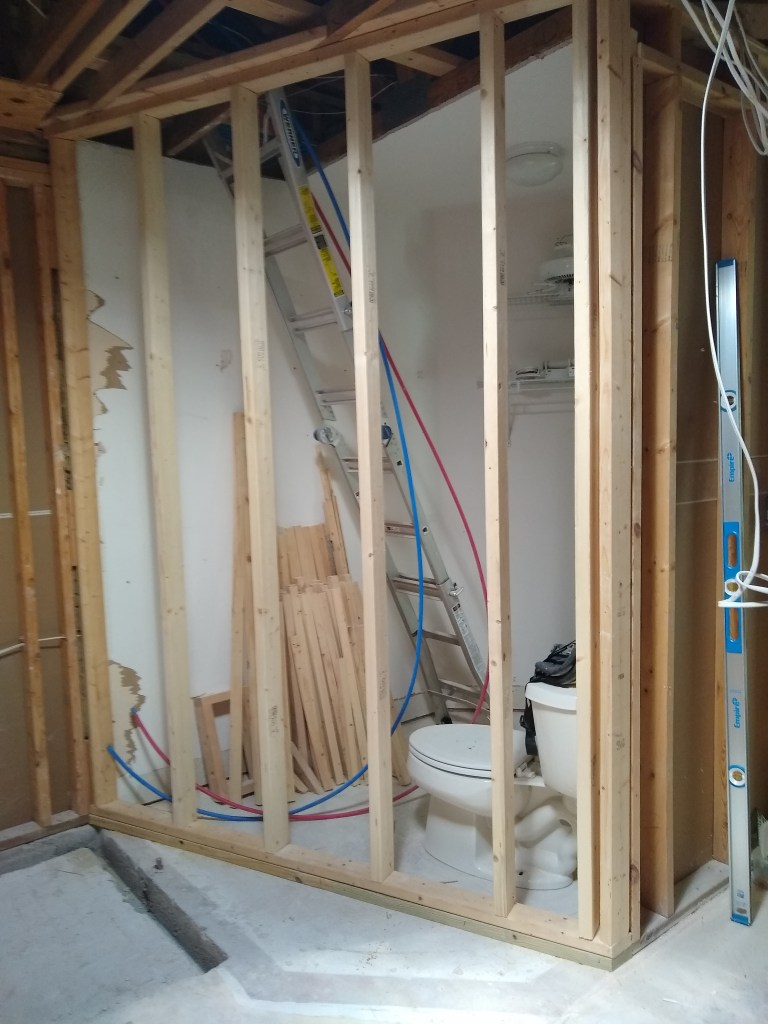
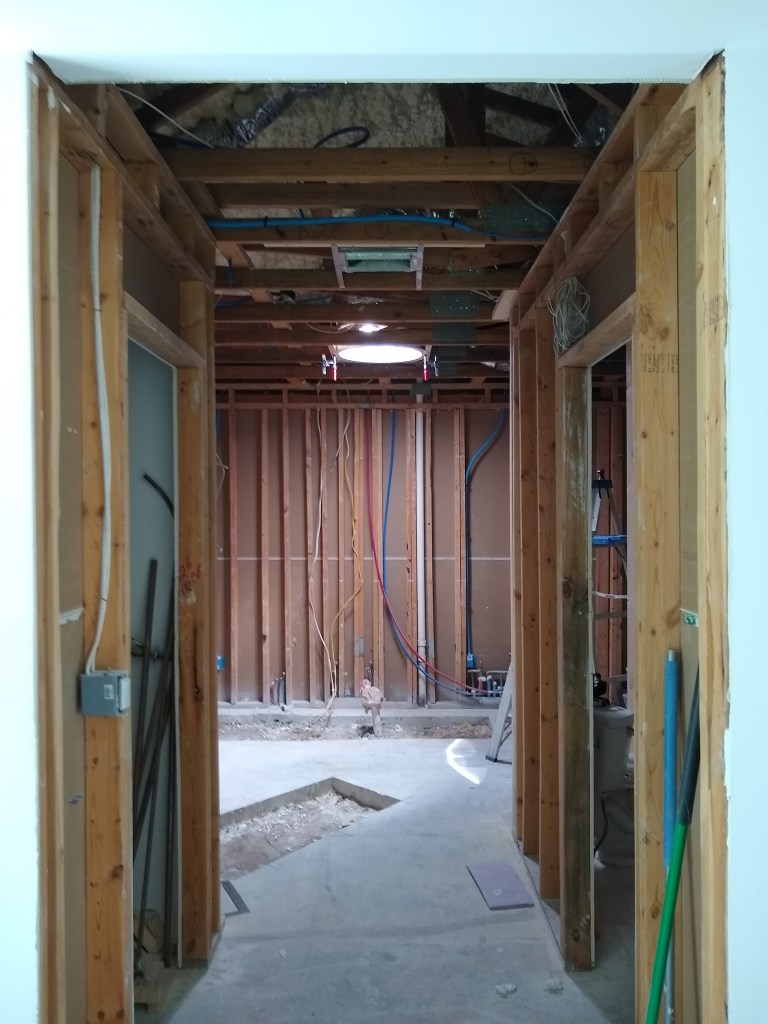
After finishing up the work I wanted to do in the kitchen, I returned to the master bathroom where I felt comfortable that the concrete was fully cured. So I framed the toilet alcove.
Recall that I had done this a long time ago, and when I removed the walls to redo the plumbing, they came down in two fully assembled pieces. However, rather than simply reinstall these two pieces, I pulled them apart and started from scratch. I did this because I am a better framer from when I first did it and wanted to do a better job. I am pleased with this. Below you can see where I added some more framing (nailers) to help with drywall installation, added the wiring, and pulled the cold water line down from the ceiling where it had been patiently waiting for so long.

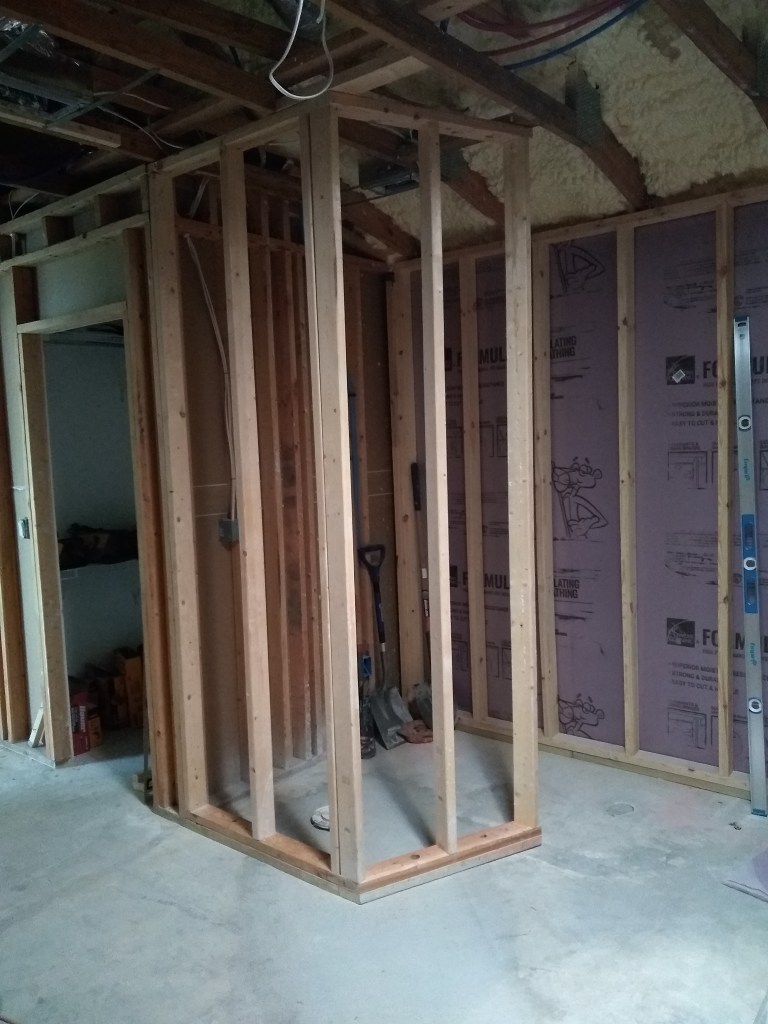
If you look closely to the left, you can see that I took this picture after framing the entrance door. I actually forgot to get a picture of the wiring I added to the alcove, so took it while I was capturing pictures of the door framing, which I got to right after the alcove wiring was done. Here are a couple of better shots of the door framing.

There is quite a bit of space above the header of this door, so I’m thinking of adding a window in that space. I think it would provide additional light during the day while not affecting privacy.
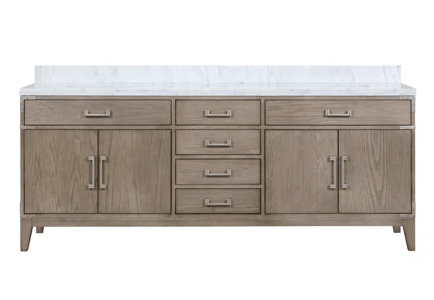
I will end this post here because I must wait for the delivery of the vanity I purchased for this bathroom. I need that to arrive so that I can get specific measurements so that I can determine where to locate the water supply lines, drains, and electrical. It is not expected to arrive until early May, so I might as well wrap up the April post here. However, before I do, here is a pic of the vanity I purchased. It is a dual sink, 84″, white oak free standing vanity.