Following the trenching, I made a decision to re-pipe the entire house, replacing all the copper pipes with PEX (flexible plastic tubing). The primary motivation was to eliminate the risk of encountering a leak in the copper under the slab. It is not uncommon for copper to develop pin hole leaks after a long time (decades). I know people who had to deal with this on more than one occasion in an older home they once owned. It required pulling up the flooring and digging into the slab to find and repair the leak, hoping that another one would not show up down the road. My house is about 18 years old, so this is something that would likely not show up for years, if ever. But once my floors go down, I do not want to have to pull them up unless it is by choice. I will be putting down tile. If a significant repair were required some day, then it would be unlikely that I would find the same tile, and if I could, the dye lot would be different, meaning I would not be able to find a perfect match. So, by re-piping, this potential issue goes away.
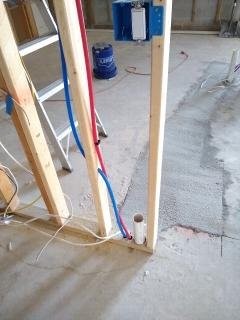
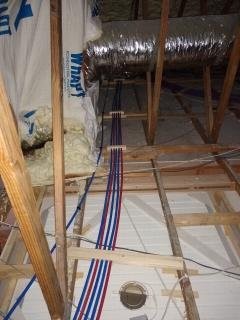
The re-piping I have chosen involves routing all new PEX lines above the ceiling. Now that my home is insulated with spray foam, access to that area was greatly increased and far more comfortable. I doubt I would have attempted it otherwise. Below you can see the original setup, where the plumbing supply line that comes in from the street branches out. The pipes are within the wall between the laundry room and garage, so I removed the drywall to expose it.


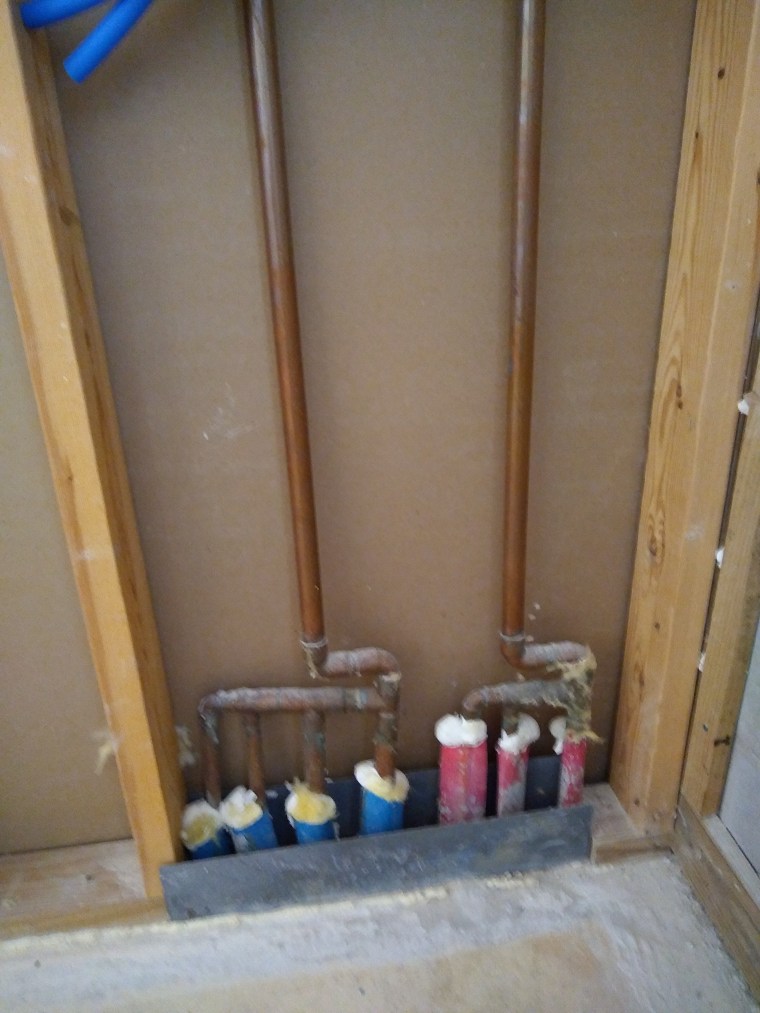
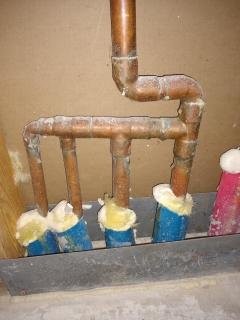
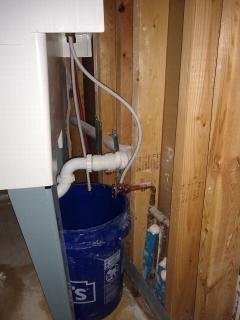
In the first image, you see the copper pipes rising up to connect to the hot water heater on the other side of the wall in the garage (second image). The third and fourth images show the details of the cold water lines that are not visible in the first image due to the laundry sink obstructing the view. Of the four blue wrapped lines, the right most line is the main supply line. It branches off to three other lines that distribute the cold water throughout the house under the slab. The main supply line also rises up to the hot water heater then returns with hot water on the other side that is also distributed under the slab.
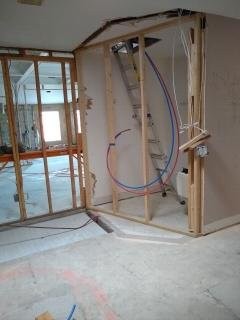
I will be severing the main supply from all other lines. The only line from the original copper I will interface with will be the main supply line. Once disconnected from the main, all other copper lines will be capped and simply remain where they are, unused. The main supply will connect directly to a PEX line and rise up through the ceiling in the laundry room, from where it will branch out to the various fixtures throughout the house.

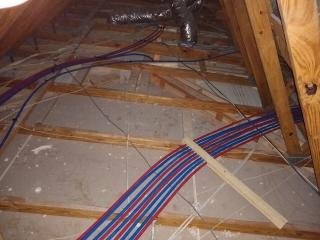
As you can see in the picture above, the lines will come down from a hole I punched in the ceiling in the laundry room. These two lines are the ones that will connect to the kitchen sink. They were encased in concrete on the other end, as I described in the post on trenching. It is important to note that these two lines will connect directly to the faucet for the kitchen sink. That is, there is no branching from these lines to other fixtures. This is the approach I chose to take for all fixtures. More commonly, a “trunk and branch” system is used, where lines are shared between fixtures. This is how the original copper lines were arranged. I decided to use a “home run” approach, where each fixture will have its own dedicated line that runs directly to the supply. This will be true for both hot and cold lines.
To support that kind of arrangement, a special manifold is required. I selected a product called Manabloc by Viega. I will set it up as shown below. The main supply line will be connected to the bottom of the manifold. Out the top of the manifold the cold water (blue) will run to the hot water heater and return to the manifold at the top (red). The lines branching out the sides of the manifold will distribute the hot and cold to wherever I choose.

The advantage to this system is that each line can be individually controlled. If I wish to repair or replace a fixture, none of the other fixtures are impacted. I can even go as far as shutting off just the hot line to a faucet, while keeping the cold line charged. I decided that if I was going to go as far as re-piping my house, I might as well get as much control over it as I can. More importantly, though, since this renovation is going to take a while, I want to be able to incrementally bring fixtures online as they are added.
A disadvantage to this system is that I have a heck of a lot of lines to run. So that hole in the laundry room ceiling is about to get a lot bigger.

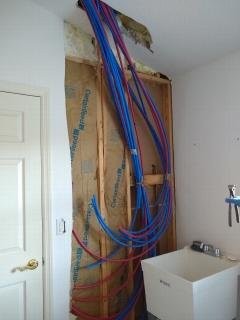

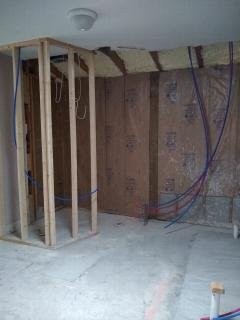
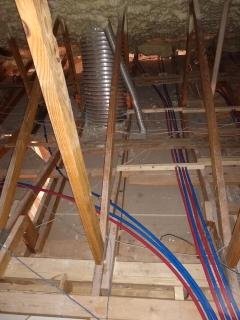
In total, I ran 24 separate PEX lines. That was a difficult job, as it required a lot of maneuvering in tight spaces in the rafters. In the third image above, you can see that I relocated the laundry sink. I moved it to the guest bathroom and connected it to the existing copper, since it was the only source of water I had and it would be a while before I would be ready to cut over to the PEX system.

It took 11 trips up to the house to get all the lines run, and that did not include securing them, which you’ll see later. Below I show the other end of these lines.


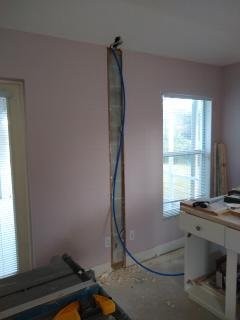
The first two pics are of the lines coming down from the ceiling for the kitchen sink. There will also be a hot water line for the dish washer (it doesn’t appear to have been run when I took this picture) and a cold line for the ice maker in the fridge. The third pic show five lines coming into the guest bath: hot and cold for the shower, cold for the toilet, and hot and cold for the vanity. The next three are of the lines feeding the master bathroom: hot and cold for the shower, hot and cold for the tub, hot and cold for both vanity sinks, and cold for the toilet. The final two images are cold lines that will connect to the spigots outside. The first is for the west spigot that comes down in the closet of the office closet. The second is for the south spigot that comes down into the master bedroom and will punch through to the lanai. There is a third spigot on the east side of the house beside the garage, but it comes off the copper supply line from the street before it reaches the laundry room, so I will leave it as it is.
With all the lines run, it was time to purchase the Manabloc. While waiting for that to arrive, I got busy securing the lines in the attic. In some places I used small plastic clips you can purchase, but in other places I wanted something more robust, so I fashioned my own. I all cases, the supports can be undone. The ones I created sandwich the lines and are screwed to the joists, so I can unscrew them to free a line or move them, if needed.

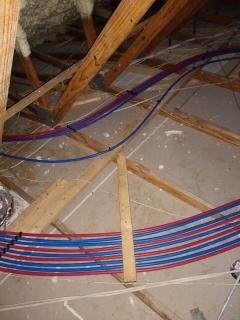

I’m not even going to try to explain which lines are which. The main point of these images is to show how nicely run they are (at least I think so). I’m not completely finished with this. I think I’ll add some more supports to reduce the distance between some of the runs so that I am in compliance with code. I won’t be completely done securing the PEX until all the fixtures are in place, but this gives you an idea of what happened to the lines once they disappeared above the ceiling in the laundry room.
In the next post, the Manabloc comes into play.
