Before doing the coffered ceiling, the plan was to use T&G for the kitchen ceiling. But since I worked on the coffered ceiling first, I decided to use T&G there too. So the T&G theme would carry from one room to the other. Before working on the coffered ceiling, my plan in the kitchen was to run the T&G from in the opposite direction to one I eventually chose. In preparation for that, I had put up fir strips to have something to nail to since the boards would be running perpendicular to the joists.

However, after deciding to use T&G in the coffers, the direction of the boards in the coffers had to be from the front of the house to the back. It just looked right that way. Consequently, the directions of the boards in the kitchen needed to change to match. So the first order of business was to remove the fir strips (sigh). They did not go entirely to waste, though. I used several of them later and will in the future when possible.
Another job that had to be done before the ceiling went up was to finalize the wiring for the lights. The kitchen will have overhead lights as well as under counter and kick plate lighting, so I had to make sure the lines were run while I still had access. With that done, it was time to put up some boards.

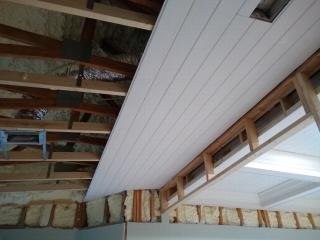
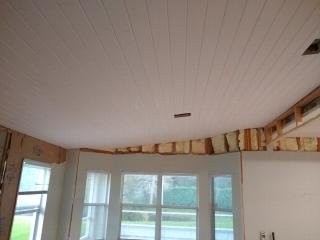
As you can imagine, this was an easier job than that of the coffered ceiling. But it wasn’t easy, especially doing it on my own. The boards were 16 feet long, so manipulating them was a challenge. I used a lift that Chris lent me to get the boards in position, and clamps for fine tuning. With that I progressed a bit each day.

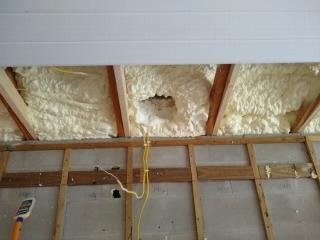
As I approached the wall, I had to address the vent for the stove top. The vent exhausts to the outside, and that opening was covered up when the spray foam was applied, so I had to dig it out and figure out a way to attach a semi-flexible hose to the opening.
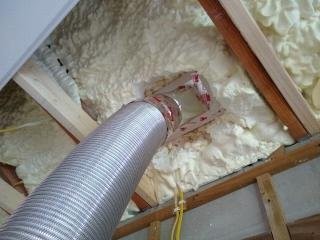
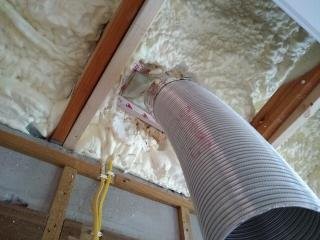
With that sorted out, I was able to push on, enclosing the vent hose. Although it looks a bit rude hanging there like that, it will be hidden within a cabinet once the kitchen goes in.

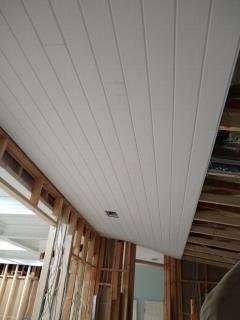
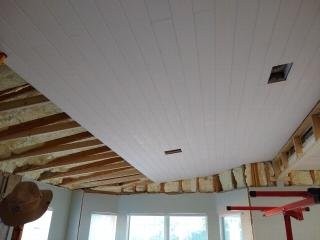
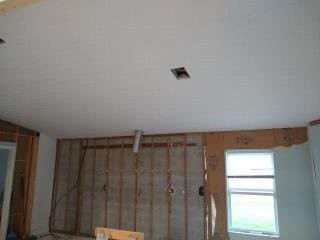
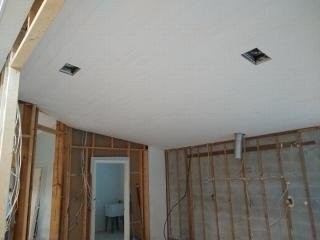
And here are a few shots after all the boards were put up. I’m happy with the look. Like the coffered ceiling, a ton of prep work will be needed before it is primed and painted. Also, I have yet to cut the holes for the ceiling lights. I’ve marked where the wires are, but want to wait until I see the cabinets in place before deciding on precisely where to put them.

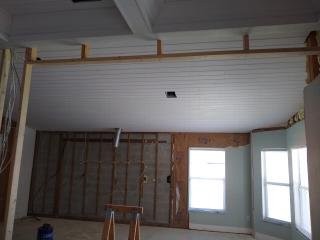
Following this job, I did some more demolition, removing the remaining drywall from the kitchen and guest bath. I won’t detail that here as it will become evident in future pics if you’re paying attention.
Next up is the trenching. This was something I was worried about, so I called Chris in for this job. That’s the next post.
