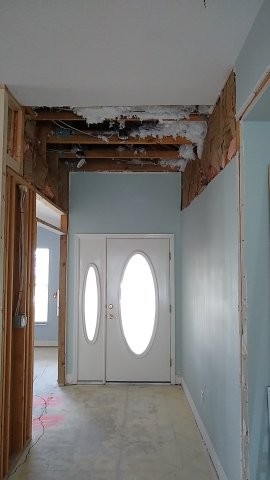
The ceiling in the great room was flat and done with wall board (drywall). The drywall was attached directly to the joists, which are rarely a good reference surface. So the ceiling was a bit wonky. This was especially evident above the entrance at the front door. I pulled down the ceiling there to see what was going on. It revealed a misaligned joist and a cracked rafter. I wonder how that passed inspection. Perhaps it happened after the house was built. There are many cracks in the concrete slab, which means there was significant movement after the slab was poured. You can see some of that in the following picture.

My neighbour subsequently informed me that the builder used a type of concrete that was not supposed to need rebar, so none was used. I think they made a mistake. We marked the cracks with spay paint so we can monitor them. There has been no movement in the year since we did that, so I am confident that the cracks that exist relieved the pressure that caused them in the first place. Irrespective of that, I will have to prepare the floor properly to guard against any further movement because I will be putting large 32″ square tiles down.
The pictures below shows the repair work that was done to shore up the area above and around the entrance foyer. The picture on the left shows how one joist is sitting lower than the other. This produced a bowing in the ceiling. The higher one is at the correct height, so I had to get in there with a hammer and chisel to correct it. The second picture shows how there was no header other than a 2×4 above the entrance to the front bedroom/office. Not only that, but the 2×4 that served as a header was not attached. Once I pulled the trim away, it moved freely. The third picture shows how we fixed it. We put a substantial header in place and sandwiched the 2×4 that sat on it with two more 2x4s. This was to provide ample strength for the cracked rafter they supported.


Leave a comment