Wood Flooring and Kitchen Cabinets – February 2025
The work I’m doing on this house requires a permit, which has an expiration date. That expiration date is pushed out by six months after each inspection that has passed. My current expiration date is April 27th, so I have to keep this in mind when deciding what to work on. My next inspection will be either an electrical inspection or a plumbing inspection in the kitchen (or both) once the cabinets are installed. In order to install the kitchen cabinets, the wood floors have to be down. So I have quite a bit or work to do before April 27th.
To speed things up, I decided to hire out the wood floor installation. An experienced crew can accomplish this in a week or so, but it would take me at least a month to do it on my own, so in this case I am willing to hire out the job. With the wood floors done in February, I would have March to work on installing the cabinets and hook up the electrical and/or plumbing. So that is why I stopped work on the guest bathroom after the tiling was completed.
To prepare for installation of the wood floors, a lot of clearing out was required. I started by pulling out and cutting up the drywall cut-offs I had stored in the garage. This was necessary to make space for the large mobile storage unit I would move into that area. I placed these at the end of the driveway along with the two toilets and utility sink, and other bits and pieces.
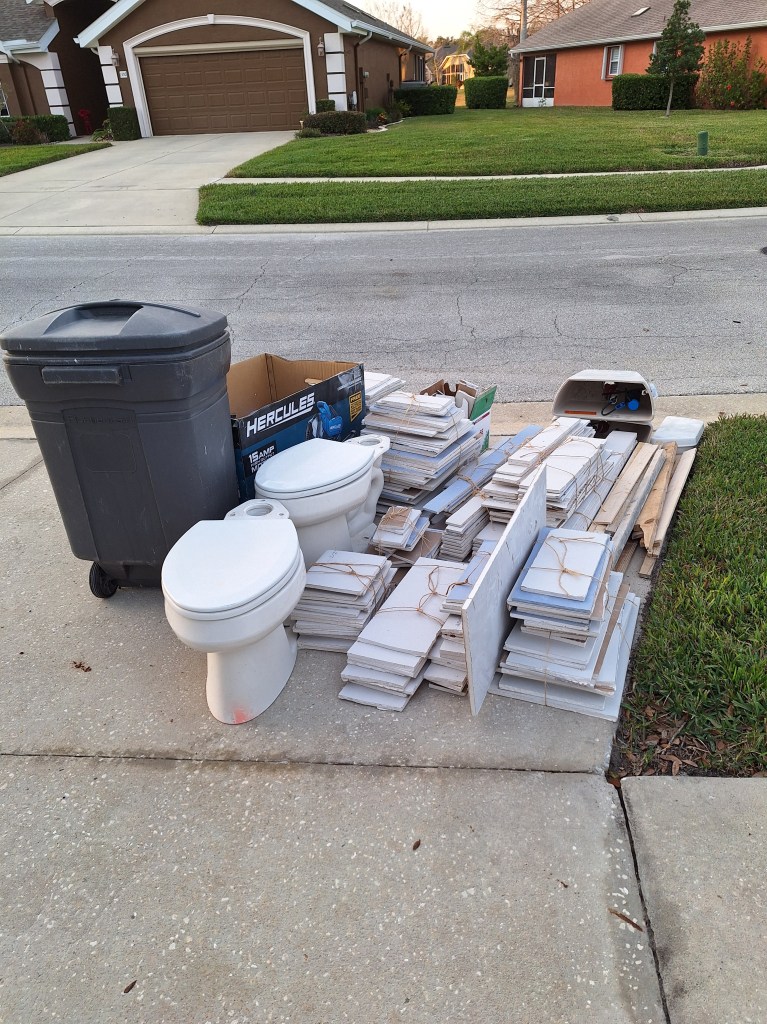
It’s difficult to throw out so much stuff, especially when much of it could still be of use. But I just do not have the room for it, so I had to do it.
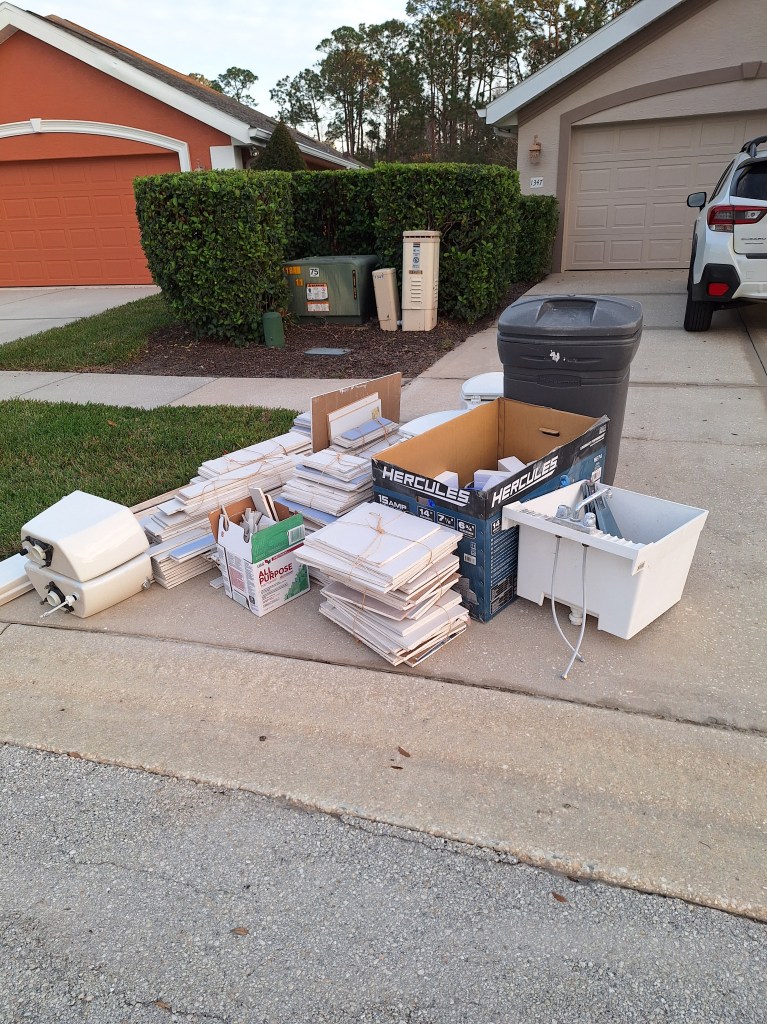
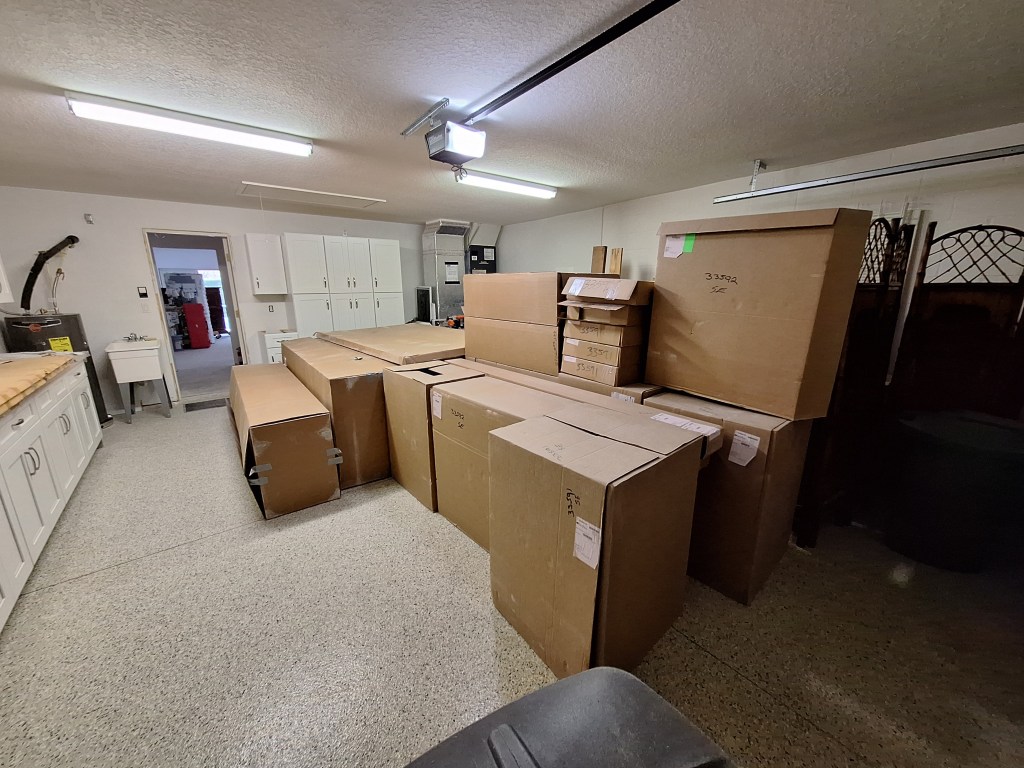
The trash is picked up twice a week, so I placed things in the garage while waiting for the next pickup day. Notice the two cabinets to the right of the trash. Those were from the original kitchen. I added mobile bases to both of them and used them extensively inside the house to hold tools and supplies. They have now been relocated to the garage where they will continue to be useful.

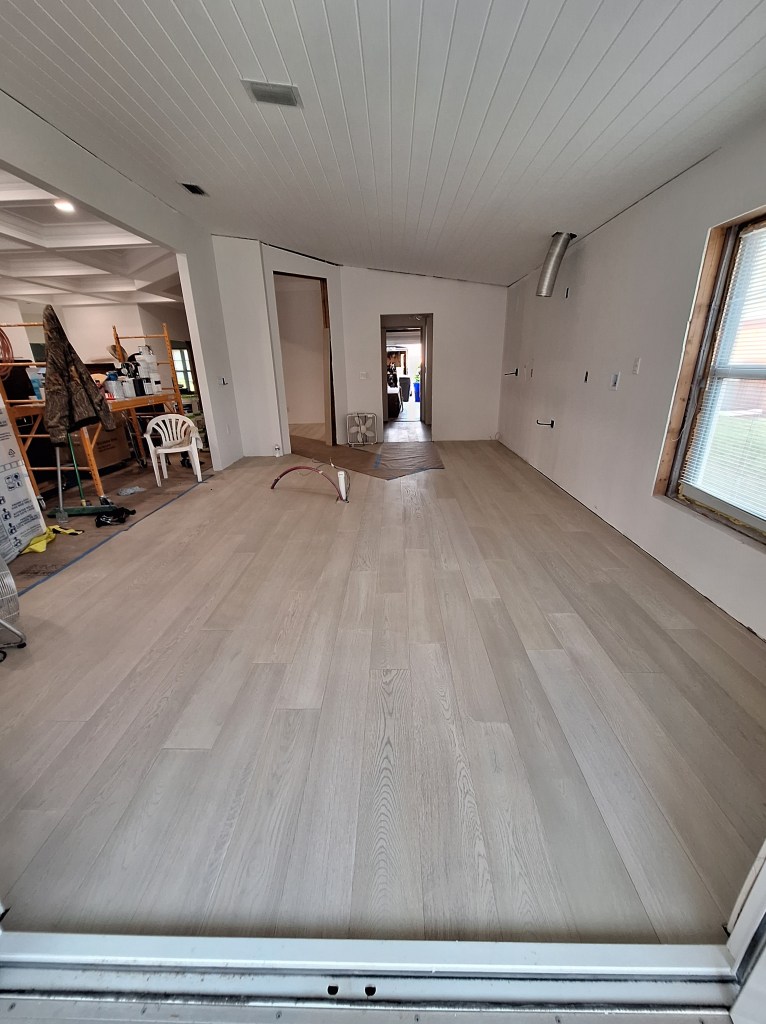
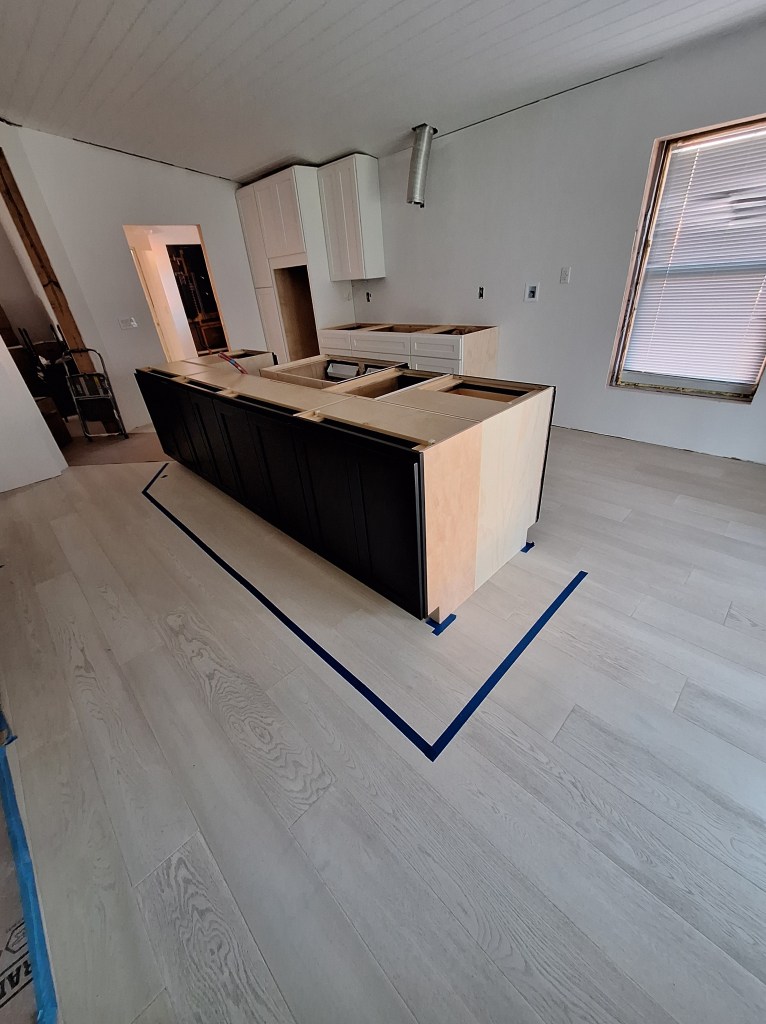
After the next garbage pickup I had room in the garage to store the kitchen cabinets, allowing me to clear out the great room and make it ready for the installers. Here is a “before” picture of the great room as seen from the entrance to the master bedroom:
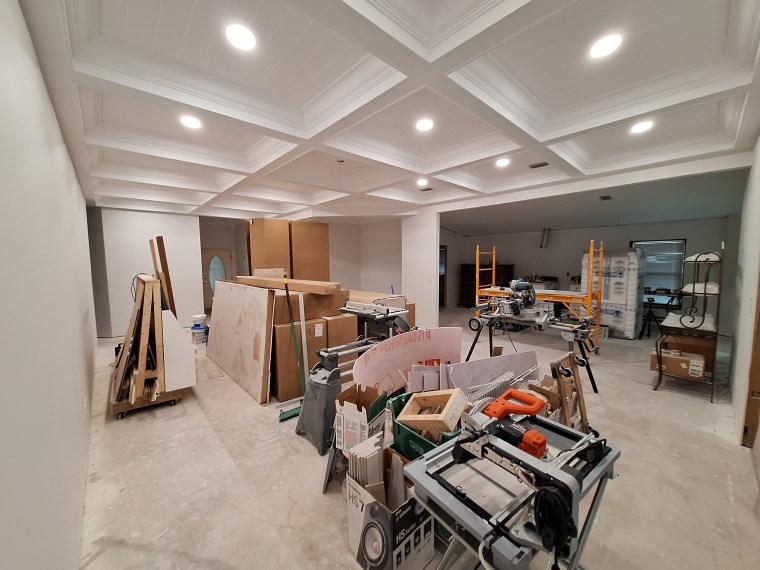
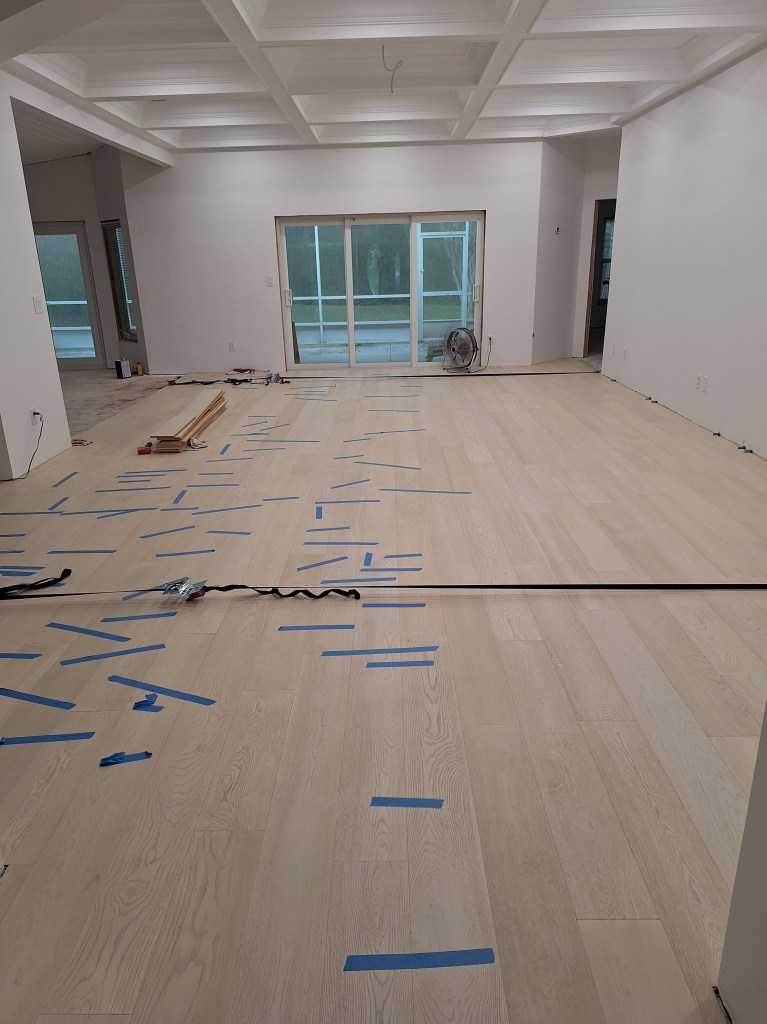
Here it is the “after” picture:
Most of the stuff I removed was put into the garage. In the image below, the kitchen cabinets are in the foreground, but behind them you can see the wood storage rack against the wall.
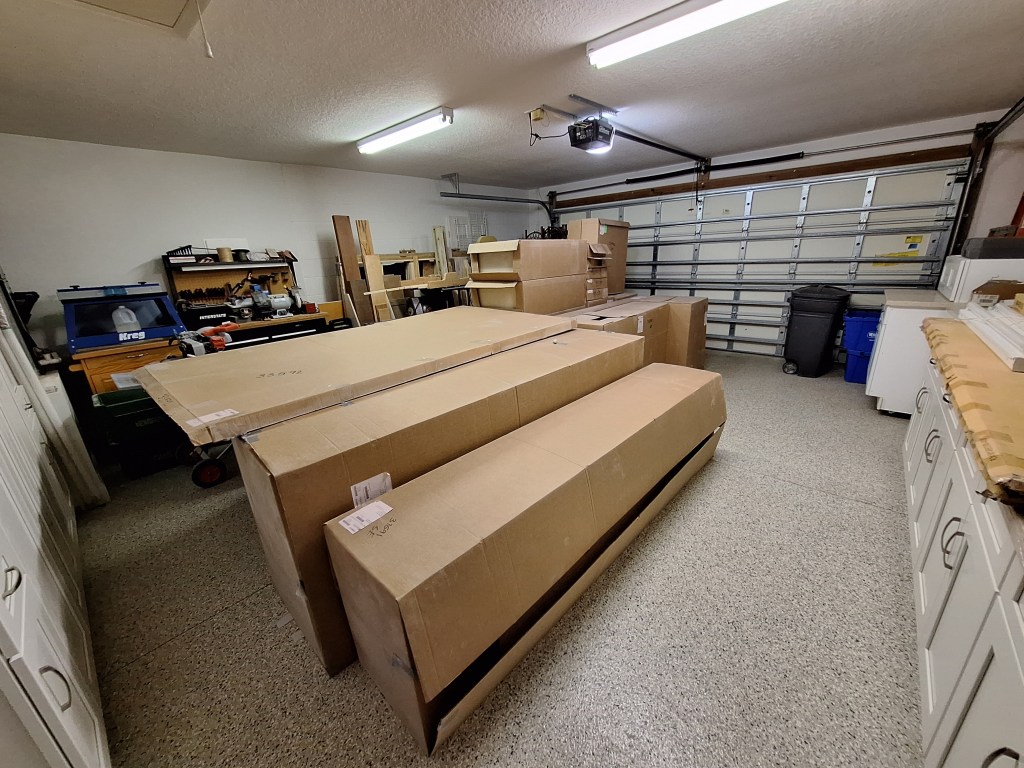
The kitchen cabinets have been moved four separate times. They were originally placed in the garage when delivered. I moved them into the house and put them in the kitchen while I worked on the great room. After that I moved them to the dining room while I worked on the kitchen. I moved them a third time into the great room, as shown in the fifth picture above, in order to work on the dining room. The fourth, and final move, was to the garage, as shown above. From here I will move each of them into position once the floor is down. The reason I did not leave them in the garage all along was because I needed the space in the garage to use my power tools (i.e., band saw, planer, table saw, etc.), and I wanted to be able to pull my car in, too.
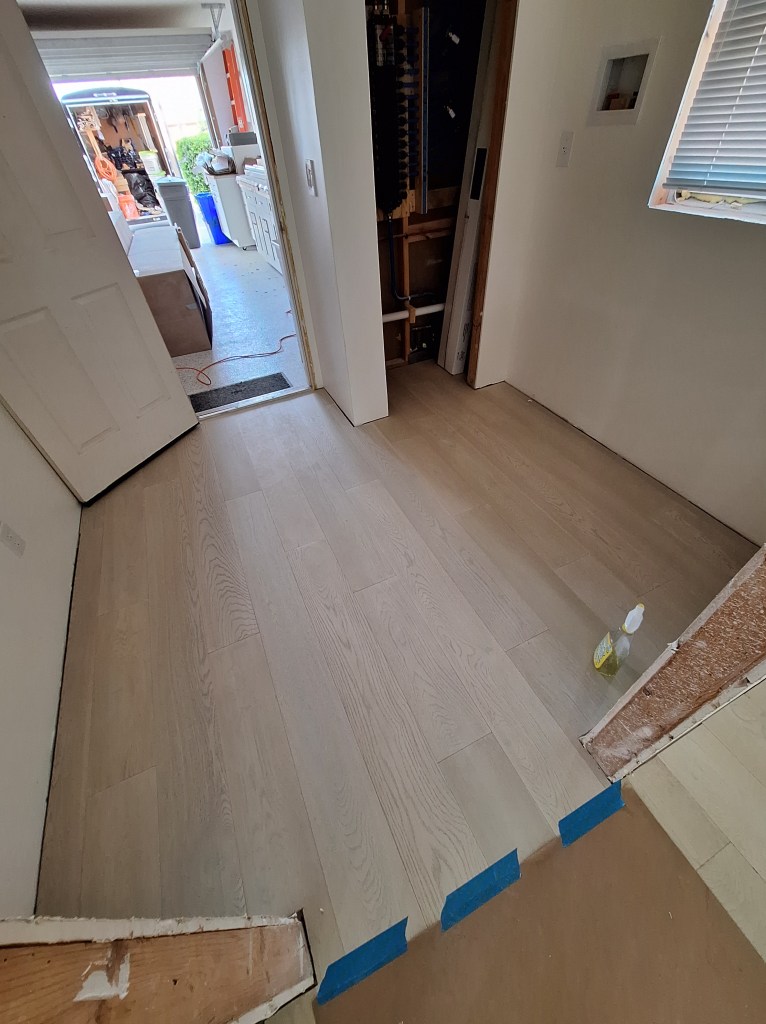
Prior to the installers arrival, I spent quite a bit of time scraping the floor to remove any bits and pieces that protruded, such as paint spills, dried thin-set from where I was mixing it, and the like. When the installers arrived they seemed fairly happy with the condition of the floor. They began by sweeping and wiping down the floor with a wet sponge to removed the dust.
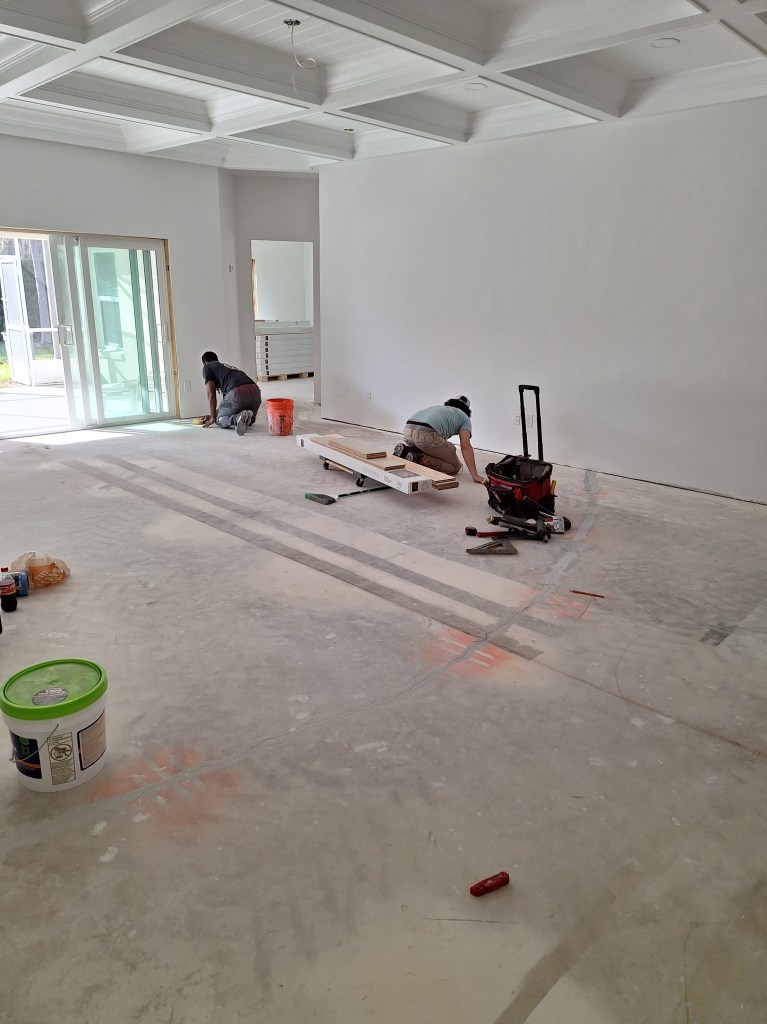
They also marked out and snapped a chalk line to establish a reference line toward which they would progress. The chalk line is the faint brown line shown above, in the middle of the room. That line is determined by measuring from the long wall on both ends to the opposite wall in the kitchen. Knowing the wall is unlikely to be perfectly straight and parallel to the opposing wall, they split the difference when marking out where the chalk line should be.
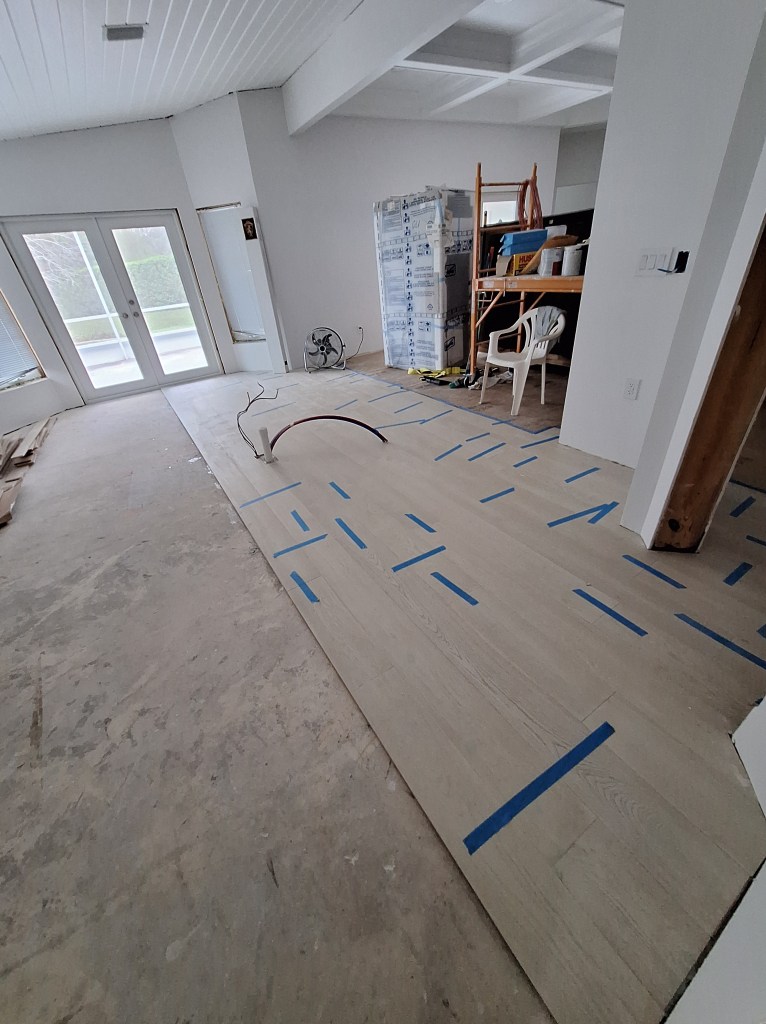
Next they dry fit the boards, moving from one wall to the other. In this case, from the great wall to the dining room and the short wall separating the great room from the kitchen.

This is done to understand how the last board will look on the opposing wall. Similar to setting tiles, we want to avoid ending up with thin slivers when we reach the opposing wall. By dry fitting we can determine how much room we have left at the end of the run and compensate for that by removing some of the width of the first board they place. In this case, they found they needed to remove about an inch from the first row of boards to end up with a board that was about 4 inches wide at the opposing walls, which is pretty good.

At this point, they were ready to start setting the first boards.

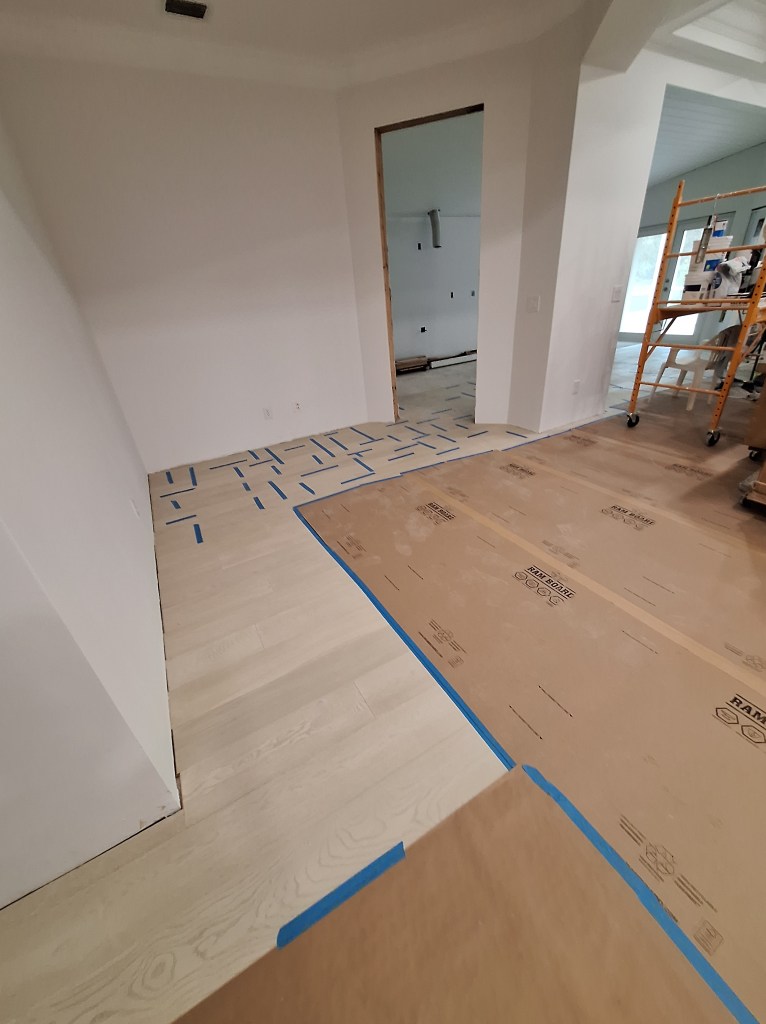
The glue is applied using a 1/4″ notched trowel. The boards along the long wall had been scribed and cut back by about an inch before they were set into the glue. At this point I left them alone and returned shortly before they were done for the day. At the end of the first day, the floor looked like this:
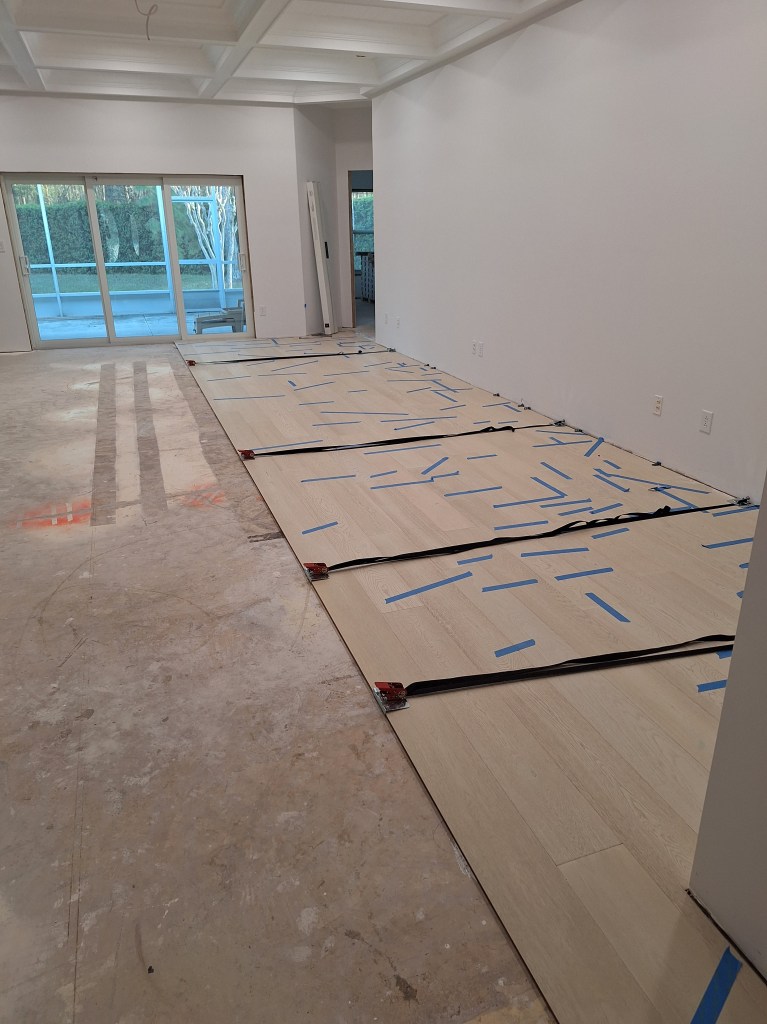
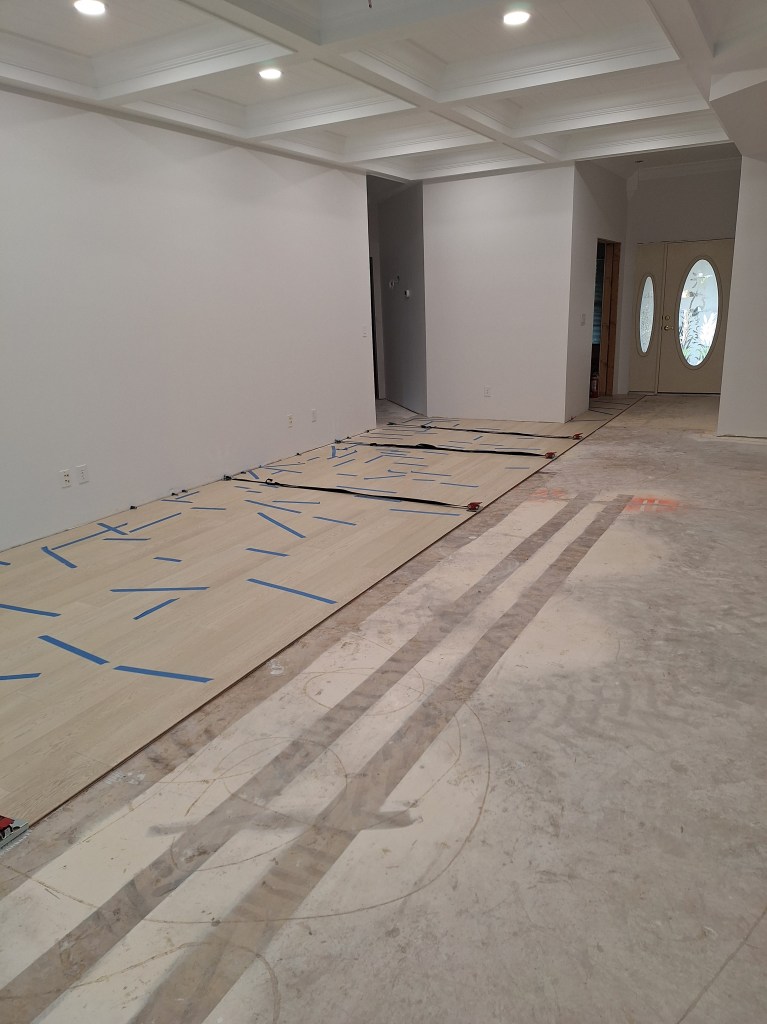
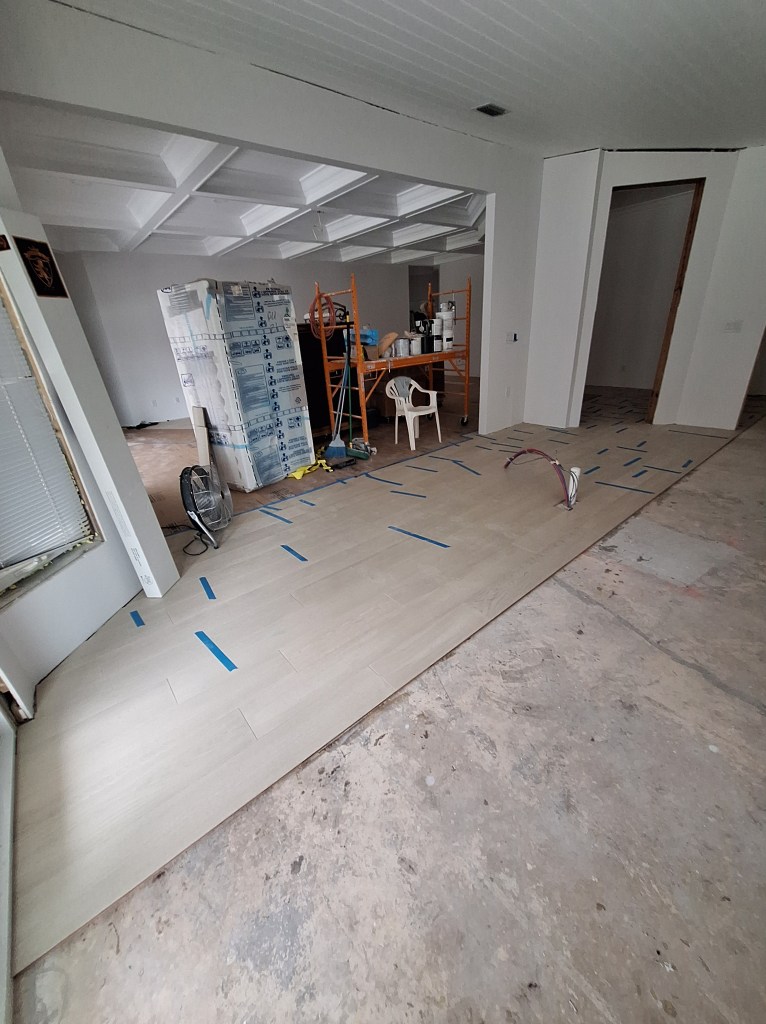
At the end of day 2, the floor looked like this:


On day 3 they finished the dining room and moved into the kitchen.
At the end of day 3 began the weekend, so the crew would not be back until Monday. So I used that time to caulk the guest bathroom, install the corner shelves, and seal the caulking.
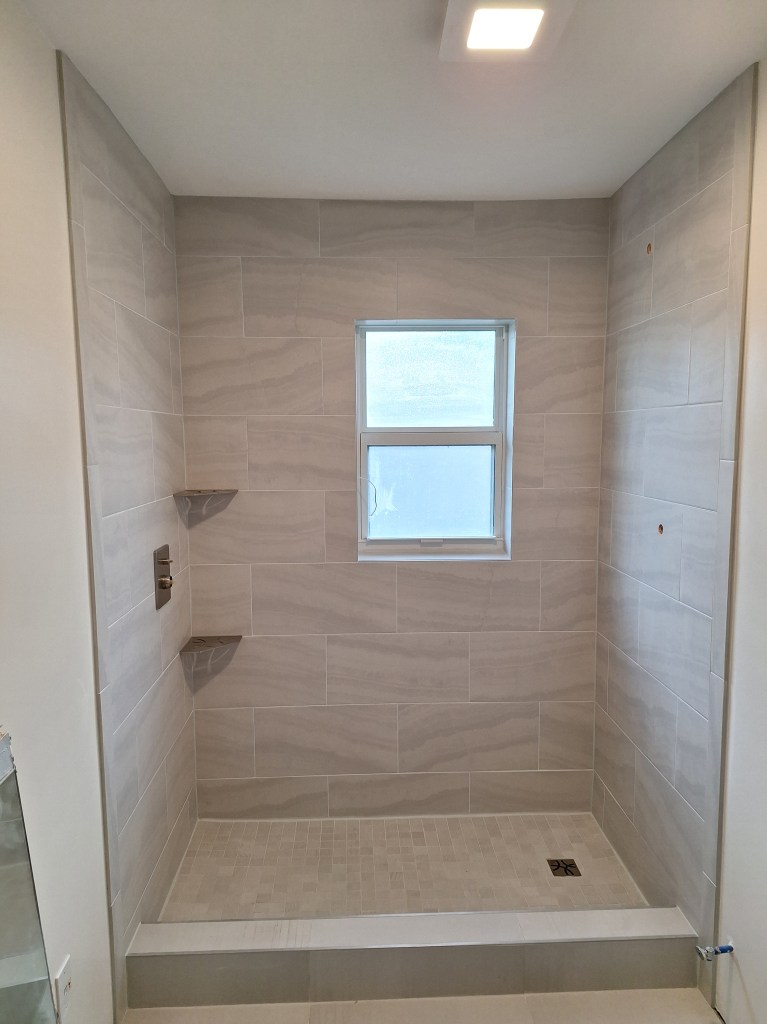
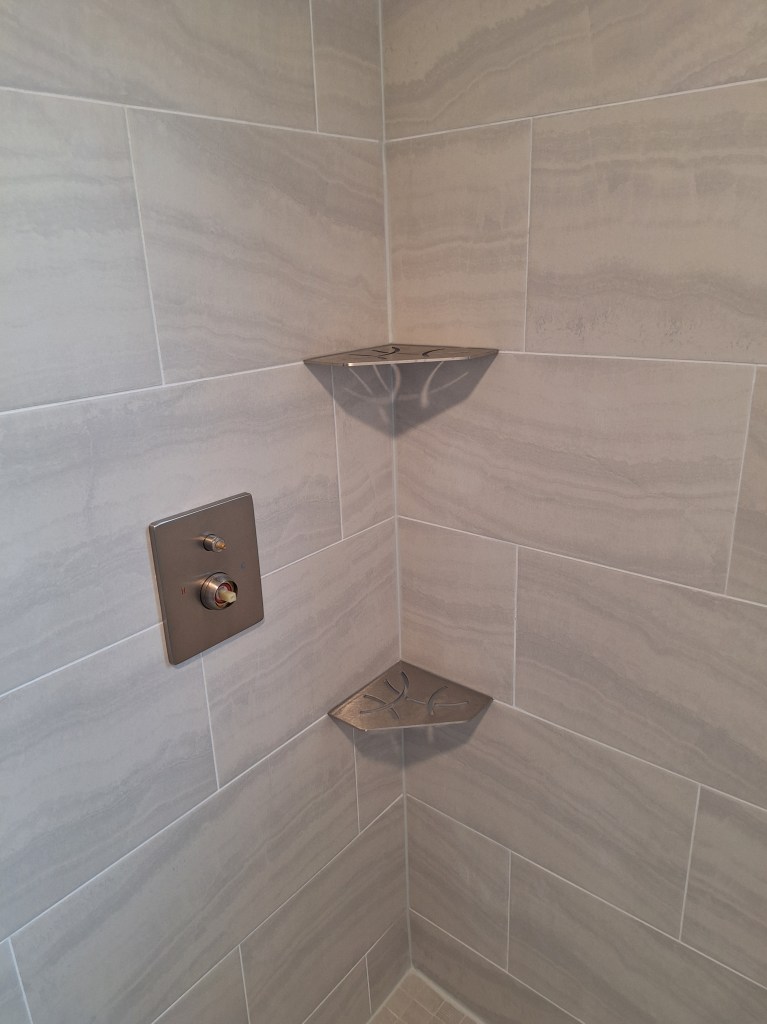
The next job I have in the guest bathroom is to install the hand wand and shower head, but that required a couple of extra bits, so I had to wait until they were delivered. Since trash day was on Monday, I spent the remainder of the weekend cleaning up and preparing the trash for pickup.
On Monday the guys returned and completed the kitchen area and laundry room.


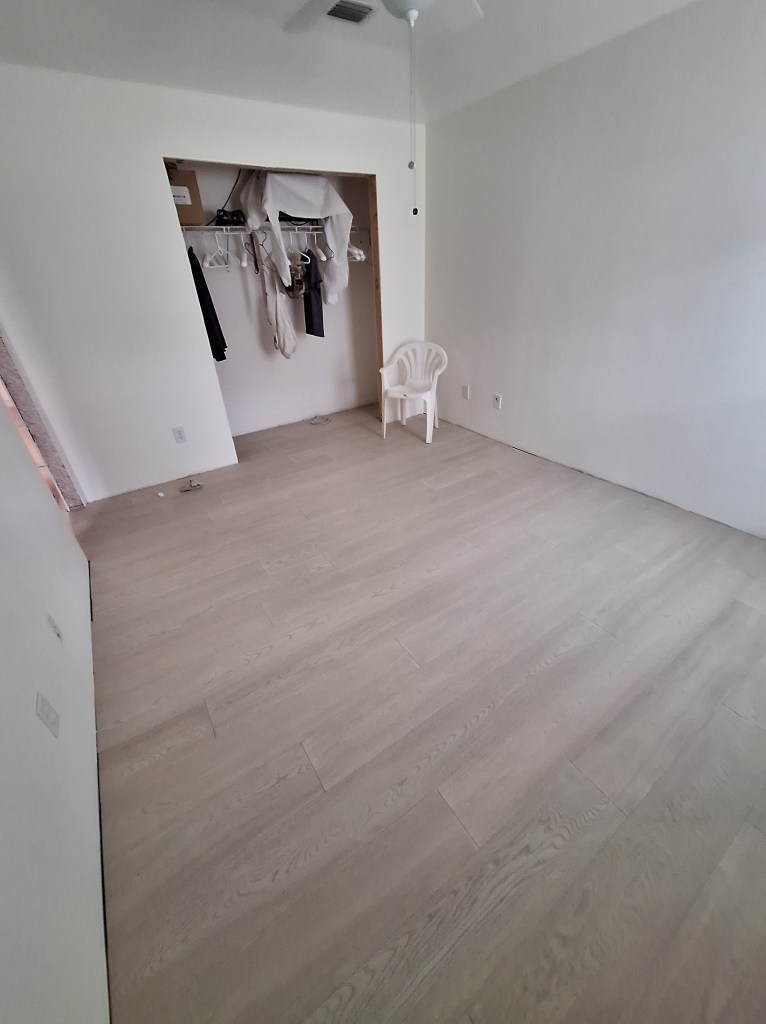
After that they moved onto the guest bedroom.

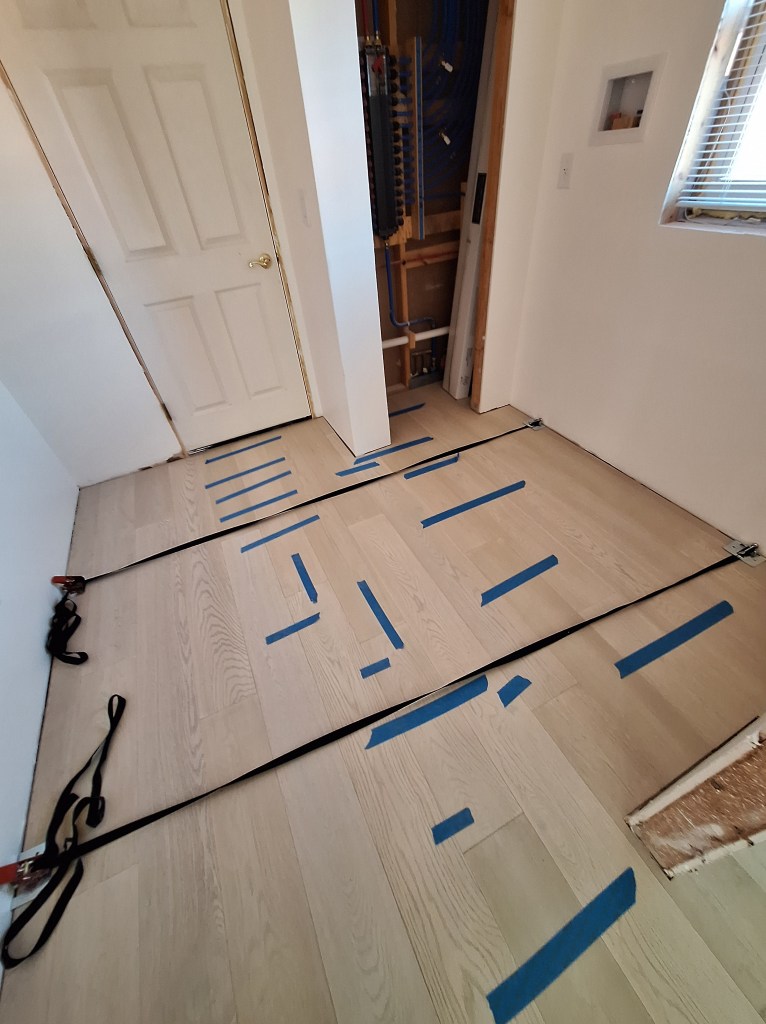
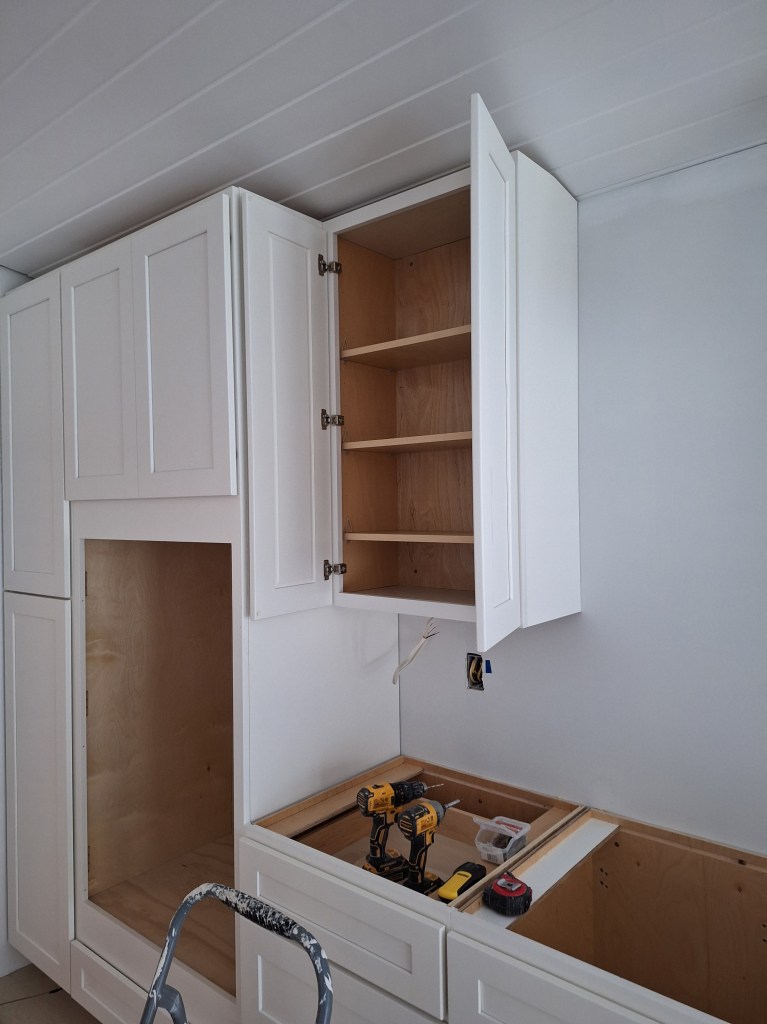
While they were working on that, I decided to install my first kitchen cabinet; the pantry.
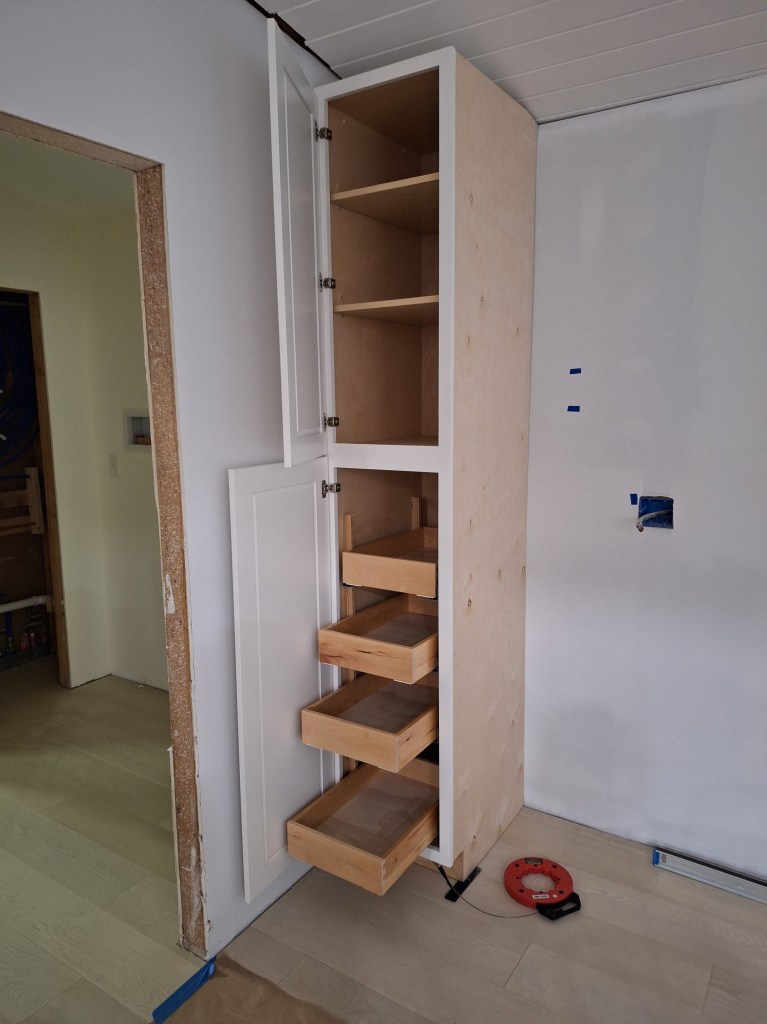
That red thing you see on the floor is a fish line I used to pull the wire for the kick plate lighting through to the front of the cabinet.
This cabinet, and all the others that touch the ceiling, had to be modified slightly because the distance from the finished floor to where the ceiling meets the wall is just under 8 feet (the cabinet height). Below I show the modification I made to the pantry cabinet.

This change was not visible inside the cabinet, as there is about an inch of material that can be cut away before interfering with the insides. This change is required for all adjoining cabinets so they align properly, which includes the wall cabinets.
At this point it became clear to the installers that we would not have enough flooring to finish the remainder of the house. There would only be enough to finish the master and maybe a bit more. So I had to order more wood, which would take a while before it would arrive. This meant that the installers would have to come back to finish the job. That was unfortunate, but did not slow me down since the kitchen floor was done and I could continue with the cabinets.
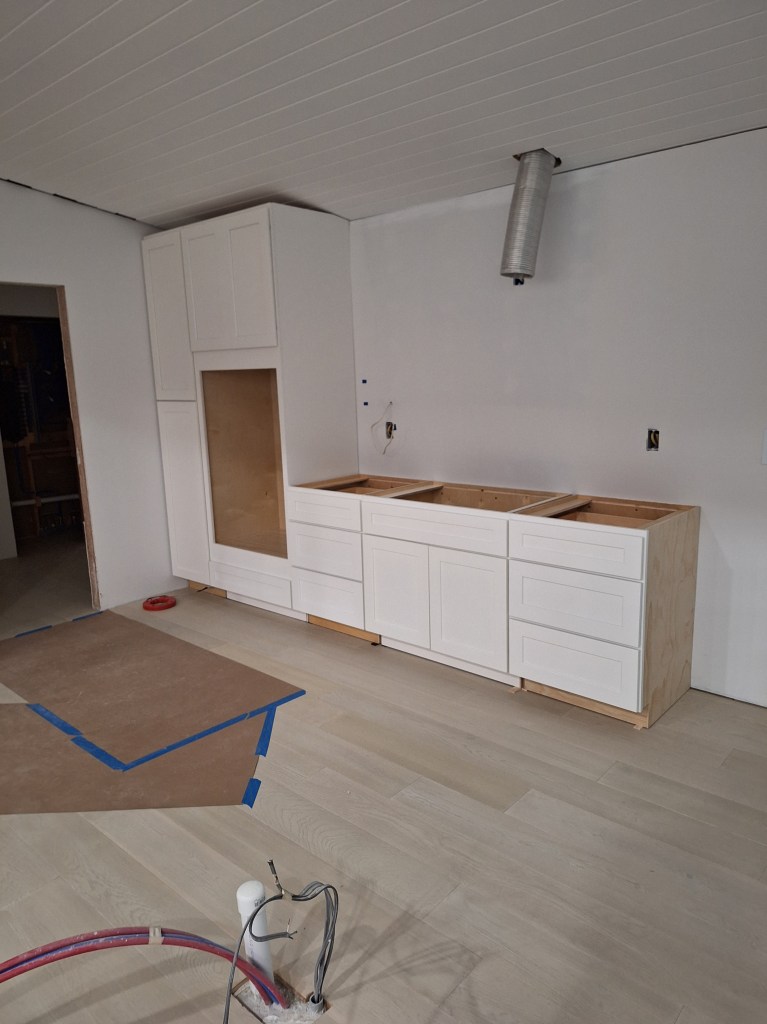
While the guys worked on the master bedroom, I installed the wall oven cabinet and the base cabinets along the wall. A couple of the installers helped me move the large wall oven cabinet into place, which was a big help.
At the end of this day, the installers were out of wood, so they packed up and left until the additional wood was delivered. They completed the master bedroom and made a start on the office floor. I’m not including pictures of that yet, because they are still covered in tape. I’ll reveal that once they are completely finished (next post).
The following day I installed the first wall cabinet. I used the same structure I built when installing the wall cabinets in the garage. It sits on the base cabinet and serves as a shelf. It is high enough that shims are enough to push the wall cabinet to the height that’s needed.

Here it is after securing it to the wall.
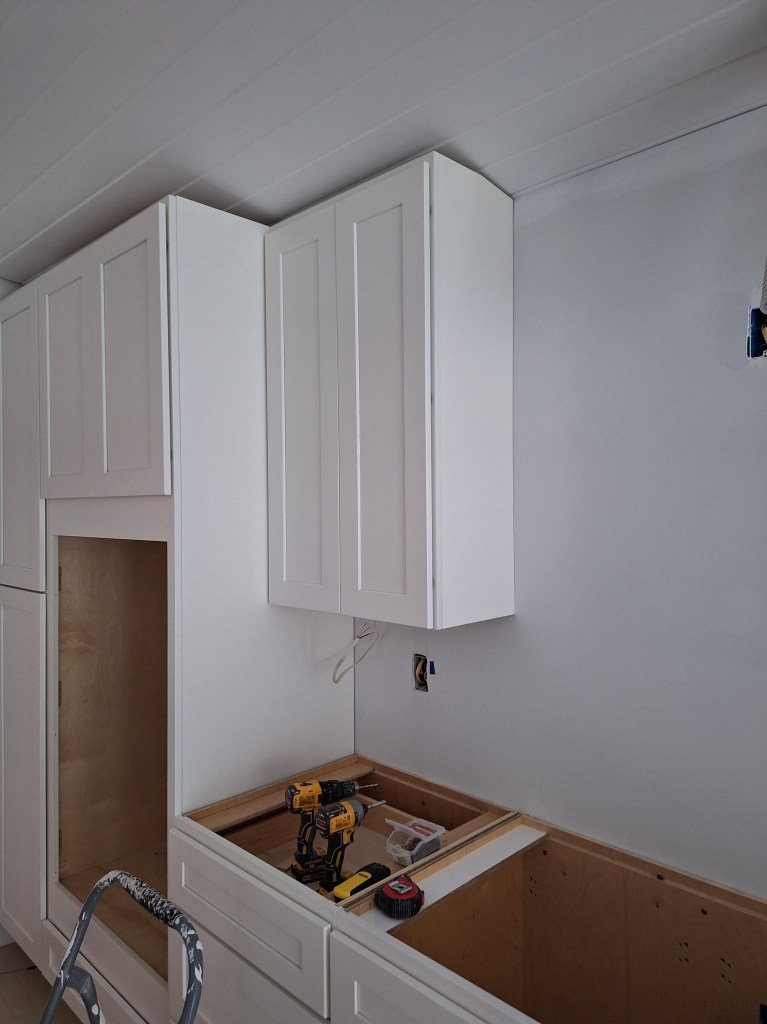
Next to this wall cabinet will be the range hood, but I haven’t purchased one yet. Depending on what I choose, it may attach to the wall cabinets that flank it, so I stopped with the wall cabinets until I’ve selected a range hood.
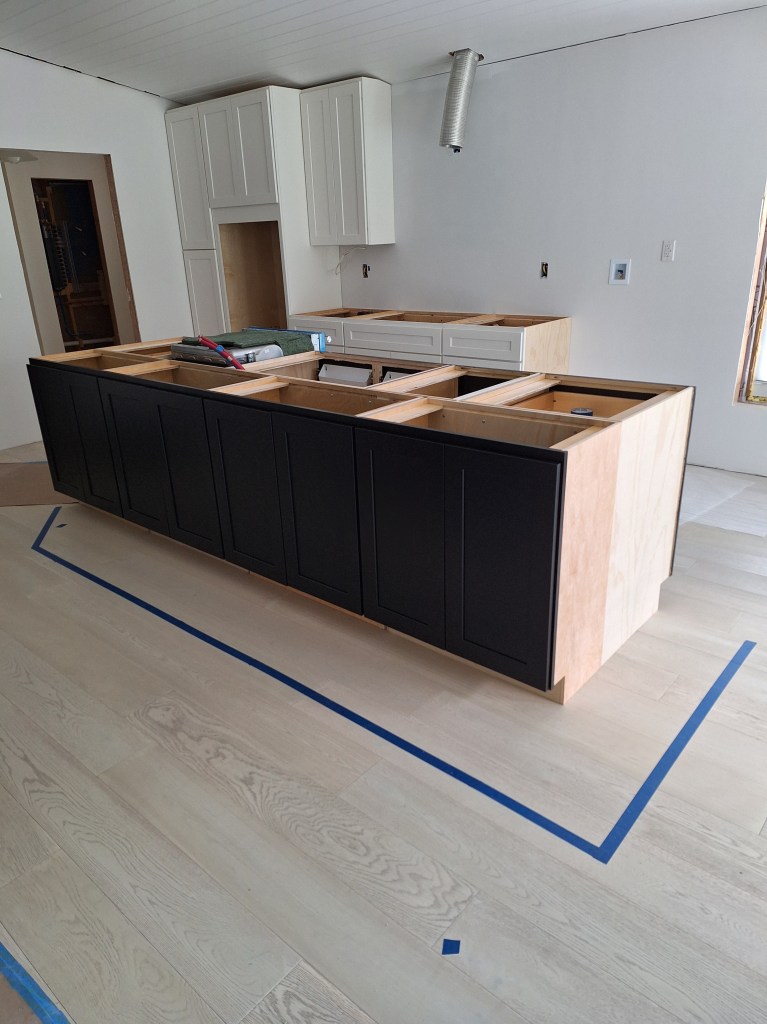
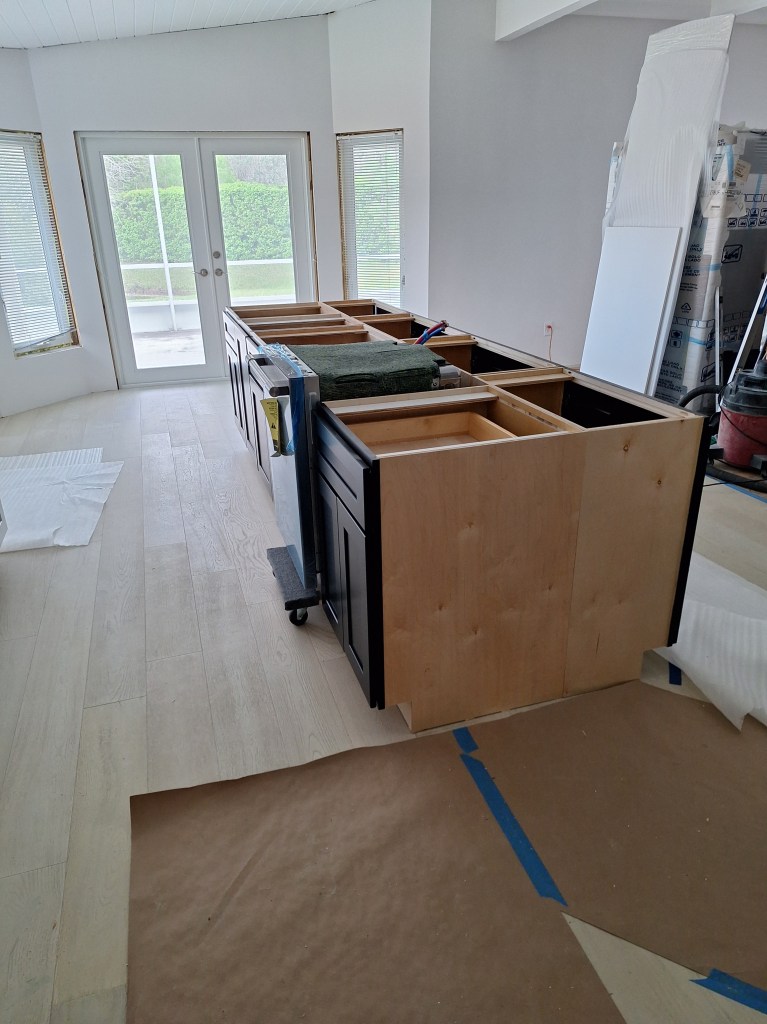
I turned my attention to the kitchen island cabinets, which needed to be unboxed and moved into the kitchen. I was still a bit uncertain about the placement, so I arranged them as best I could in an effort to get a better sense of where they needed to go. It was important to ensure there was enough room to move comfortably around the island, taking into account that the counter top would overhang the cabinets.
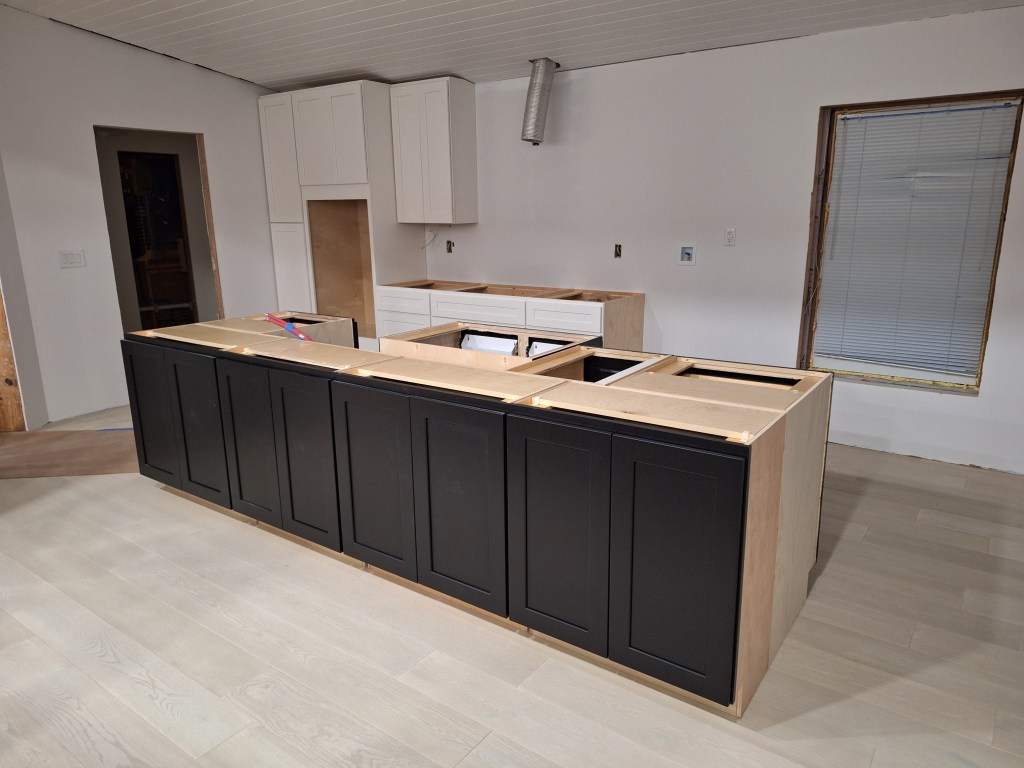

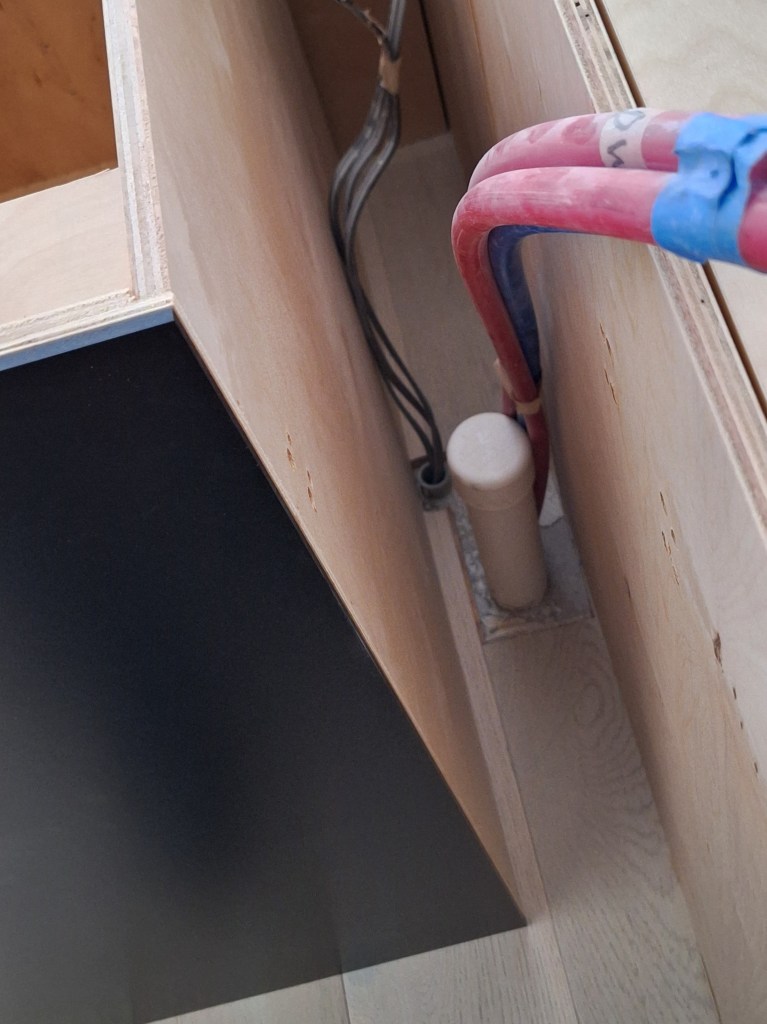
The cabinet sticking out in the image above is the where the sink will go. Notice how, unlike the other cabinets, the sides of the cabinet are finished (dark, like the front). This is so that it can protrude out a bit. A design aesthetic. I’m not sure how far I’ll have it stick out, if at all. At the moment, the pipes are preventing it from being aligned with the others. Once I know exactly where I want it, I will cut an opening in it to accommodate the drain and water supply lines. During that time I will decide if I want it to protrude or not.
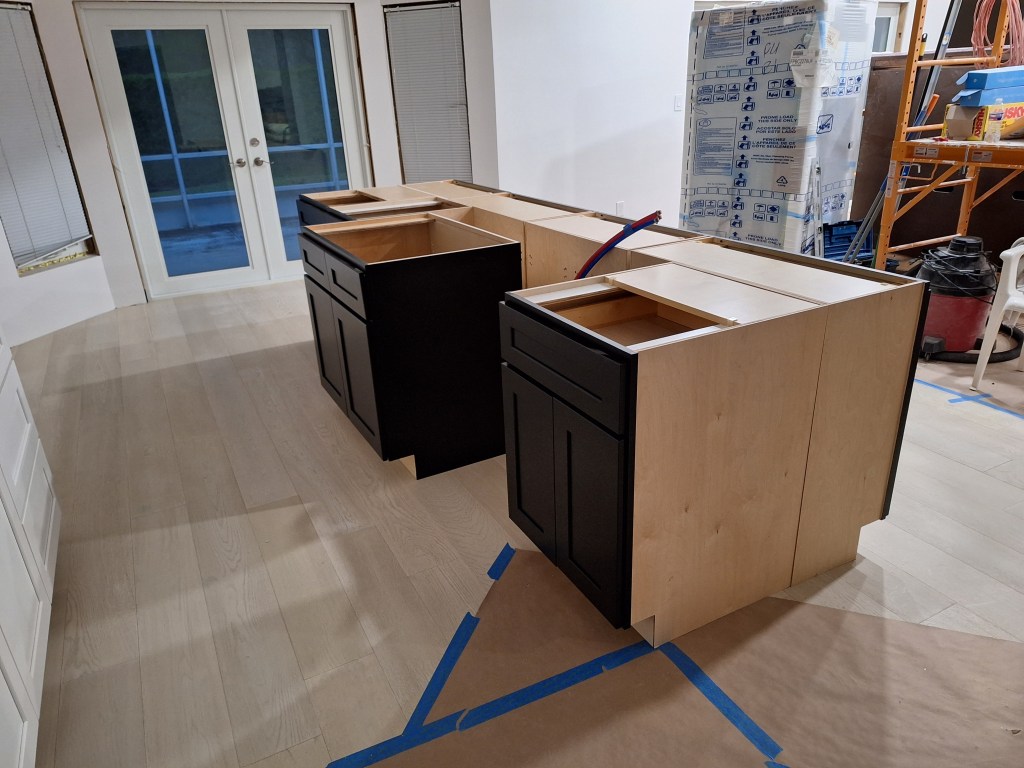
The gap between the sink cabinet and the one on the end (shown above) is where the dishwasher will go. Here are a few wide angle shots to help get a sense of the space.
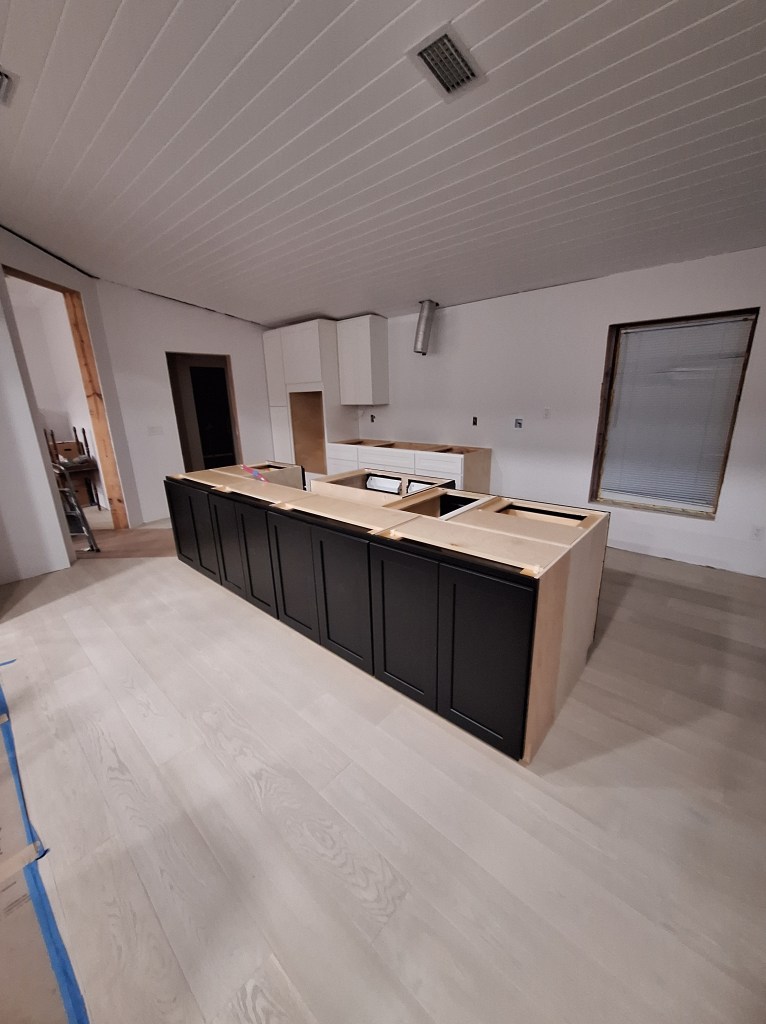
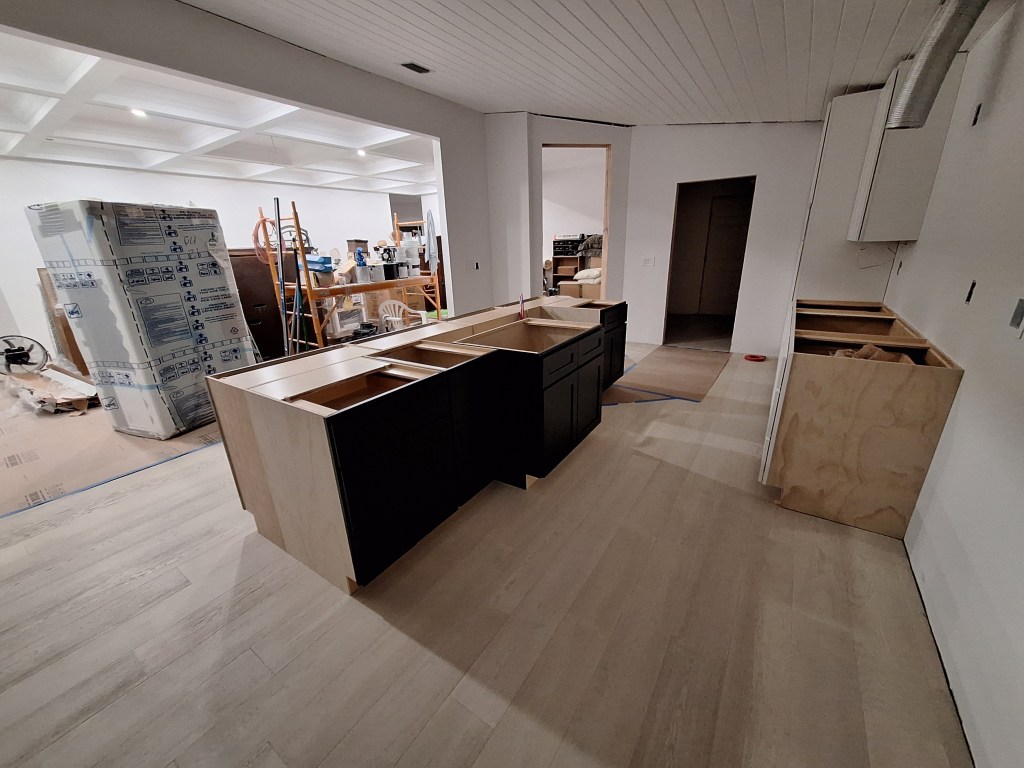

Before securing the island cabinets in place, I used blue tape to outline where the counter top will go. It will extend about 14″ beyond the front and far end to accommodate seating. Adding this outline was important so that I could get a real sense of the space before committing to their final location. It resulted in a small adjustment to the initial placement I showed above.
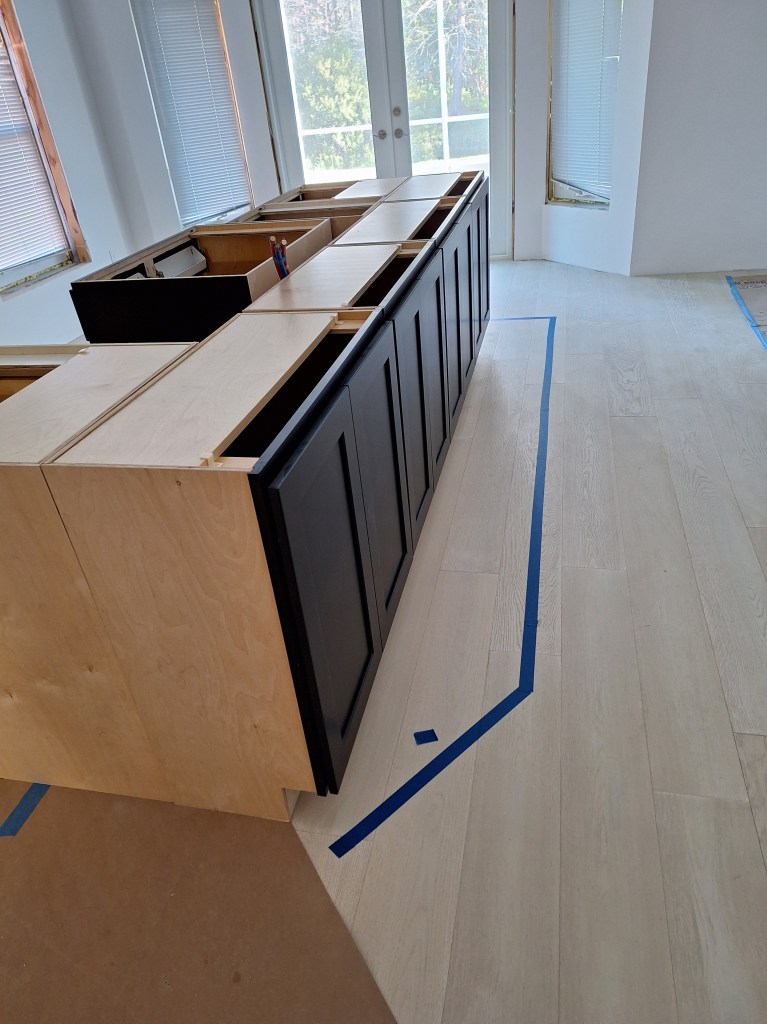
The counter top at the front edge as you enter from the laundry room will be angled, as shown above, so that it is parallel with the imaginary hypotenuse line that is formed between the perpendicular walls opposite that corner of the island. This forms a small corridor, which provides proper access. It also feels right.
To secure the cabinets to the floor, I introduced a cleat that was screwed into the floor and the concrete slab.
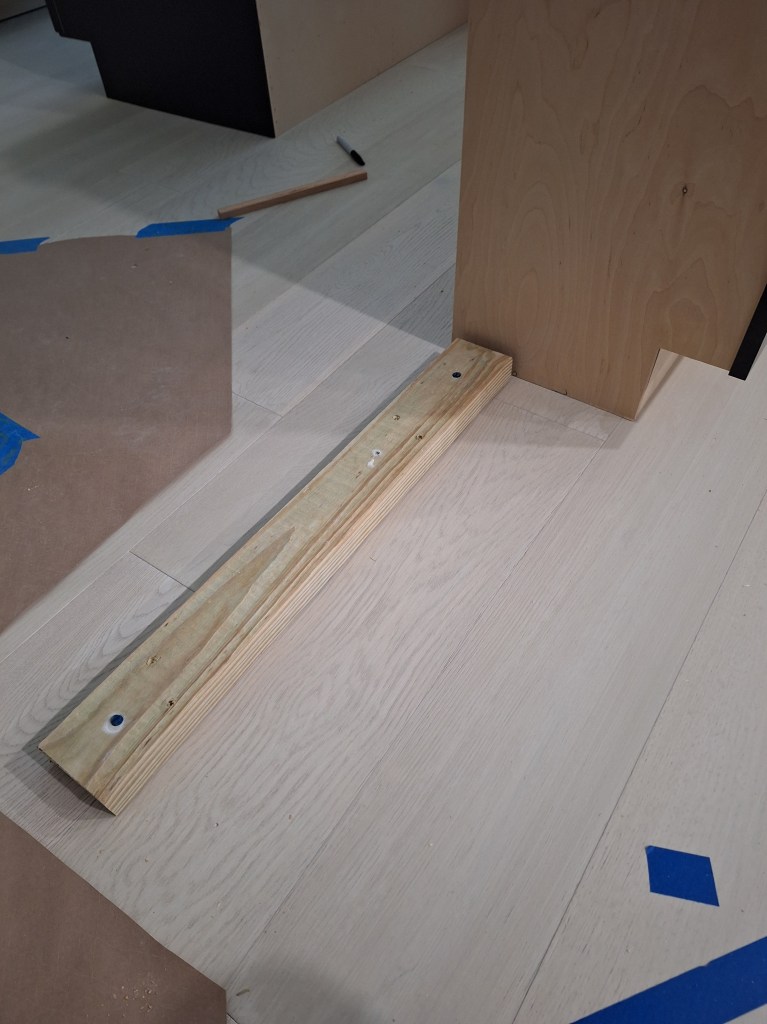
This was done for each of the four cabinets that face the great room.
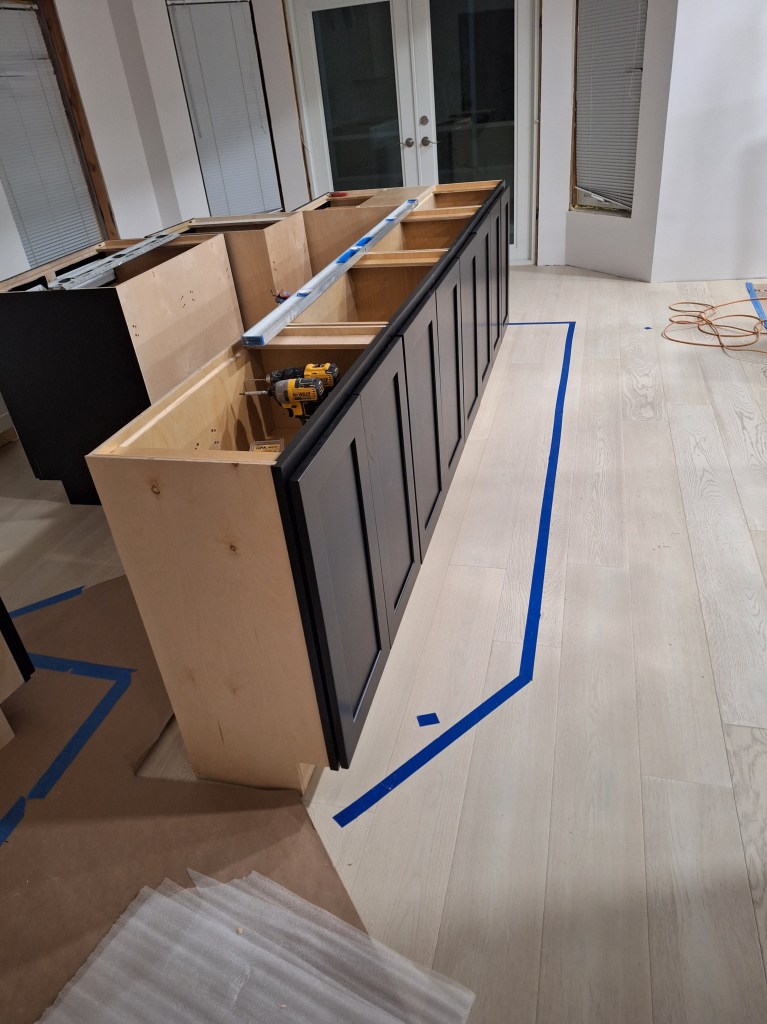
With them secured to the cleats and each other, the cabinets that go on the back side benefit from this once they are screwed to these front cabinets, making the whole island secure. It’s a really big island, and once the quartz counter top is installed, this island is going no where.

Notice how I decided not to have the sink cabinet protrude. I pushed it all the way in because I wanted to provide as much room as possible between it and the refrigerator that will be behind you as you face the sink.
I unpacked the dishwasher an placed it on a dolly to make sure it fit in the opening I left. That opening is 24″, as required, so I wasn’t concerned about it not fitting, but I wanted to temporarily put it in position for verification.
End panels will be placed on either end of the island to match the color of the doors. The same will be true for the toe kick areas. I’ll get to that after the electrical wiring has been sorted out. Since this is the end of February, I’ll cover that and the continuation of the flooring installation in the next post.
