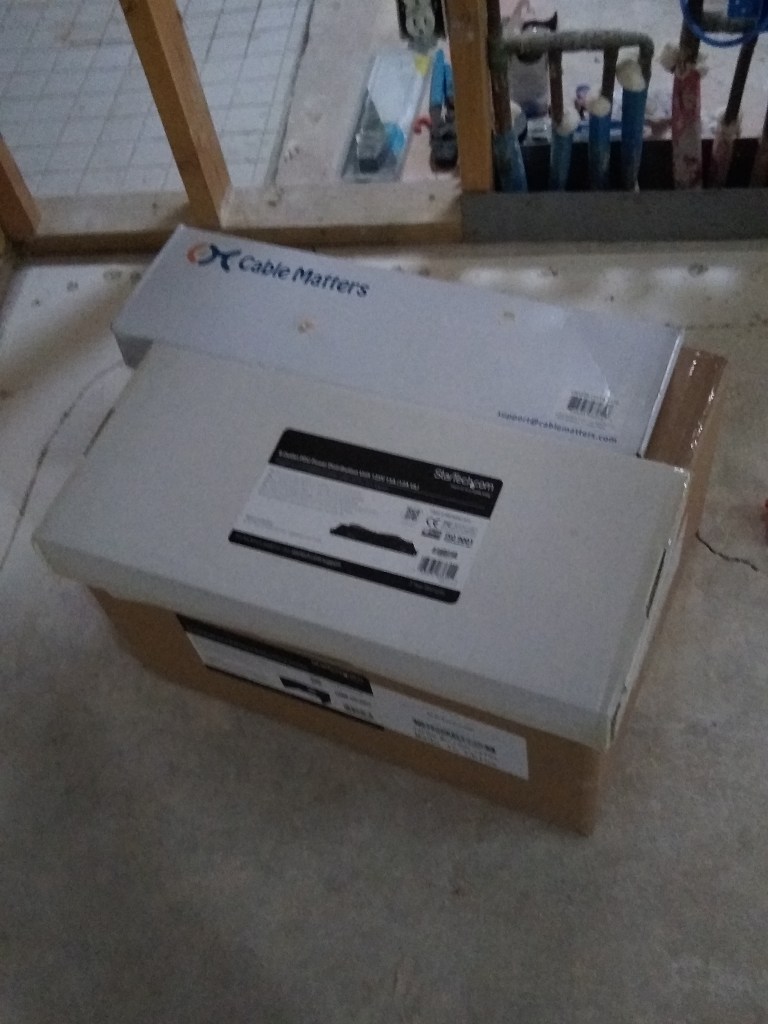
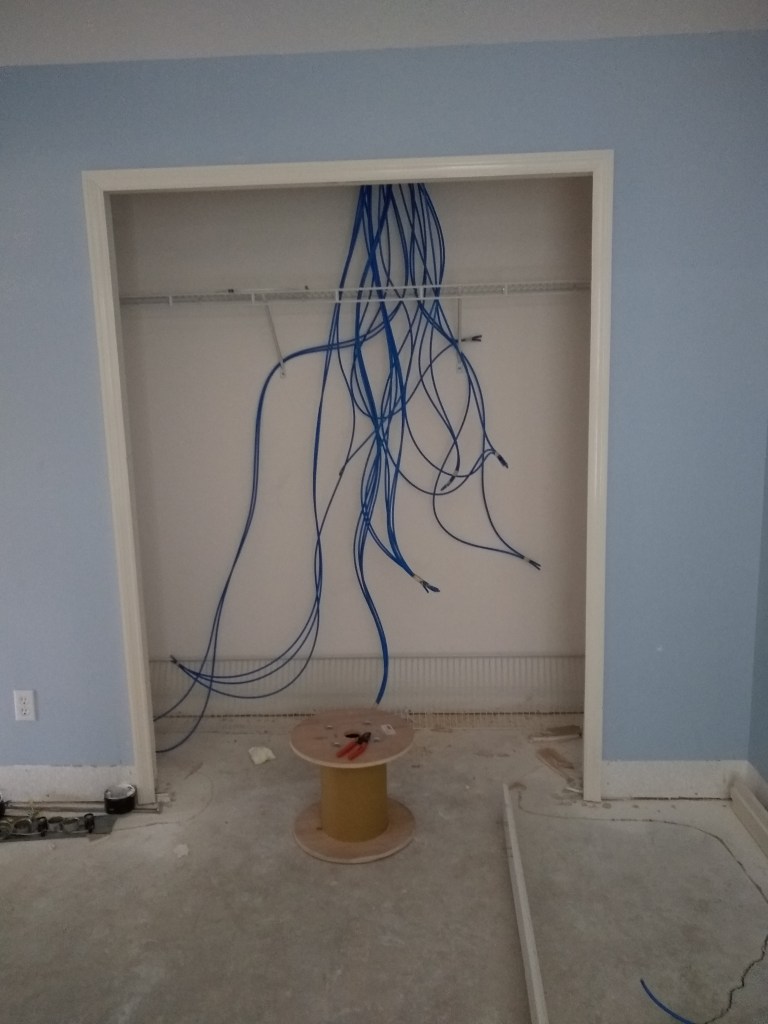
The additional cable and networking equipment arrived on time, so I was able to add the remaining runs and begin the process of terminating the cables.
Patch Panel and Power Distribution Unit sitting on top of Rack.
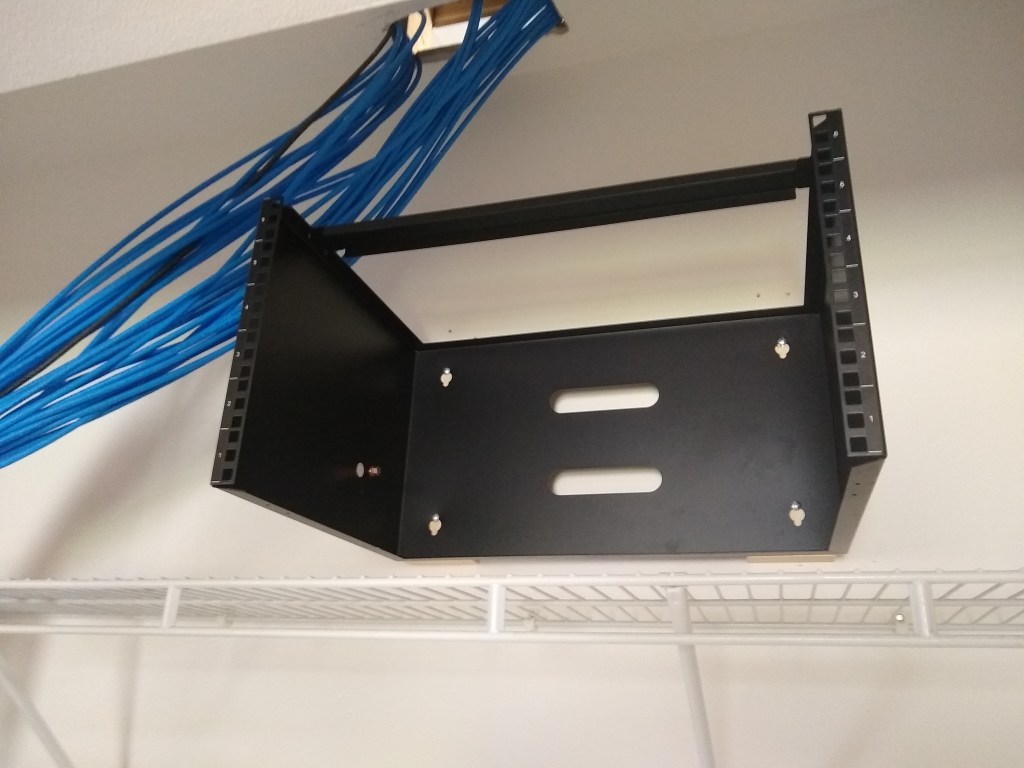
The first step was to mount the rack in the network closet.
Rack Mounted
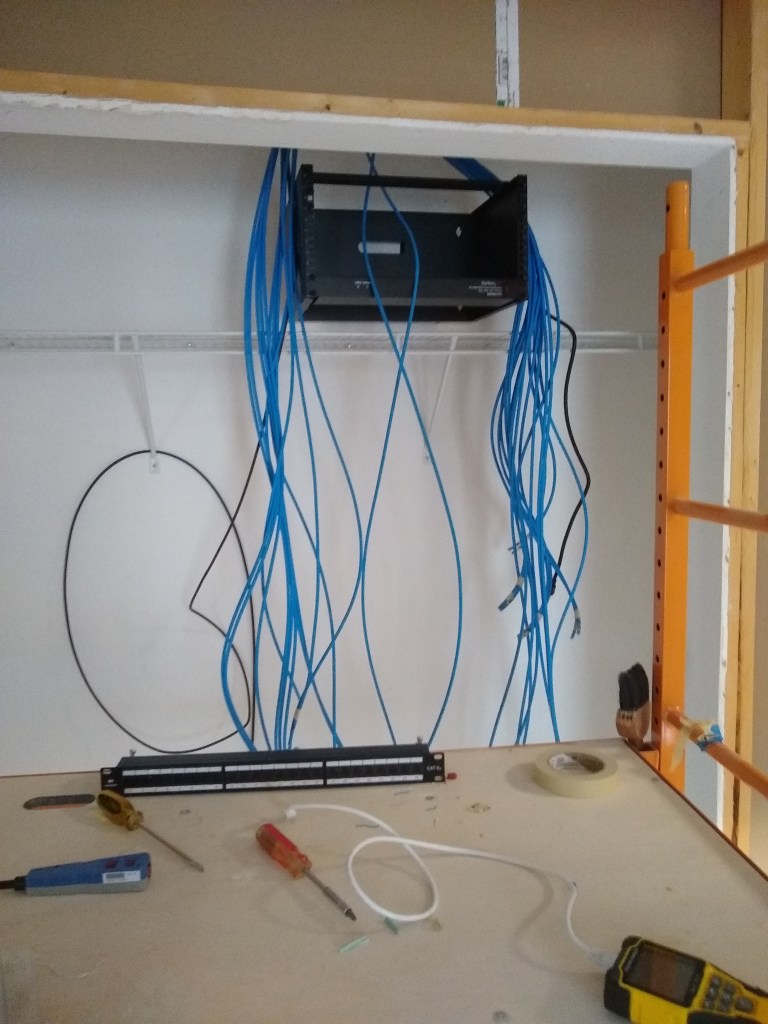
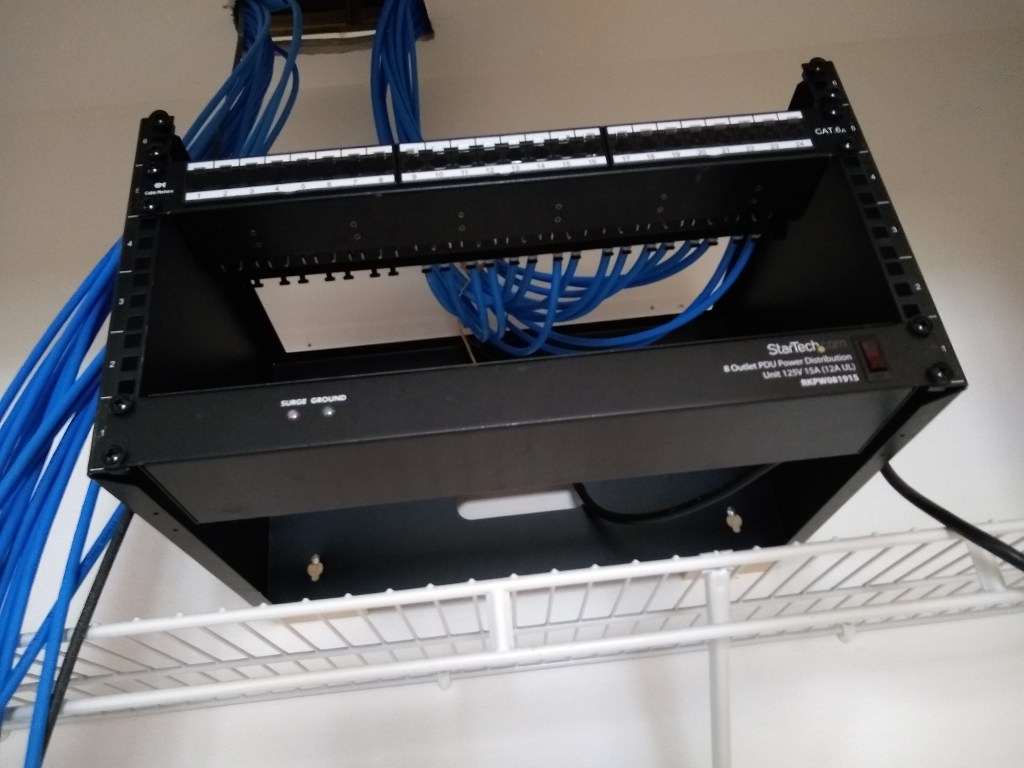
I mounted the power distribution unit/surge protector to the lowest slot (see below). That will plug into a power outlet I have yet to add and will provide 8 additional outlets for other equipment requiring power (i.e., router, modem, etc). I decided to divide the cabling into two sets based on the directions they ran above the ceiling. I have 30 cables in total and only 24 ports on the patch panel, so another patch panel would be needed. The lower patch panel would be used for the cables that ran toward the south of the house (right side of rack), and the second patch panel (on order) would receive the cables that ran toward the north (left side of rack).
Power Distribution Unit mounted and preparing to Connect Cables to First Patch Panel
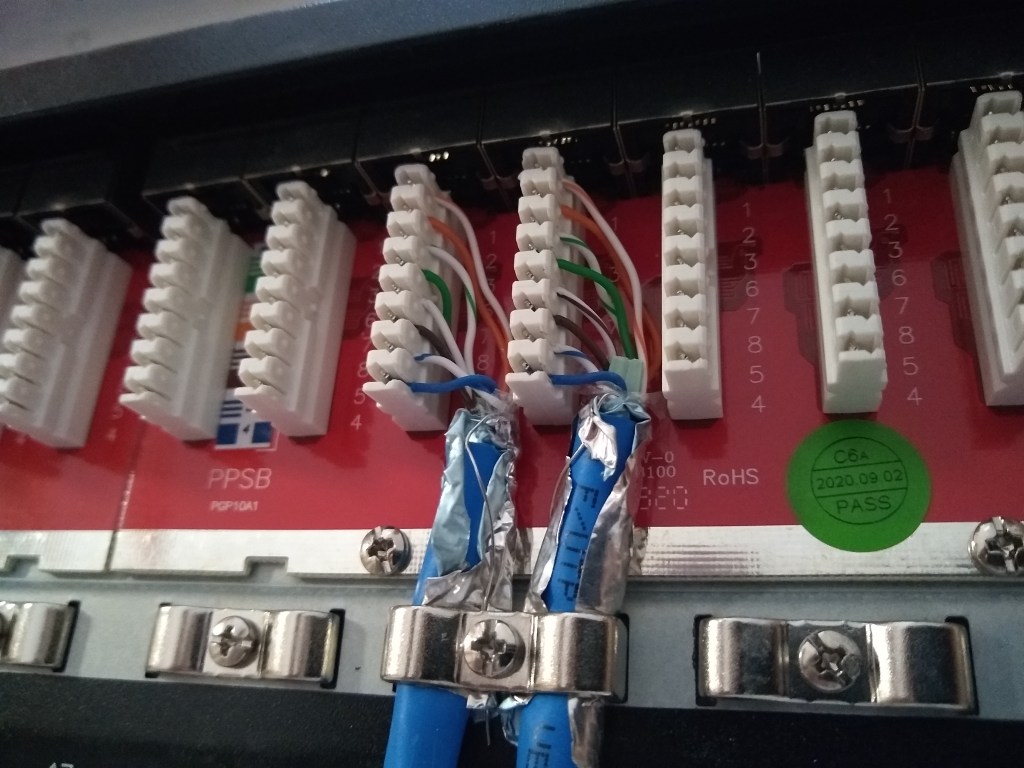
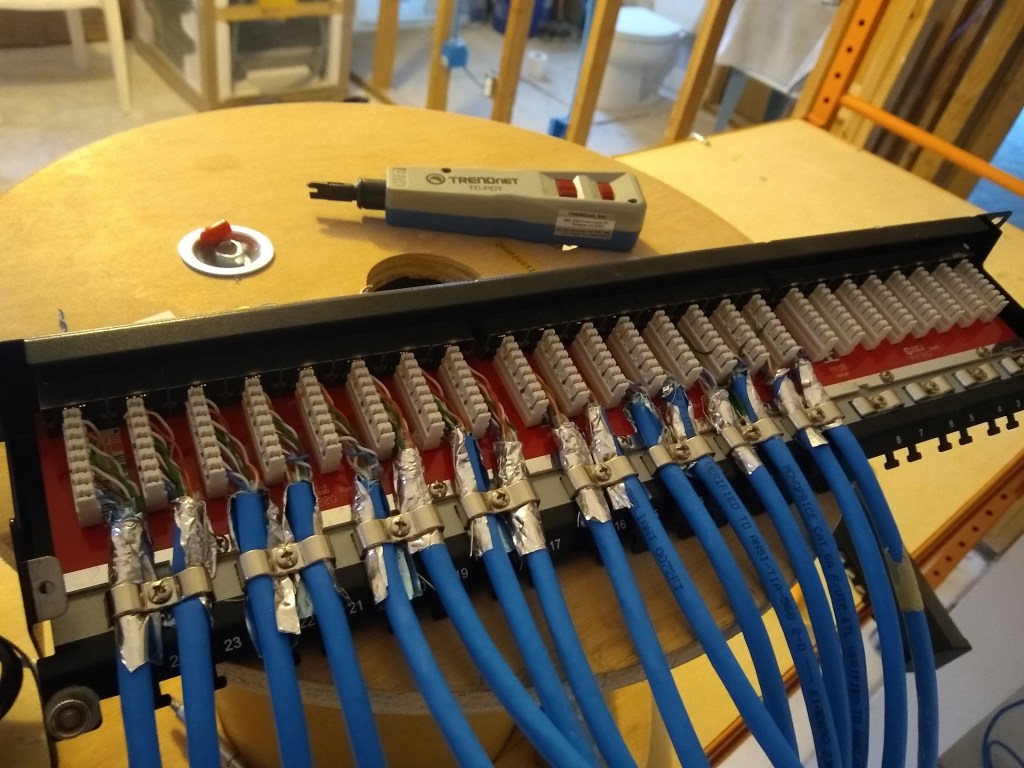
Having never done this before, I took it slowly. I punched down one cable into the patch panel and terminated the other end with an RJ45 connector. Then it was time to pull out my new tester tool to verify that the connections were good. It passed! Time to do the next one.
First Two Cables Terminated
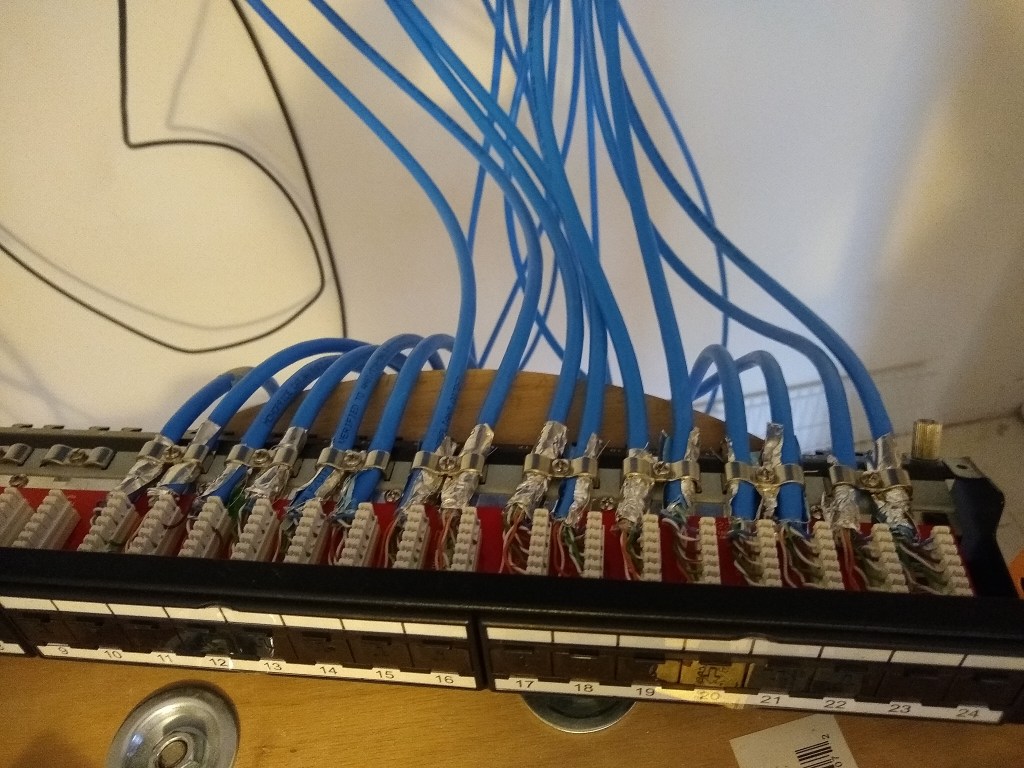
Having gotten the hang of it, I proceeded to connect the remainder of the 16 southbound cables to the first patch panel.
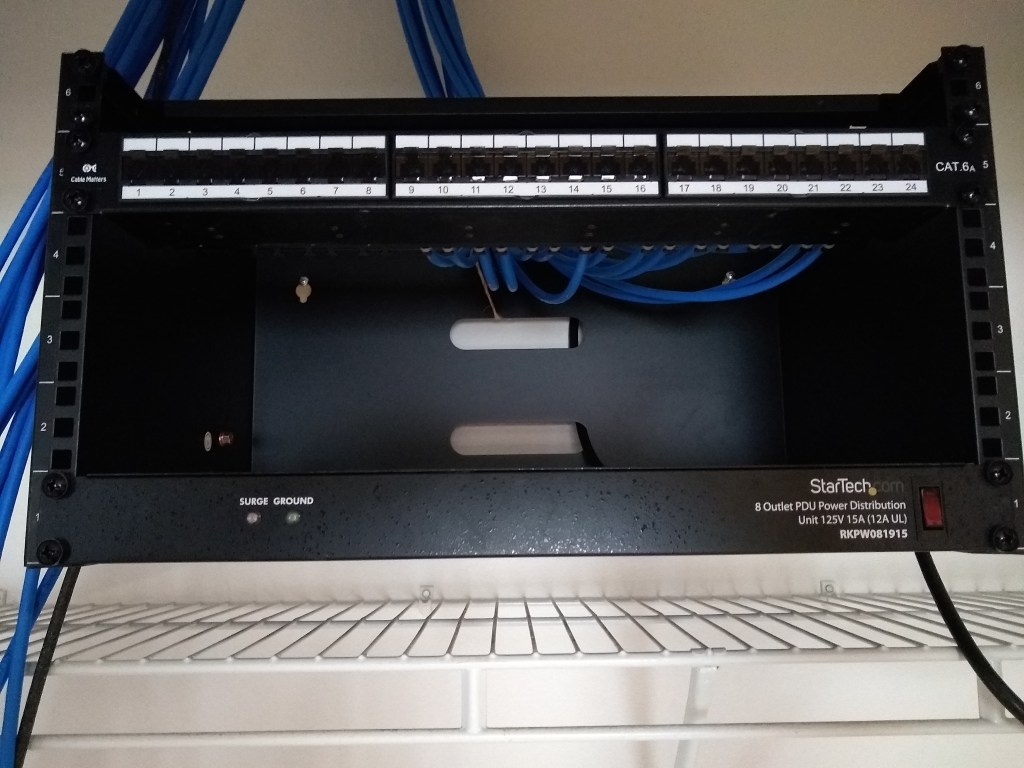
First Patch Panel Complete
It is a kind of tedious task. The other ends were subsequently terminated and tested, so hopefully I will not have to mess with these connections again. In the second image above, you can see the punch down tool used to punch each wire (8 wires per cable) down into the appropriate slot of the connector. The cables are secured by metal brackets. There are also metal tabs to which you can add further support using plastic ties. Finally, a metal dust cover is placed over it all, which will make it look nice and tidy before placing the patch panel in the rack. And here it is:
First Patch Panel Mounted
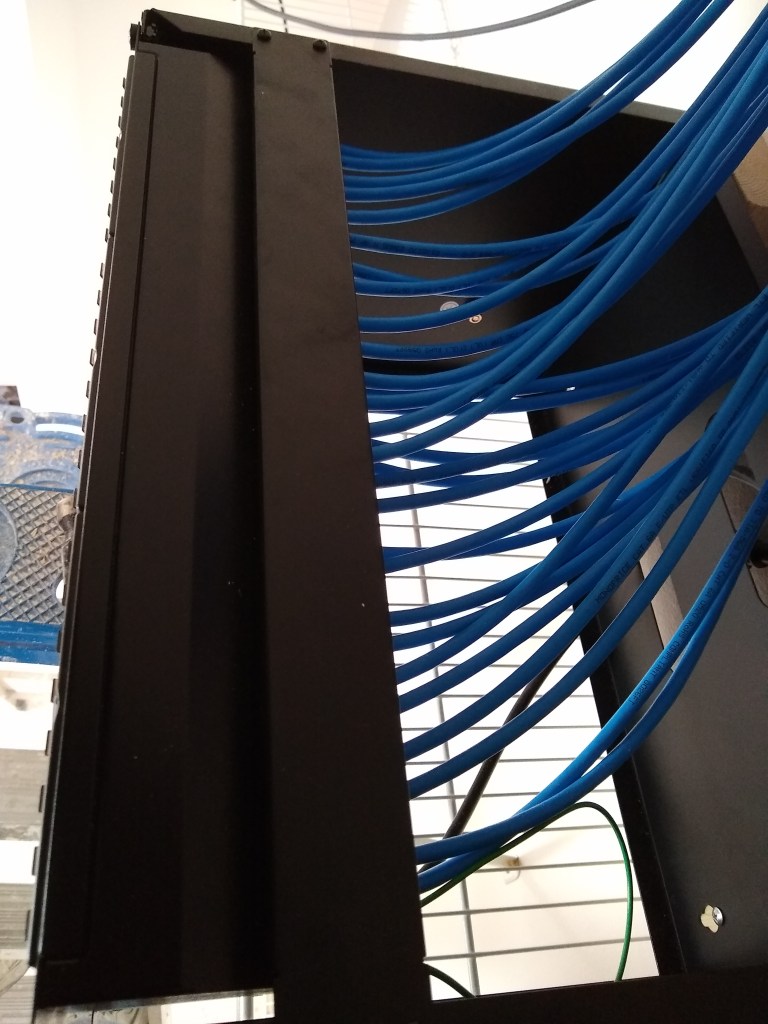
With the first patch panel mounted, it was time to get to work on the second one, which arrived while working on the first one. The first patch panel had 16 cables connected to it (the southbound lines), so the second patch panel that would be mounted above the first would have the remaining 14 cables (northbound lines). I followed the same process of course, but I was a bit more efficient having had some experience. This is the result:
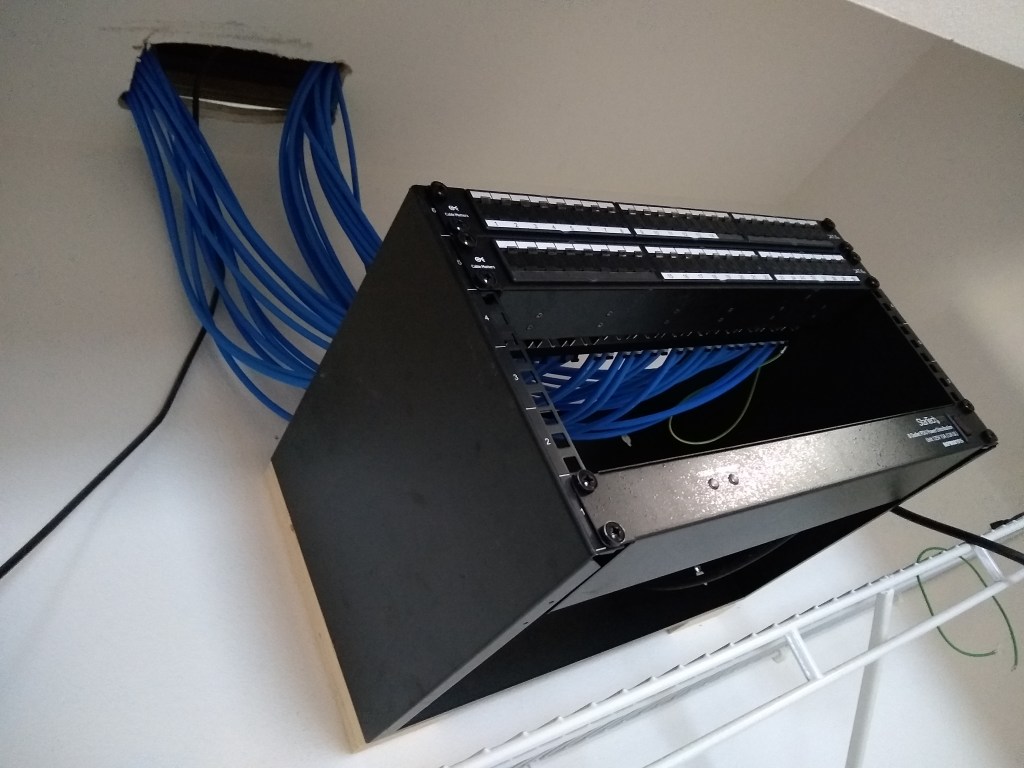
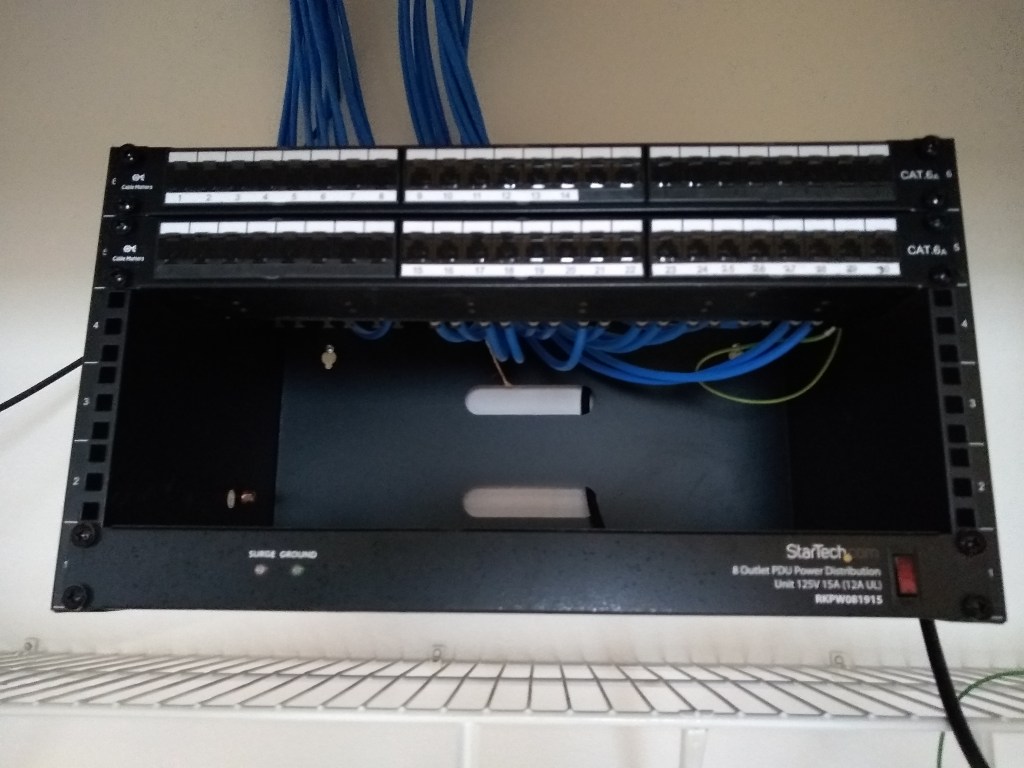
Both Patch Panels Mounted
I’ve attached the cables to reflect the north/southbound orientation, so the top panel is labeled 1 to 14 starting from the left (north) and the bottom panel is labeled 15 to 30 starting from the middle and advancing to the right (south).
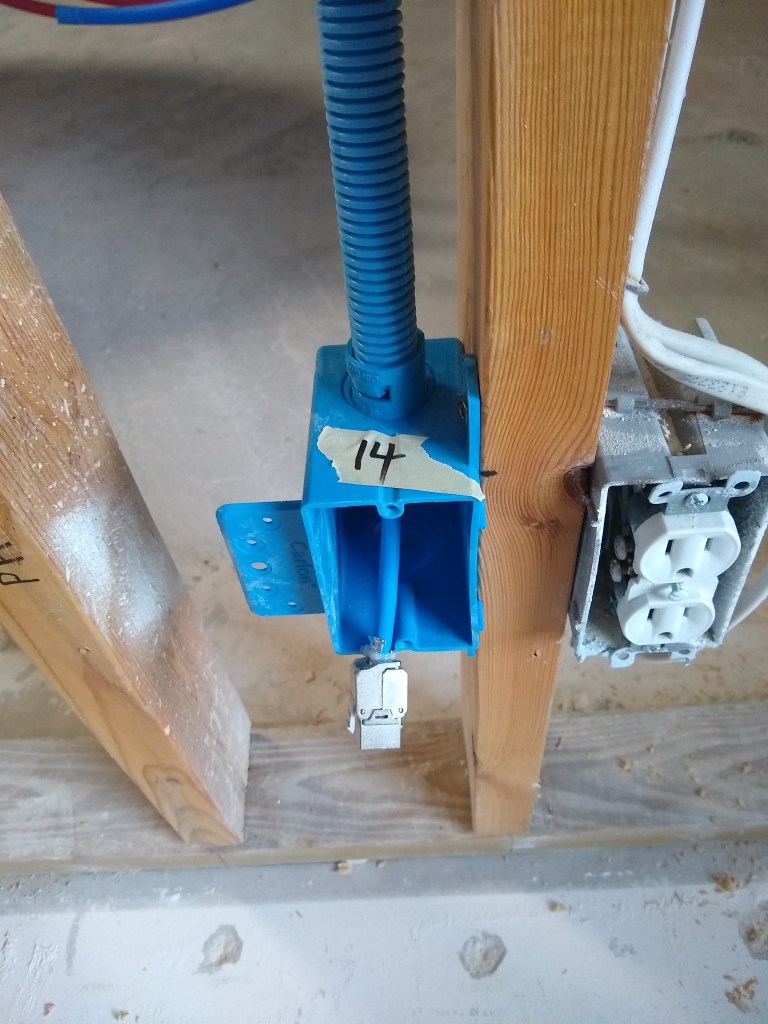
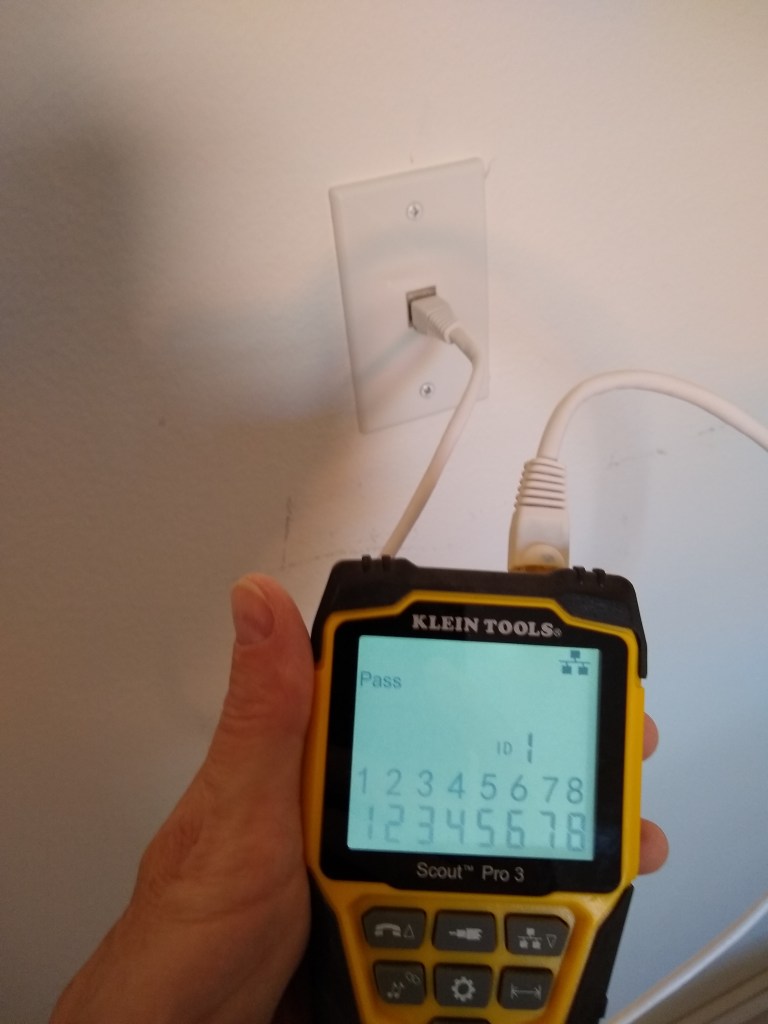
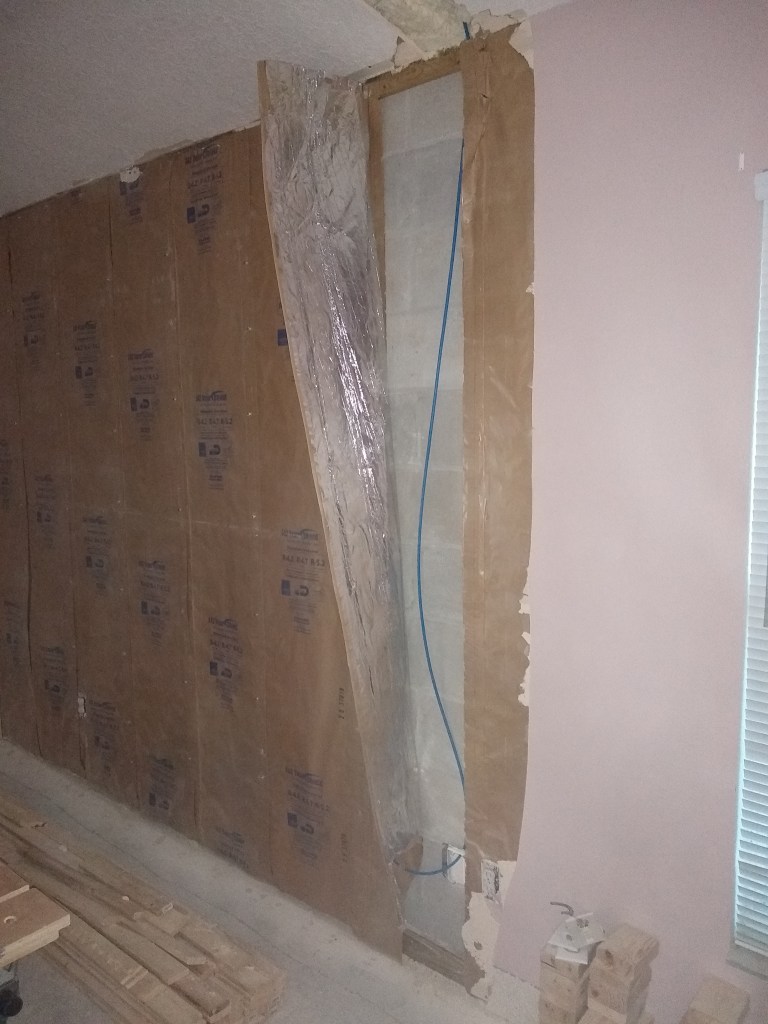
To give you a sense of what the other end of the cable will look like once attached to a faceplate, I took a picture of the one in the laundry room. This is the only place where there was still drywall in place (that I don’t plan on pulling down), so I could actually install the faceplate. This is connected to port 14 on the upper patch panel. You can see from the tester that all 8 lines are verified to be working.
Line 14 Passed!
This ends the cable termination process. I still have three slots available in the rack. One will receive a 24 port switch to connect 24 of the 30 lines to the router. Another slot will receive a battery backup unit. That will leave one free slot for another switch if I deem it necessary. I expect I will get another switch only if needed, even though it means some of the 30 lines will not be connected to the router. I can do that anytime and I suspect there will be several of them that are rarely used. Over time I will discover which lines I use and which ones I don’t. If I discover I need all 30 lines, I’ll add another switch and connect them. That’s the beauty of having a patch panel.
Now I need to add a new power outlet above the rack so the plug from the power distribution unit has some place to plug into. So electrical work is next.
Until now, all posts have described work I had done before starting this blog. With this post, I have finally caught up and will now be reporting on work I am currently doing. As a result, the posts will expose a bit more of the process rather than me simply summing up what was done after the project was completed. My current project is about setting up my home network, which will involve several stages. In this post I will be discussing the first stage: running the cables.
A friend of mine visited the house and suggested that I take advantage of the fact that the walls were opened up by running more network cabling (thanks Tom). When the house was built, they ran cat5e cable to several areas of the house. I won’t go into detail about what cat5e is, but it is a category of networking cable (Ethernet) that supports gigabit speeds. After thinking about Tom’s suggestion for a while, I decided I should take his advice and run even better cable everywhere. This way I will be (hopefully) future proofing my house and be able to tap into the faster speeds you can get from a direct Ethernet connection (as opposed to WiFi) from any room in the house. So that is how “Networking” became the next project.
After deciding to do this, I started to plan where I would run the cable. I decided I would put it just about everywhere, including the bathrooms. I wanted to be able to plug in as easily as you would for power. So I ordered 1000 feet of cat6a cable. Again, I won’t describe the difference between cat5e and cat6a. That information is easily found online and I am guessing most of you don’t care. Suffice it to say, I chose cat6a because I think it should cover any needs I might have for a very long time. Later on you’ll see how I added additional contingency.
It would take a couple of weeks for the cable to arrive, so in the meantime I took a bit of a break from working on the house. It was during this hiatus that I decided to create this blog. I had a lot of pics and notes, so I thought this was the time to organize them and share them. That kept me busy until the first week of February, when a nice big spool of cable was delivered.
1000 feet of Cat6a
A thousand feet is a lot, but in many cases I will be running more than one line to each location. As it happened, 1000′ was not enough, but I’m getting ahead of myself. I decided to start with the easiest runs first. All the cables would extend out from the closet in the guest bedroom. I used this location to be my “network closet” because it was the most centrally located closet in the house. That was important not only to limit the runs, but because my wireless access point would be located there and I wanted it to reach as much of the house as possible without having to add an extender.
North end of Great Room Wall
To make use of existing holes, the first two lines were snaked though holes that were previously used for electrical lines. These two lines are on the north end of the long wall in the Great Room. The next two lines were added on the south end of the same wall.
South end of Great Room Wall
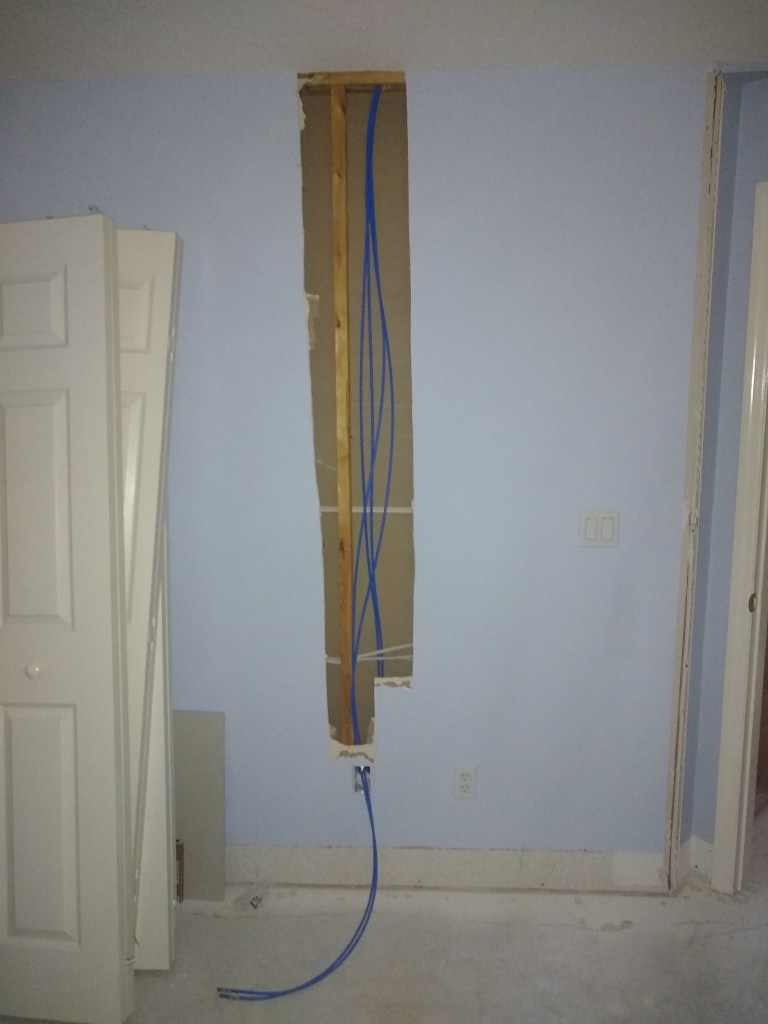
Next I ran a couple of single lines that would be on either side of the bed in the guest bedroom. The image below is from behind the wall, so I am standing in the master bathroom when I took this shot. Later that wall will be demoed, and you’ll get a better sense of it.
Behind the Guest Bedroom Wall
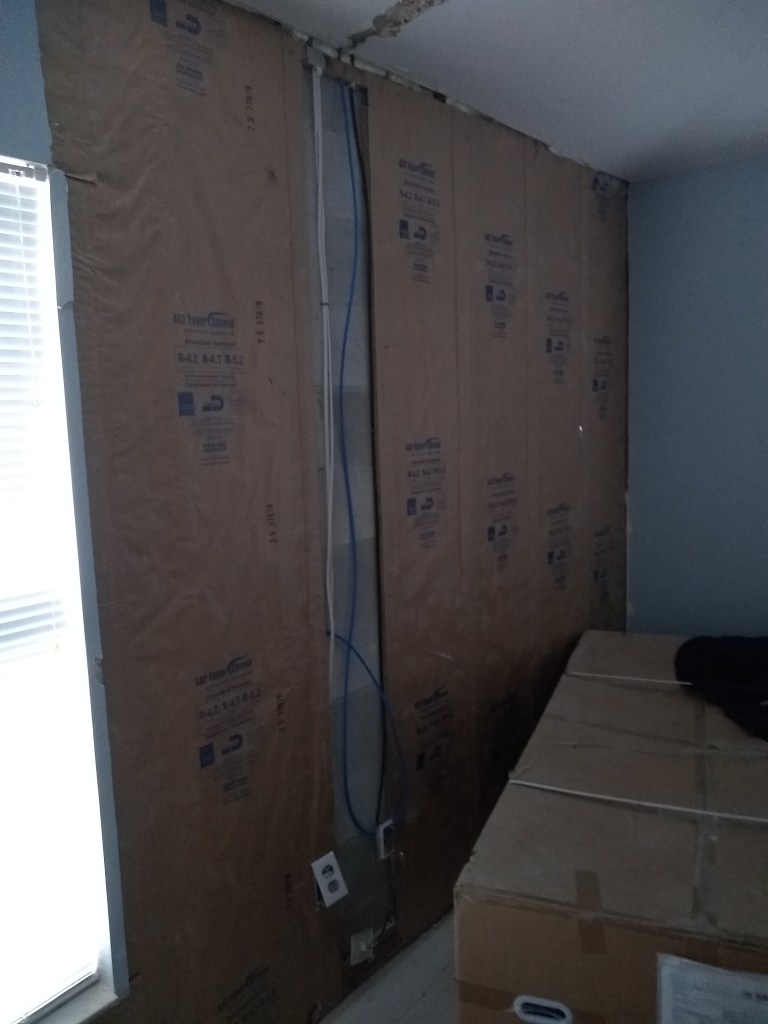
I then ran another line to the opposite wall in the guest bedroom and two more lines in the guest bathroom.
Guest Bedroom and Guest Bathroom
The image on the left shows the wall in the guest bath that is shared with the guest bedroom. One line goes to the bedroom, the other stays is the bathroom in front of the toilet (perfect!). The image on the right shows the line that will be accessible when using the vanity in the guest bathroom.
The final run of the day was to the interior wall of the office. It already had a hole drilled for the electrical, so I used it.
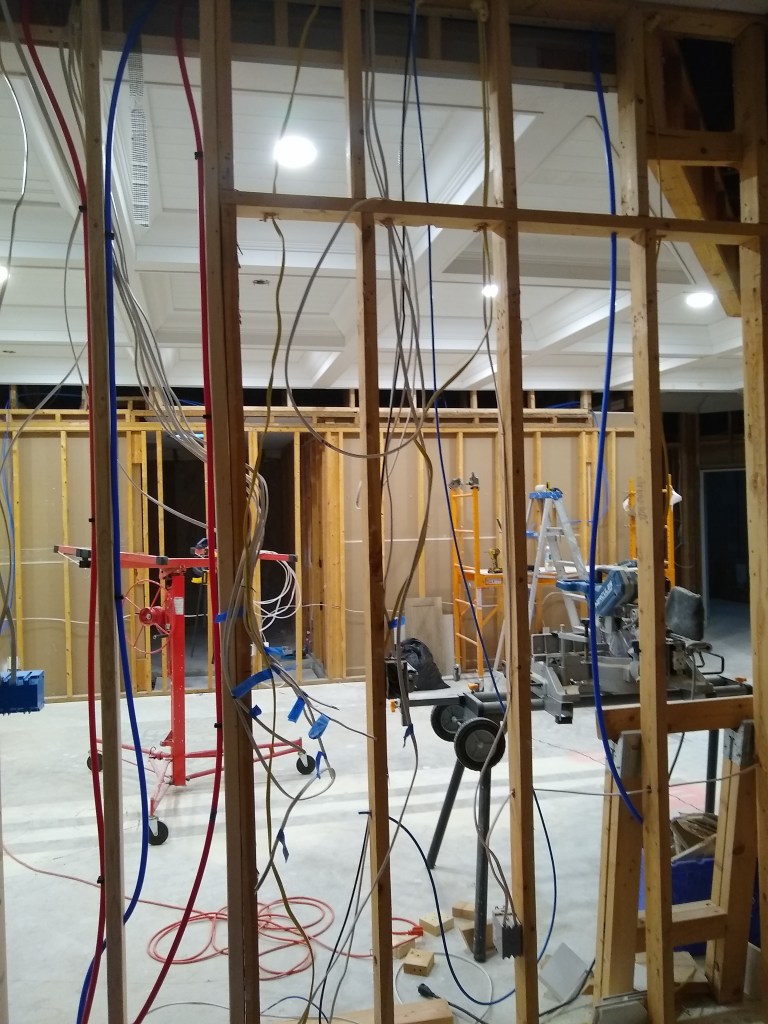
So far, running these lines was relatively easy. Not a lot of messing around in the attic since the runs were near the network closet. In one day (February 9) I was able to run 10 lines! Below you see some of them coming down from the ceiling into the network closet, where they will be connected to a patch panel, switch, and router. But we’ll get to that in another post. This post is just about the work required to run the cables.
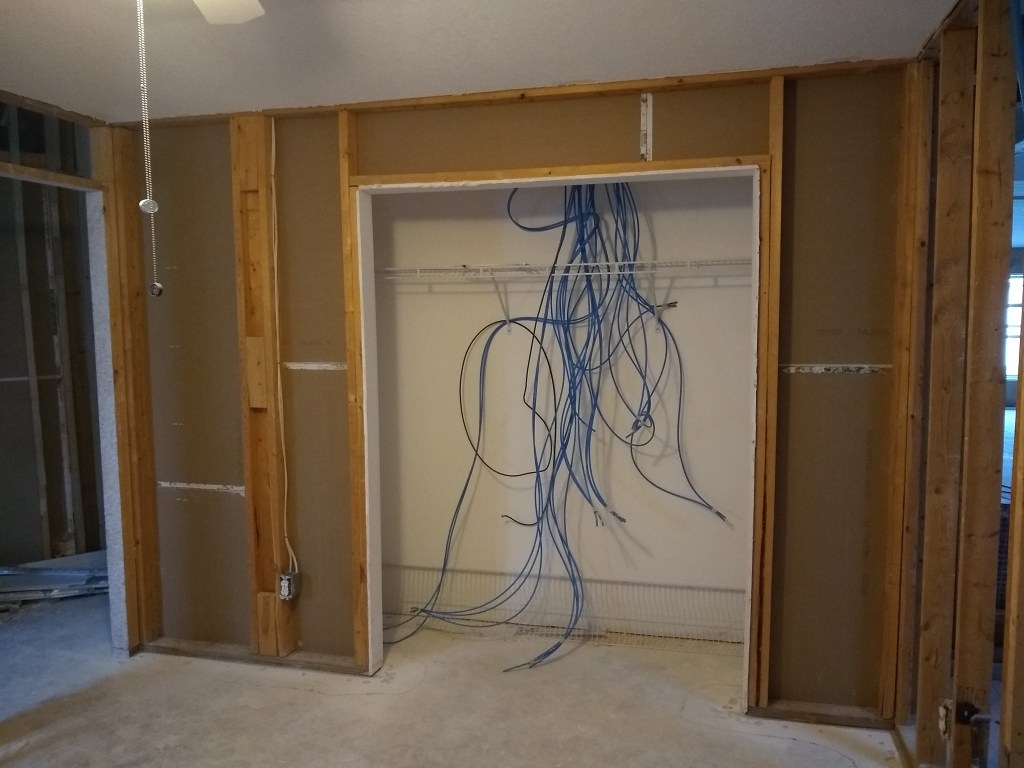
Cables originating from Network Closet
That hole looks pretty ugly now, but it will be cleaned up and made pretty when I’m done. Lot’s more ugliness to come.
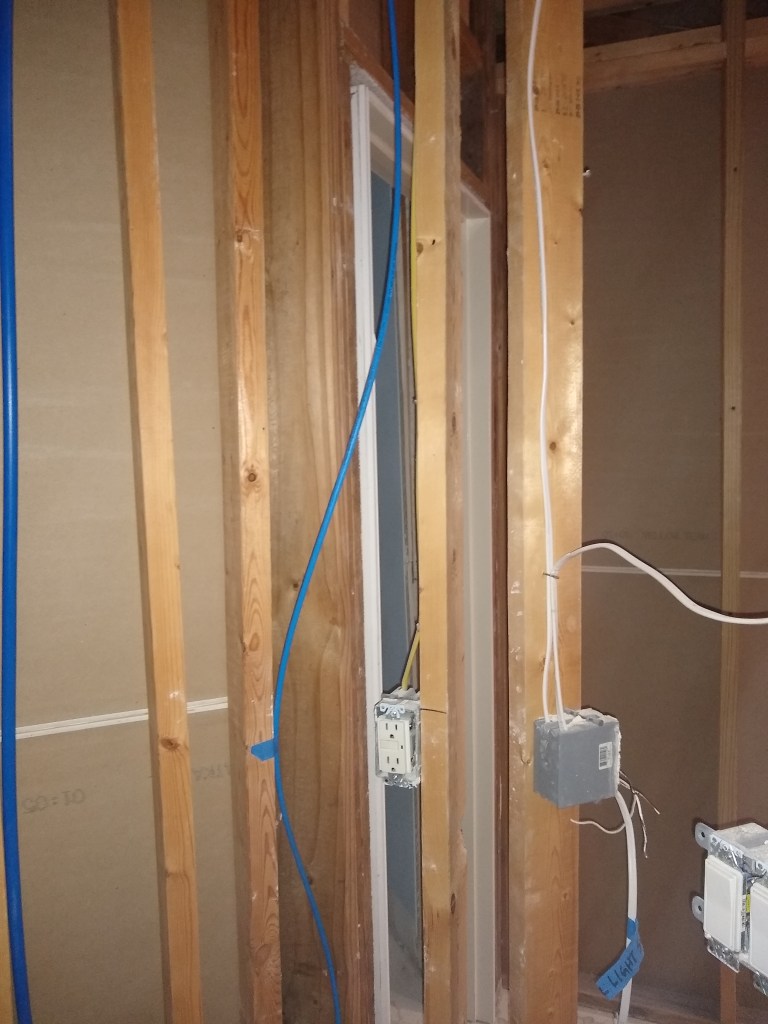
Having tackled the low hanging fruit, I was now forced to deal with the more tricky runs. The next day I ran only 4 lines, mostly due to the demolition required and awkwardness of running a line to the exterior wall of the office. I started by adding 3 more lines where I left off the day before. This required some drilling in the attic above the wall between the office and workshop. I intend to have 2 lines coming out of each box at that location.
Lines to Office and Workshop (inside wall)
The outside wall of the office would be my first tricky run. As you can see below, I had to first remove the drywall, but the really difficult bit was feeding the wire down from above the ceiling. I was fully extended on my stomach to reach into that corner, trying to punch through the spray foam. In the end I had to break out some of the ceiling to find the opening.
Exterior Wall in Office
So, from a blistering 10 lines run on the first day, I slowed considerably to only 4 the next day. The next day was even worse. I had to tackle the outside wall of the workshop. It was very difficult because it was in a really awkward location. I climbed up and down many times before I got it sorted. Similar to the day before, I had to be a bit of a contortionist to do this. I was a very sweaty fellow when I was done.
Exterior wall in Workshop
Fortunately, I did not have to break the ceiling in this case, so that was a bonus. After this task I wasn’t up for anything as difficult, so I ran a single line to the kitchen, which was simple, and demoed the wall in the dining room opposite the laundry room in preparation for the lines I would run there.
Dining Room wall Demoed and 1 Line run to Kitchen wall.
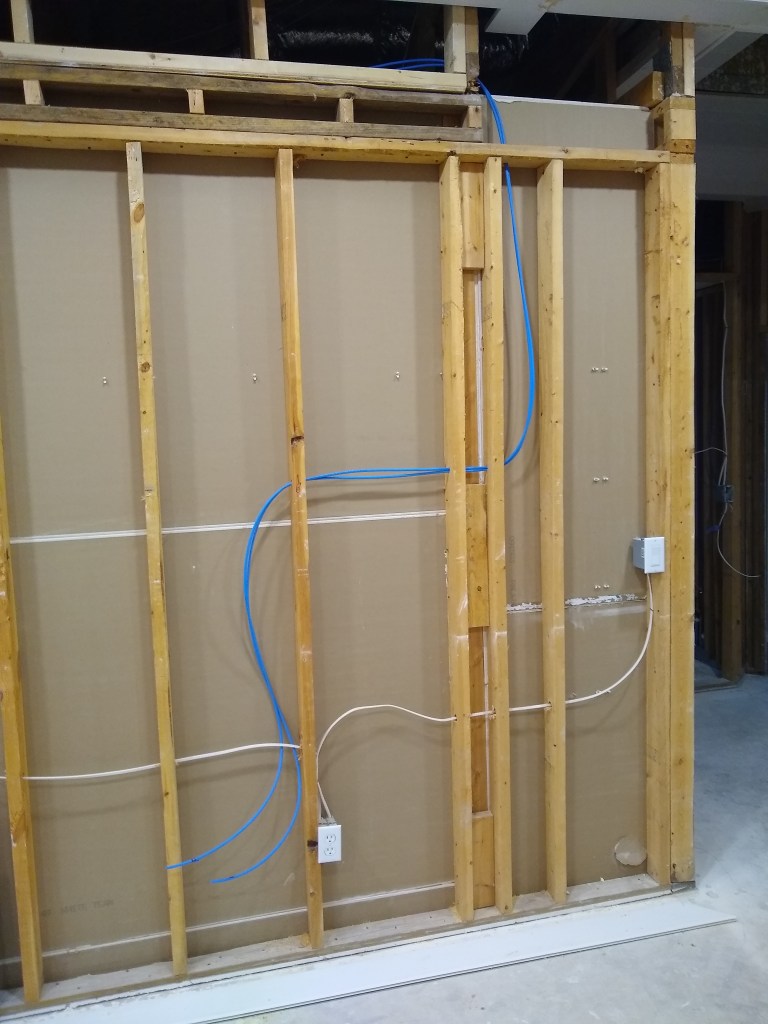
On February 12th I did a little better, running 7 lines: 3 to the dining room wall I demoed the day before, 3 to the wall between the kitchen and great room, and 1 to the master bedroom.
Dining/Piano room, Great room and Kitchen, and west exterior wall of Master.
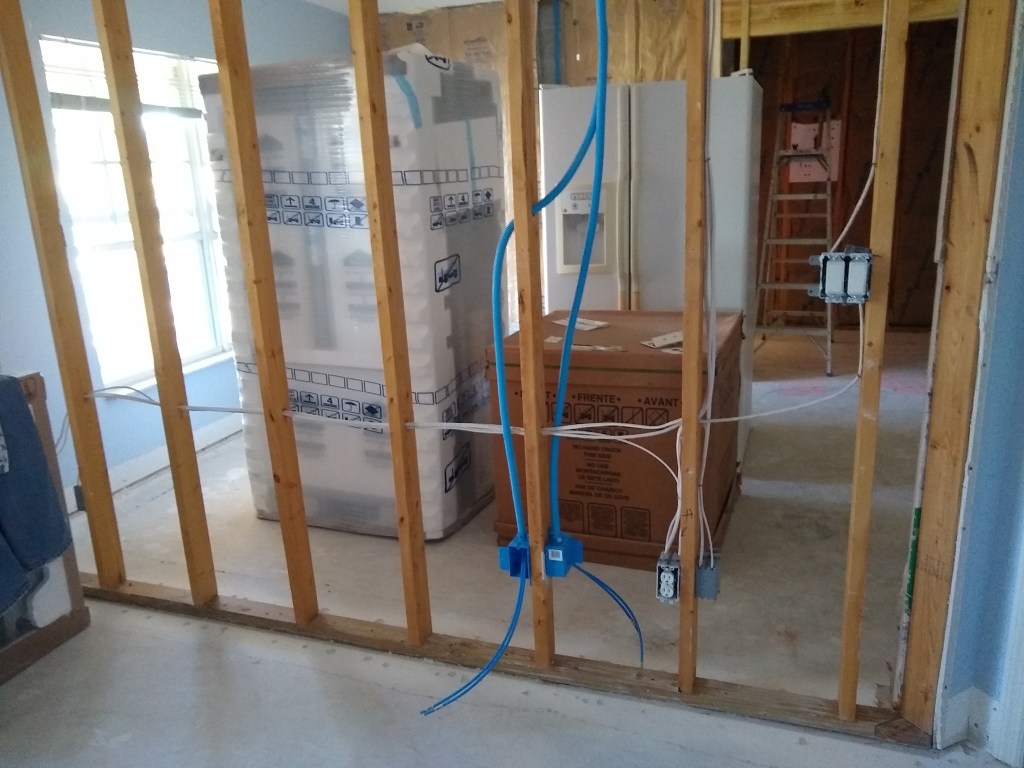
The dining/piano room will have 2 lines and I will put 1 line in the laundry room. On the wall between the kitchen and great room there are 4 lines: 2 for the great room where the television will be, and 2 for the kitchen beside the refrigerator. The line shown in the third image above is along the west wall of the master, which is an exterior wall. There was an existing telephone line there, so I taped the cat6a cable to it and then went up into the attic and pulled the telephone wire to draw the cat6a cable through the same opening. So, although it was another difficult location, that trick made it much easier.
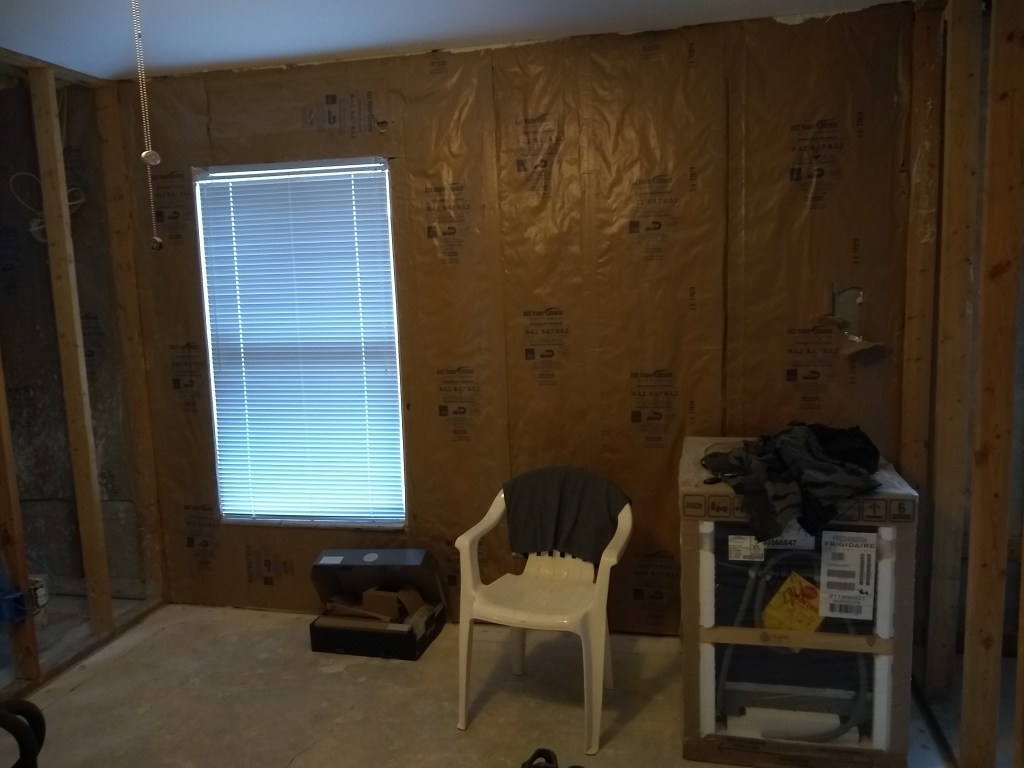
After that I took the weekend off, during which time I came across a video where a fellow was running the lines through a flexible conduit. This idea really appealed to me because it meant that I could fix the conduit to the studs within the walls and still be able to change out the wires once the drywall goes up. I may never have to do this, but who knows what technological advances may occur, and I like having that option. So even though it meant climbing back into places I had hoped I was done with, I decided to run all my wires through a conduit.
Conduit and Boxes
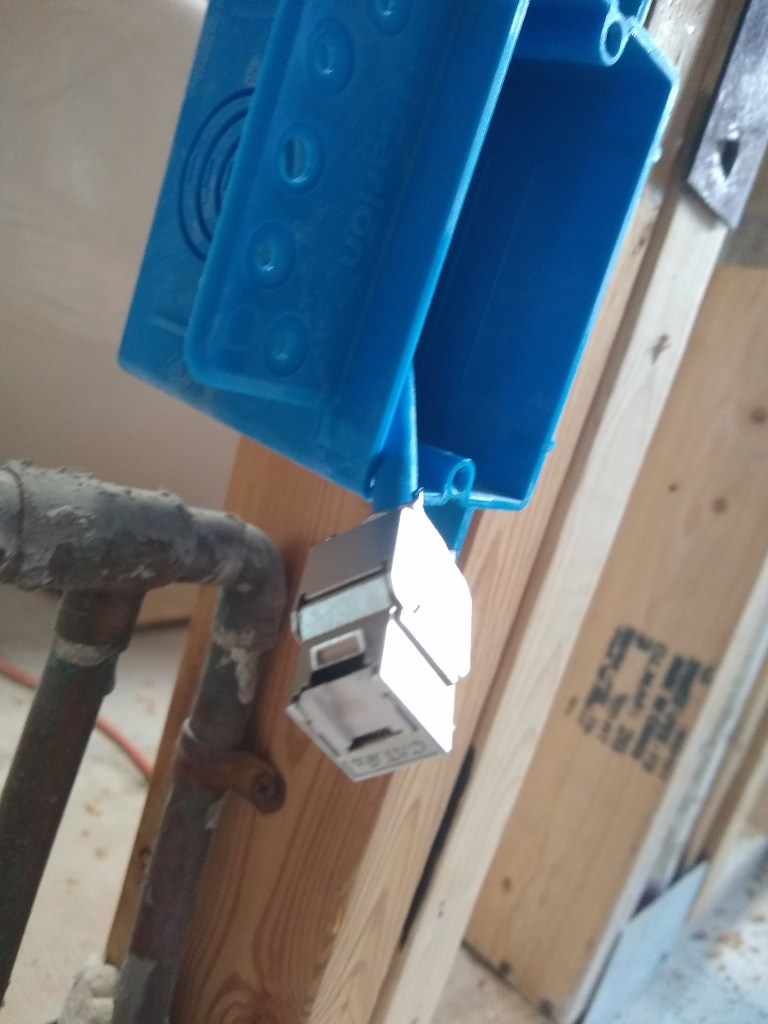
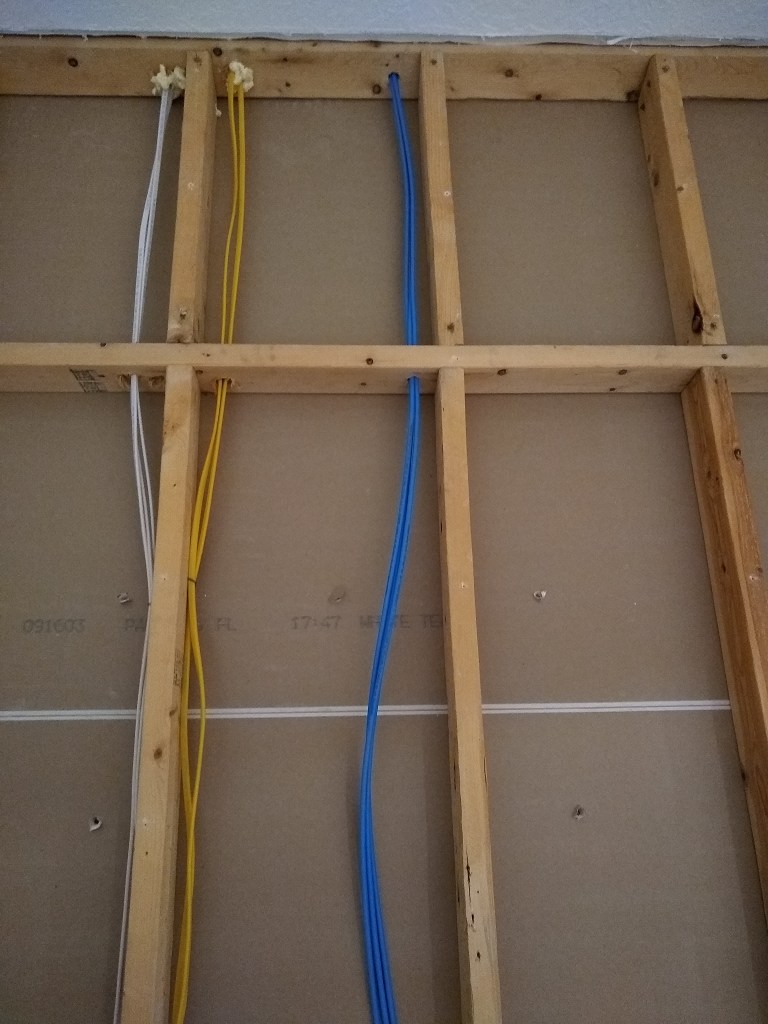
To run the conduit and install the boxes into which the conduit would attach, I had to do some additional demo. The image on the left is taken from within the office looking at the wall between it and the workshop. You can see two conduits coming down from the ceiling. Each conduit contains 2 cat6a cables. The conduits have a special attachment that allow them to fit nicely within the boxes to which the face plate will eventually attach. The image on the right shows 2 lines emerging from a conduit.
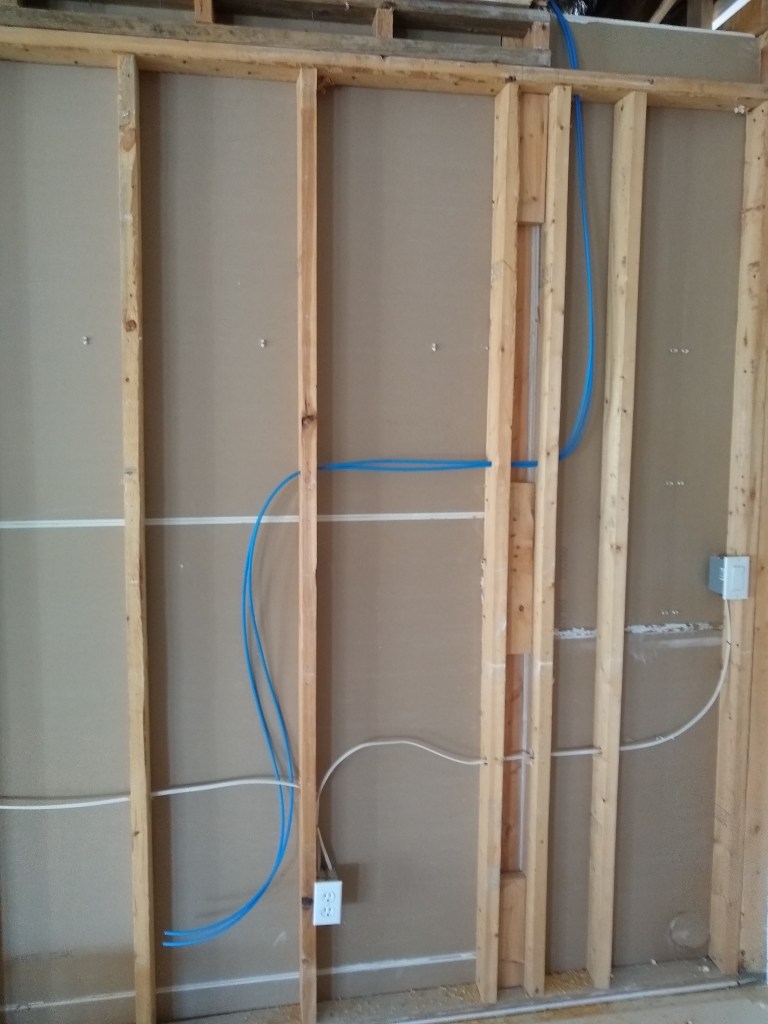
I exhausted the 1000 feet of cat6a cable, so I ordered another 250 feet. In the meantime, I ran conduits everywhere, including an additional line in the middle of the great room wall where no cable had been run yet. It’s not obvious in the image below, but the lines that I originally snaked through existing holes on the north (right) end of the wall had to be rerouted. I drilled 1 inch holes directly above to accommodate the conduit. So the lines and conduit now run straight up the wall into the ceiling, just like the other two along this wall.
Conduit and Boxes along Great Wall.
Since I was planning to remove all the drywall, I did a lot more demo to make it easier to install the boxes into which the conduit would fit. Here are a few images of that.
Great Room/Kitchen, Guest Bedroom and Guest Bath.
With most of the lines run, the network closet is looking a bit uglier.
A lot more lines arriving in Network Closet
In addition to ordering more cat6a cable, I also ordered a small 6 unit wall mounted rack and the patch panel that would hang in the network closet to collect all these cables. Setting that up and wiring all the connections will be a chore.
Without anymore cable to run the remaining 5 or 6 lines, I pressed on with demolition work.
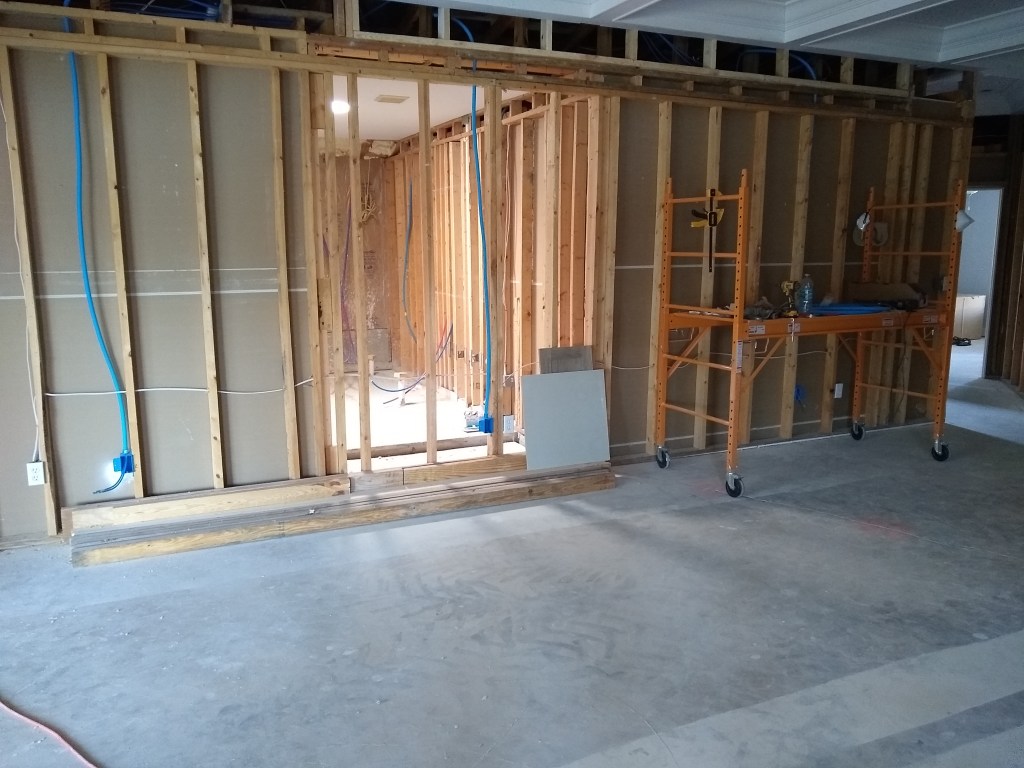
More Drywall Removed
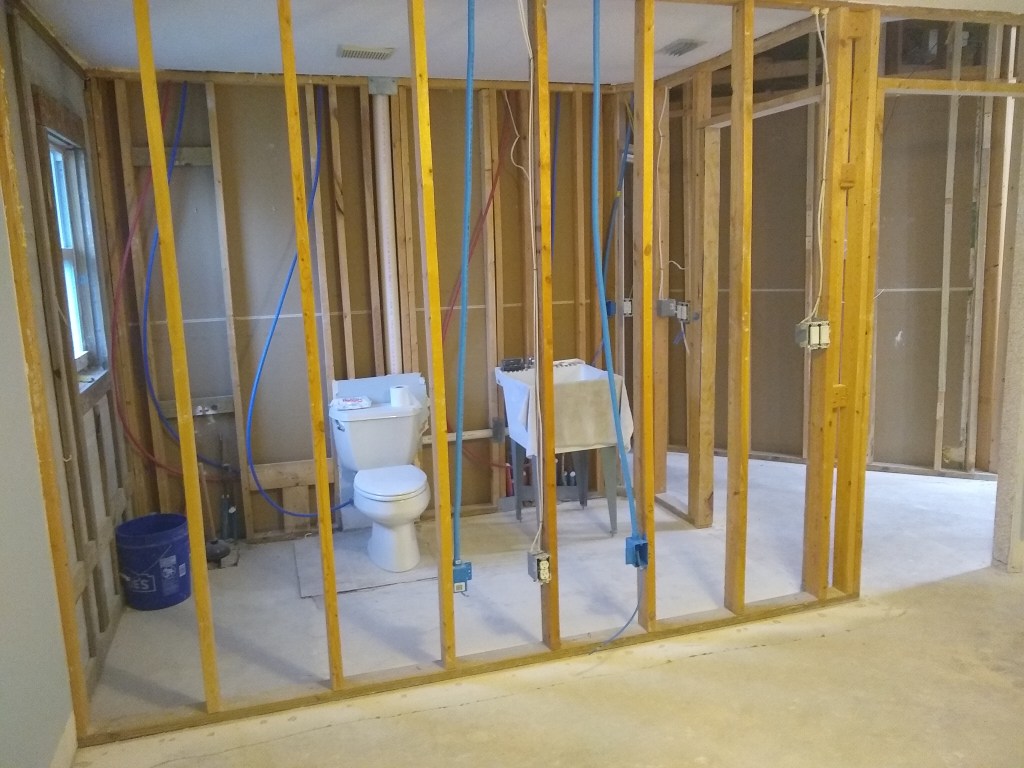
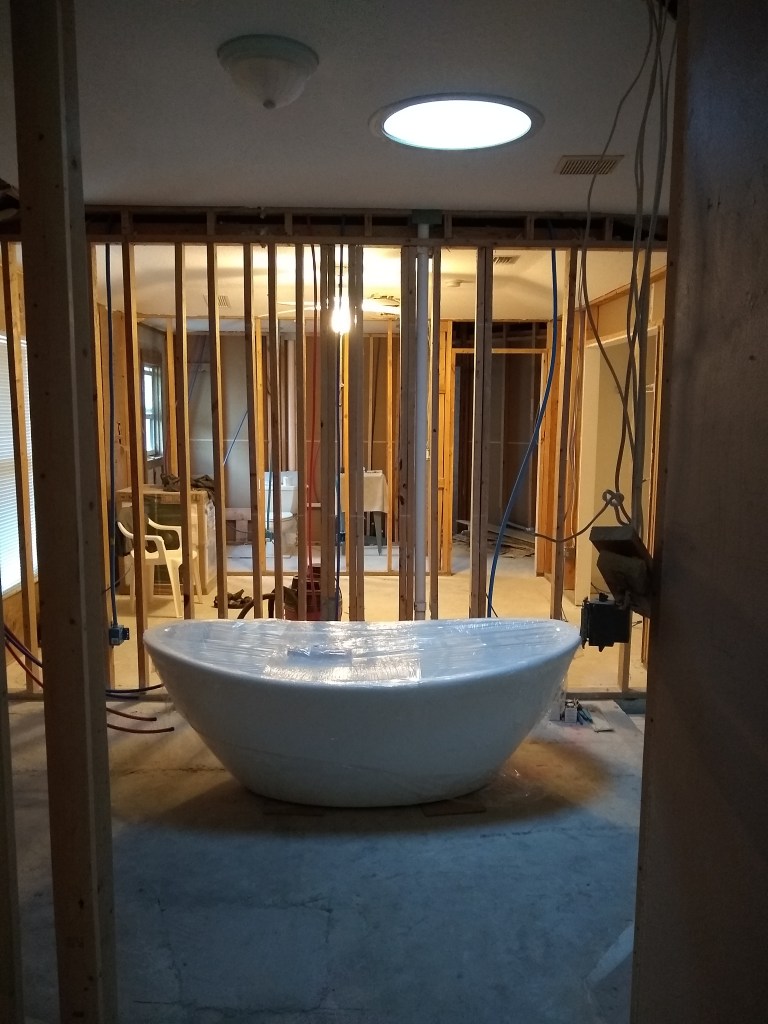
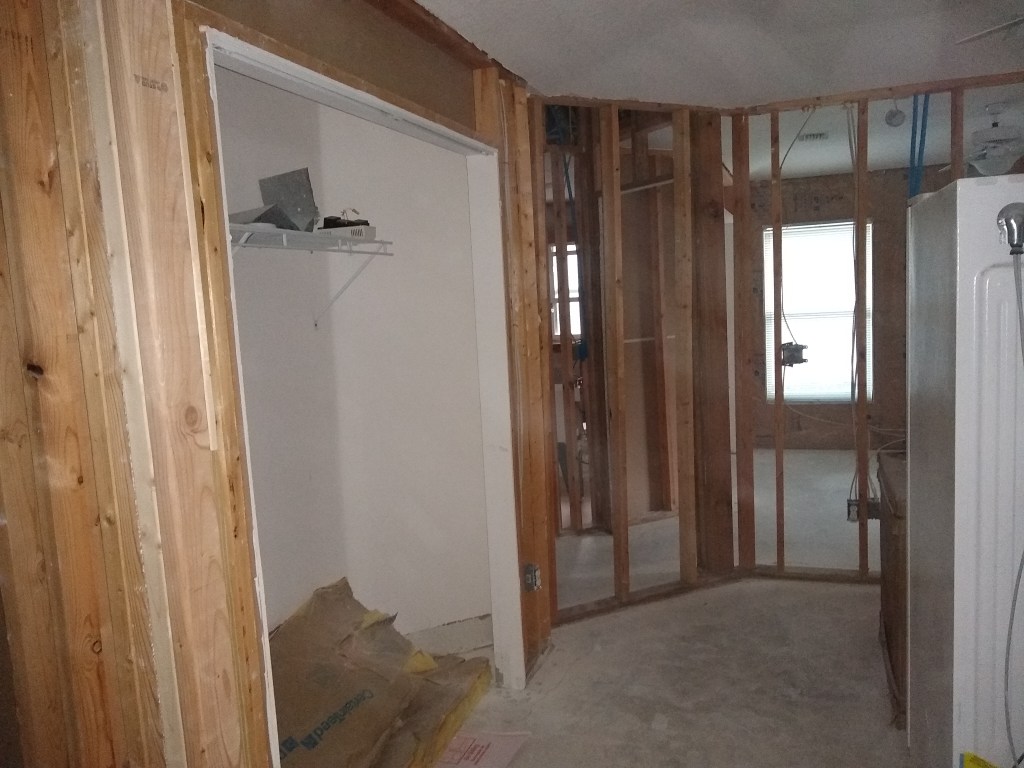
The first two images are the guest bedroom. To make more room I removed the tub from the huge box it was in and put it in the general area it will ultimately go. Beyond the tub you can now see into the guest bedroom and guest bathroom now that the drywall is gone. The last three images are: the office closet, looking from the office through the wall into the demoed front wall of the workshop, and the closet in the workshop.
Today, February 25th, I am not at the house as I await the delivery of more cable and some other networking stuff (rack, patch panel, etc.). Assuming the cable arrives today as promised, I will get back to running the remaining lines. Once that is done I will set about terminating the cables (i.e., connecting the cable to the end points). The cable still needs to be neatly tied and organized in the attic, but that will be the last thing I do as it will have to be loose and moveable until I am sure all is working and positioned correctly. In the meantime, stay tuned.