Preparations for Moving In – August, September 2025

After returning from vacation, the plan was to turn my attention to the garage workshop. The idea was to prepare for the upcoming trim work that was facing me inside the house. A lot of thought went into it, but no real action. I was considering getting several new pieces of equipment, including an 8″ jointer, a cabinet saw, and something for dust collection. Some of these would require new 240 volt outlets. The table saw and jointer are both large machines. I have limited room in my garage so both would have to be mobile so they could be moved to the side to make room for the car. After considerable thought, I decided to not buy anything, yet. Instead I decided I would see if I could make do with what I have and only buy something when not doing so becomes painful.

While that was going on, I decided it would be best to focus on the things that would have to be ready in order for me to move in, which would be mid November. Some low hanging fruit was adding hardware to the master bathroom.

Towel Hook
Towel Rod
Toilet Paper Holder
Shower Towel Hook

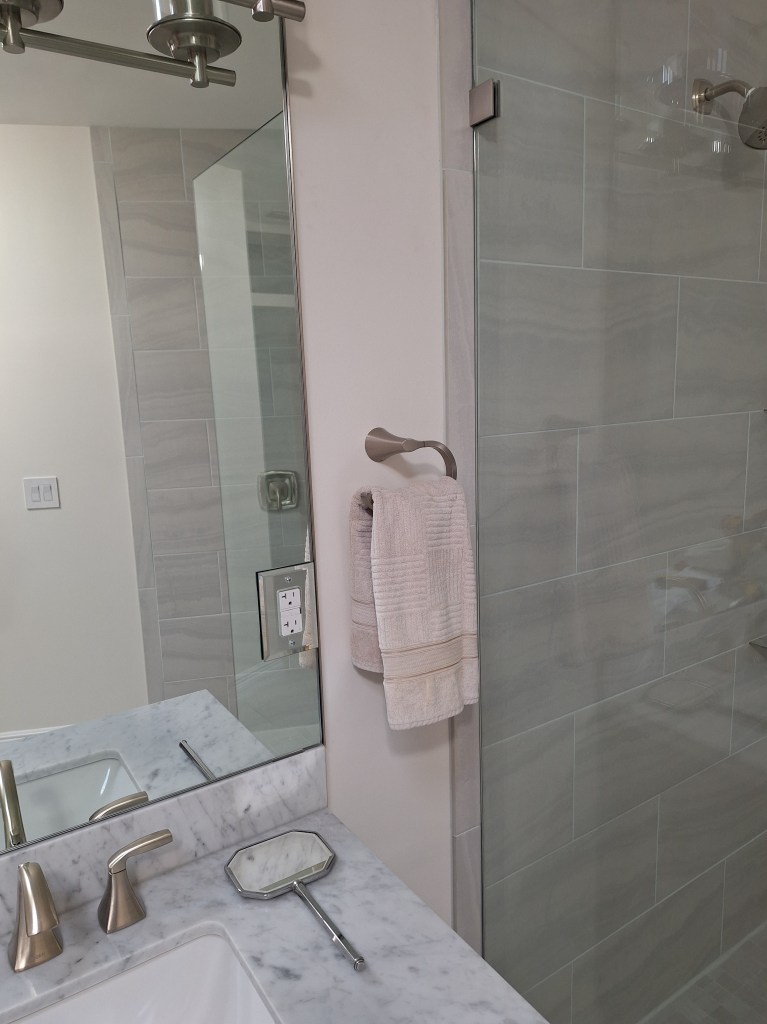
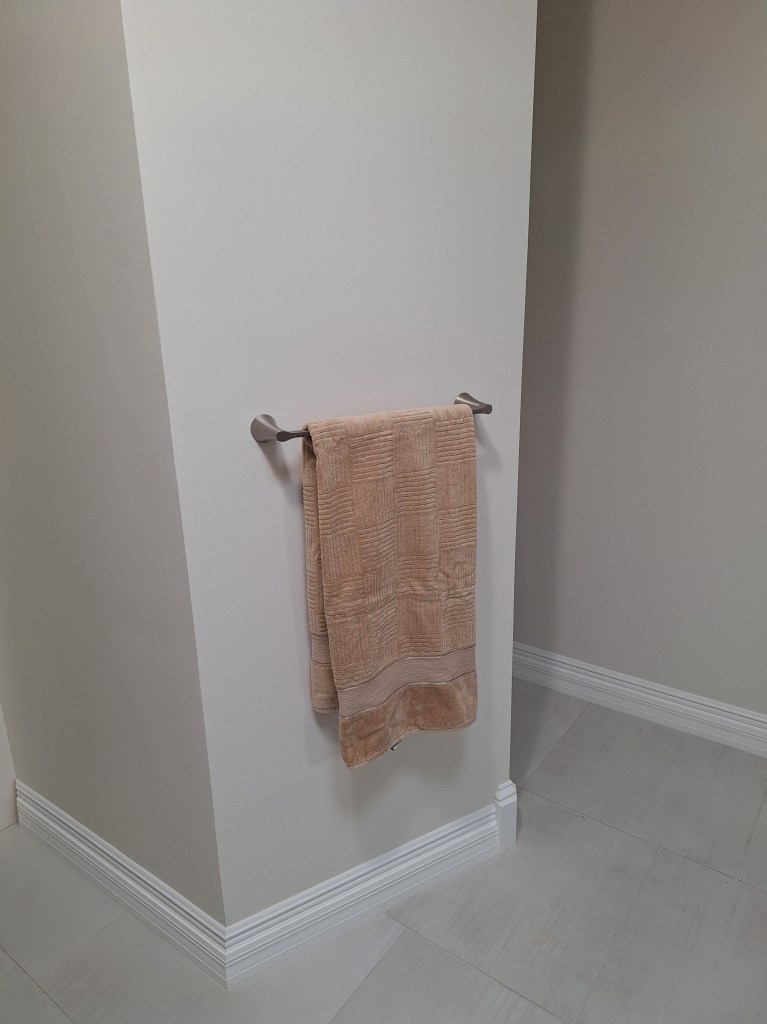
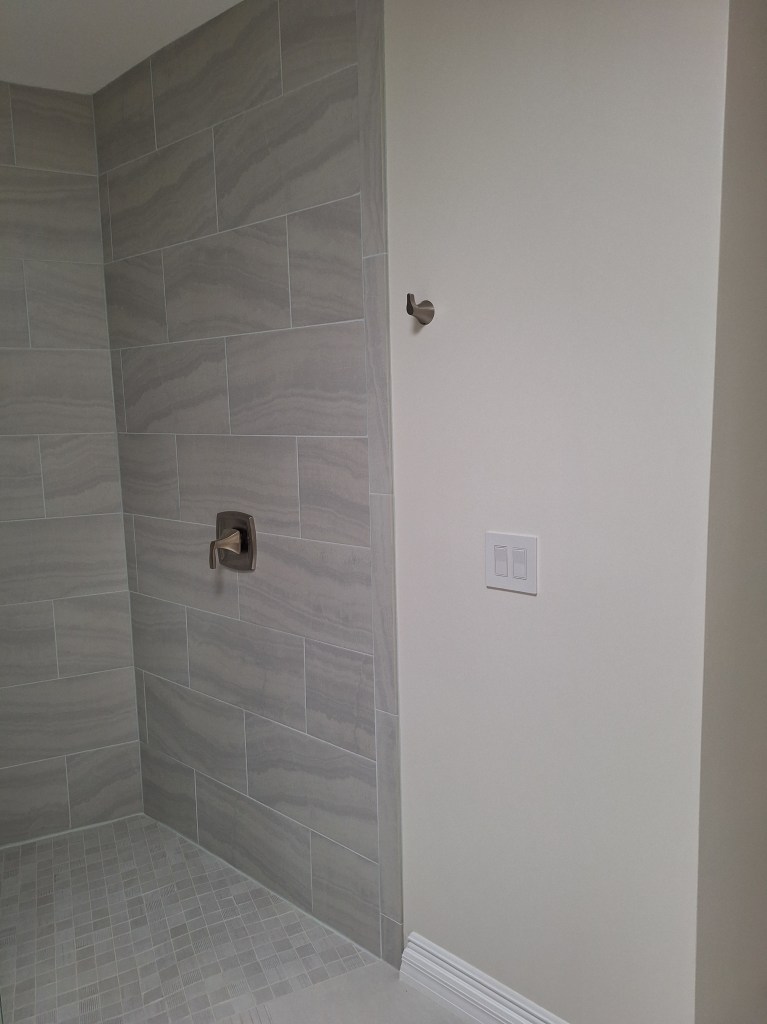
Since the towel rod is not right beside the shower, I added a hook to hold the towel while showering. I did not want to put a towel rod on the wall outside the shower because, if hung in the usual location, it would cover the switches.

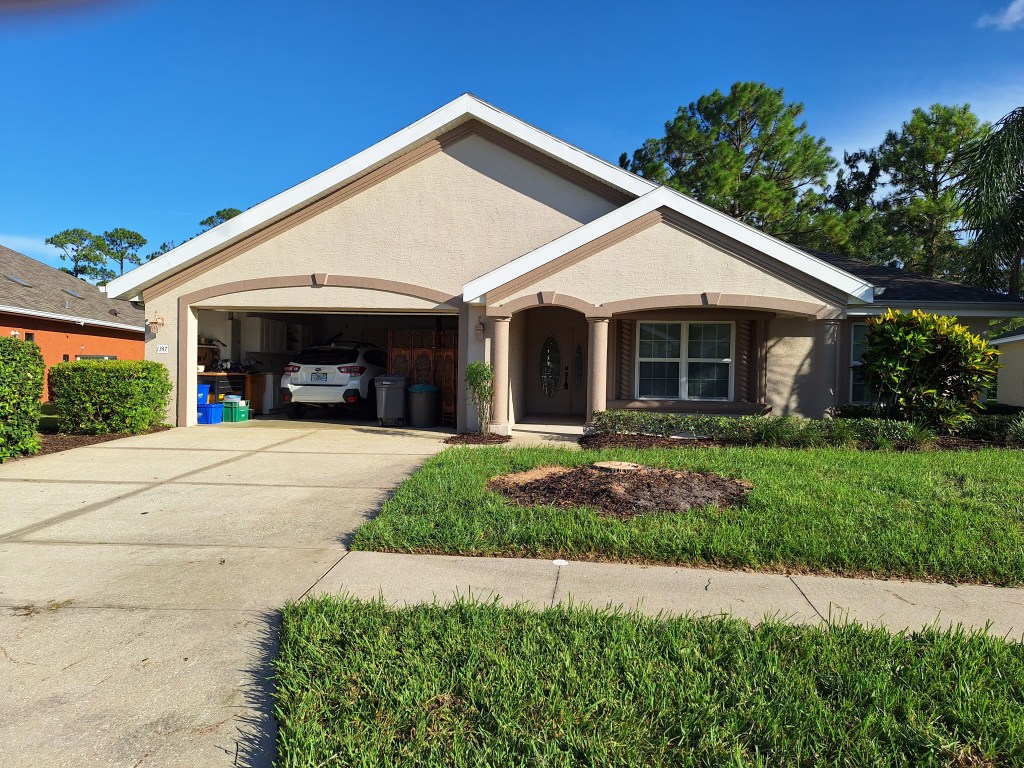
Before moving in, I really needed to have the backsplash behind the cooktop installed. In the last post I mentioned that I planned to run the black granite up the wall. That was the plan, but the installers were really dragging their feet on this. I also asked them for an estimate for the vanity in the guest bathroom but, again, nothing. So while that was in limbo, I decided to have the tree in the front yard removed. It was something I figured I would do after I moved in, but given the limited activity, I decided to initiate that process. Fortunately, the company I contacted to do that was very prompt and responsive.

Tree Before Removal
Tree Before Removal

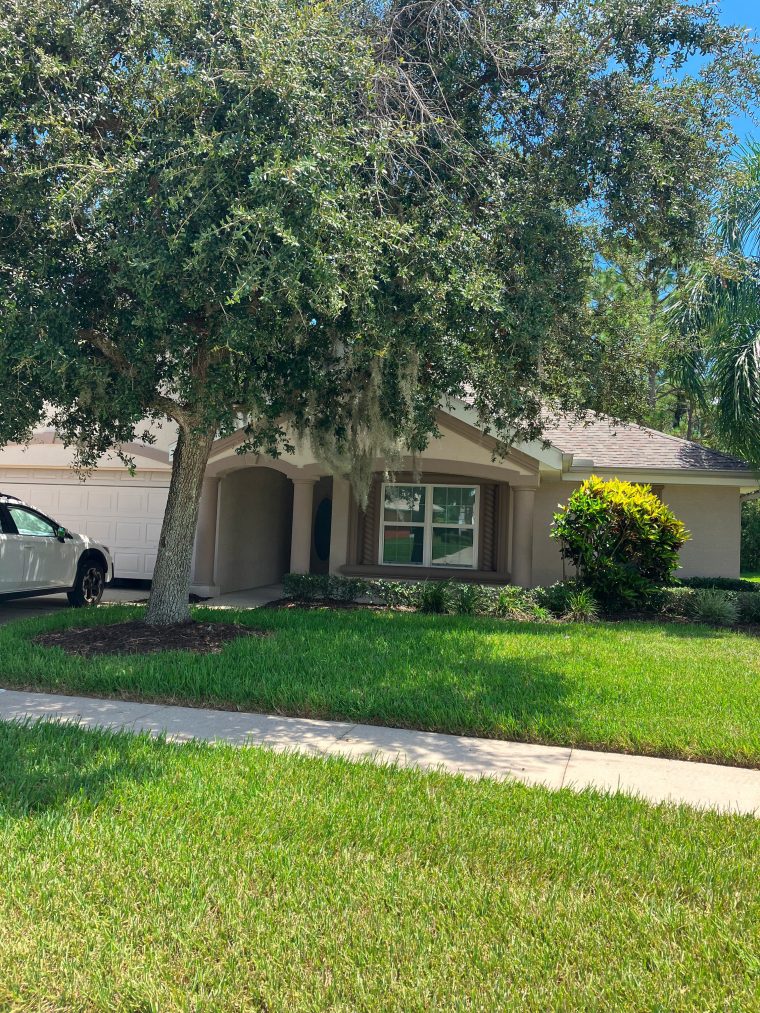
As you can see above, the tree was pretty ugly. Knowing it was going to be removed, I did not have it trimmed, so it was getting really crazy. It was a Live Oak, and was really not suited to this small a plot. The root system is extensive, so it would eventually mess up my driveway. Also, it sits atop the drain that leads from the house to the city sewer system, so that could be impacted too.

Tree Removed
Remaining Stump
After Stump Ground Down

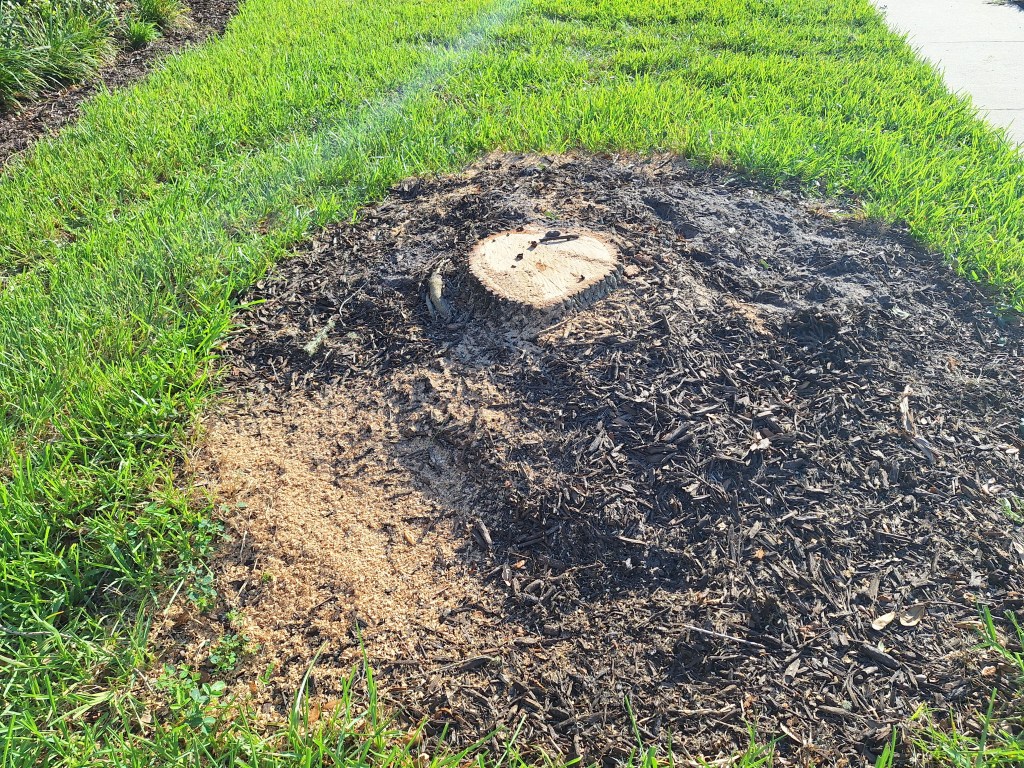
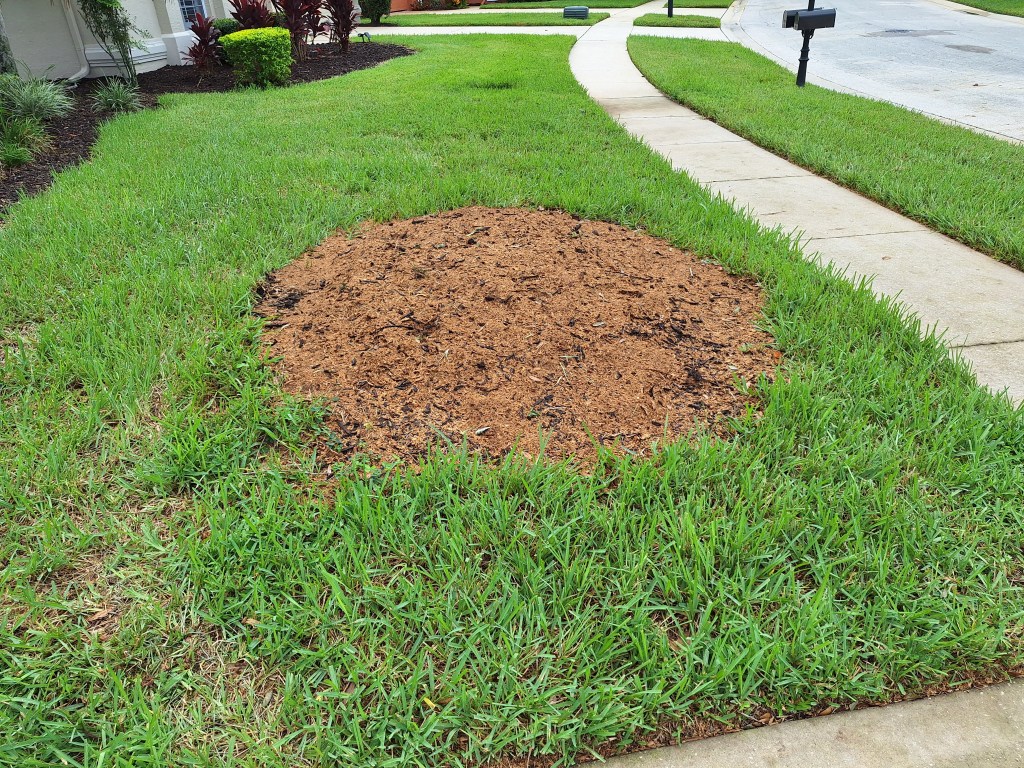
I will leave what you see above until the spring before sodding that area. It needs to settle for some time.

Returning to the cooktop backsplash, I contacted someone else to get an estimate, since my countertop installers still hadn’t responded. I got a much higher quote. Shortly after that, I did hear from my countertop guy, and he was expressing some concerns about the weight of the slab for the backsplash. It would be a very heavy slab. So that got me thinking of alternatives, and I decided to abandon the granite and instead opted for an embossed stainless steel backsplash with a diamond pattern. It would look really nice, be easy to clean, and would not introduce any weight issues. So I found someone to do that work and initiated the process.

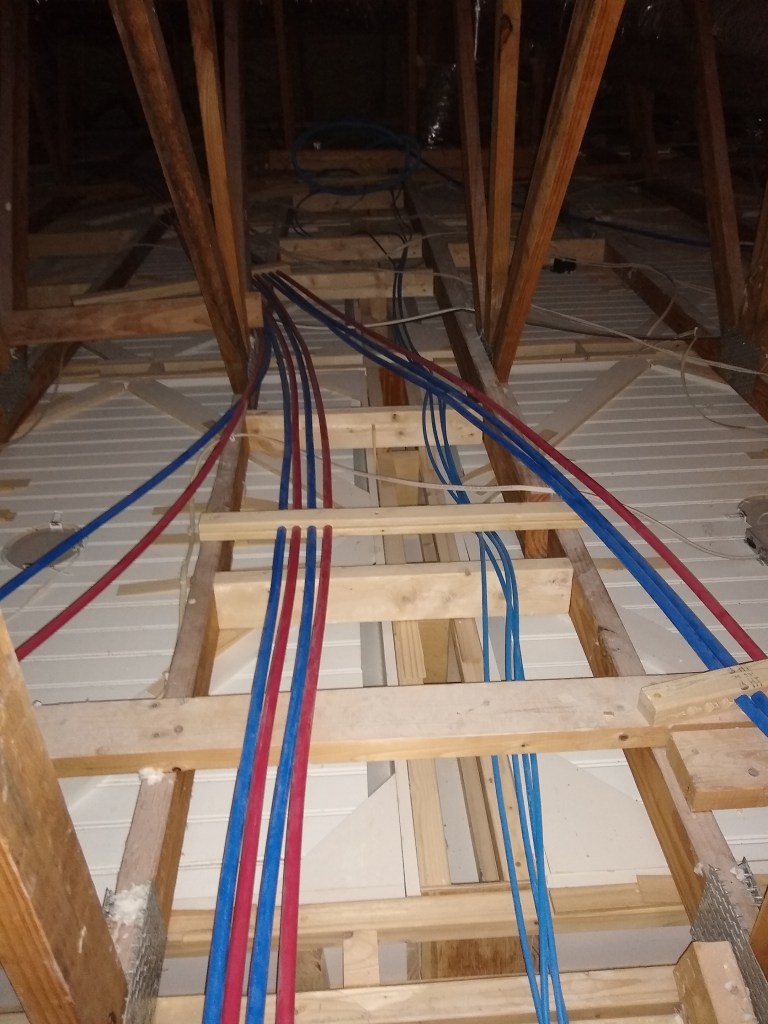
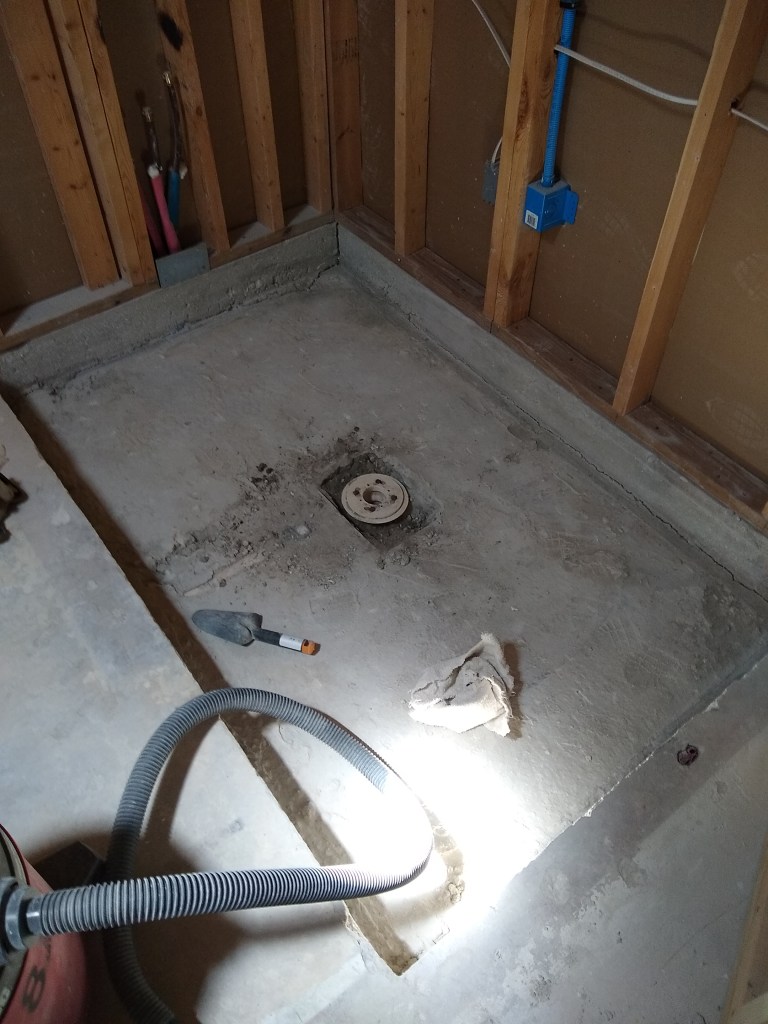
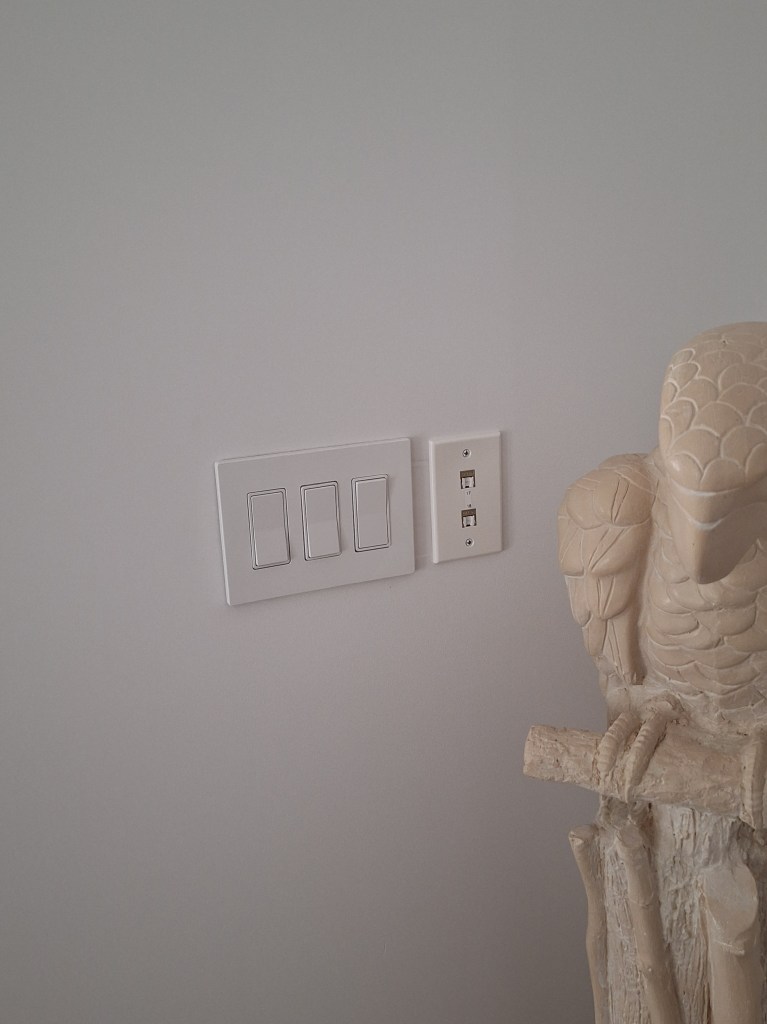
While that was going on, I took care of a small but nagging issue that needed to be done before I moved in; mainly adding the remaining Ethernet keystones and faceplates. I wasn’t looking forward to this because it is fiddly work, but I was pleased to have it done. Here are some of them.

Keystones 17 and 18, in Kitchen.
Keystone 21, in Master Bathroom.

Once each of these is wired up, they have to be tested for connectivity (I have a special tool for that). If the connectivity is good, then I plug in my laptop and make sure it connects to the internet. Once that it confirmed, I insert the keystone(s) into the faceplate and attach the faceplate to the wall. After that is done, I verify again that the laptop can get online. I do this second test because, when attaching the faceplate, the keystone gets pushed into the junction box, which can disturb the connections. Fortunately, that did not happen on any of my installations.

With that done, I hooked up the washer and dryer. They certainly need to be working before I move in. I started with the dryer because it needed a couple of modifications before I could use it. The first was to simply reverse the door. In its current setup, the door would swing open toward the washing machine, making it awkward to transfer clothes from the the washer to the dryer. That was a pretty simple operation. The other thing I had to do was change the way the dryer vented. In its current configuration, it would vent to the left (toward the washer). That needed to change so it would vent out the back where it could connect up to the exterior vent. This proved to be quite an undertaking.

Original Vent Location

To move the dryer vent from the side to the back required that I disassemble the dryer (really!). I found a YouTube video that walked me through it, so that was great, but far more than I was expecting. So I moved the dryer into the living room where I had more space to work and started opening it up.

Disassembly Started

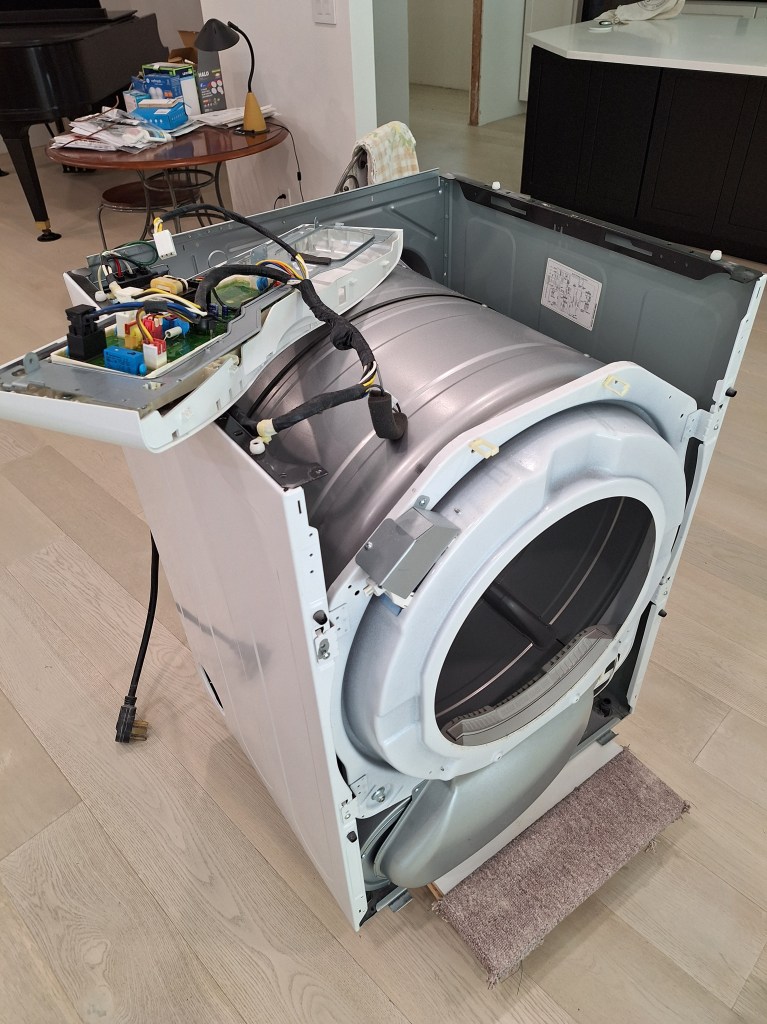
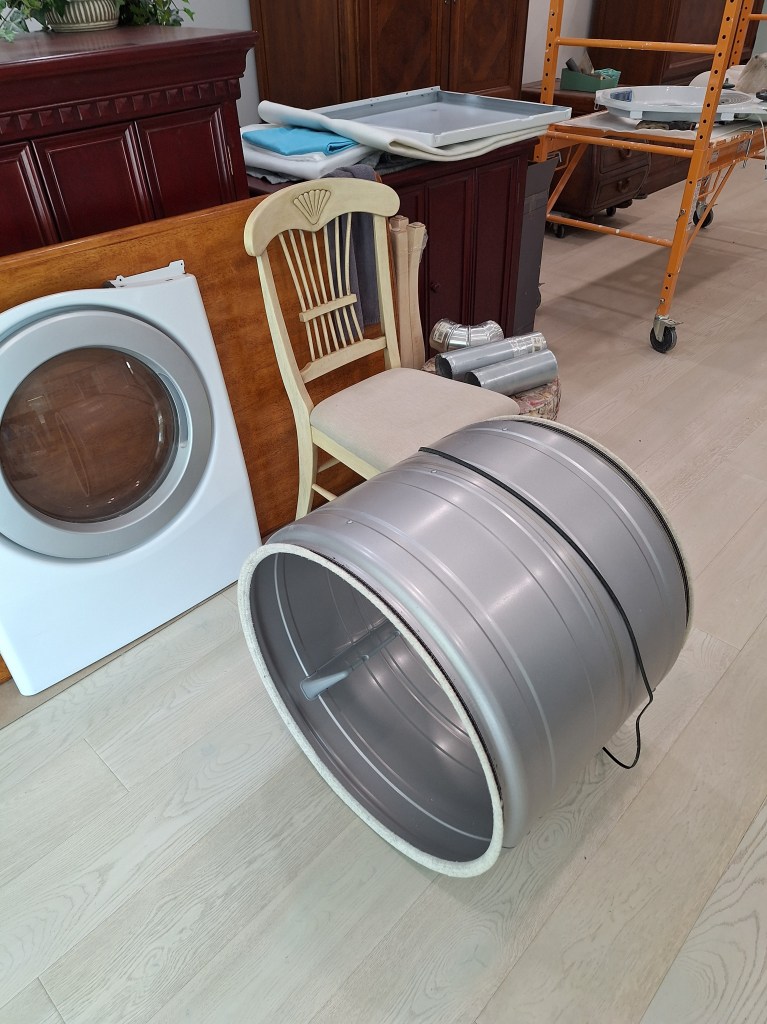
What you see above is the top and front door assembly removed. The control panel is resting on the frame and drum. That was just the start. To get access to the vent, the drum would have to be removed.

Dryer Door and Drum after Removal
Drum Removed

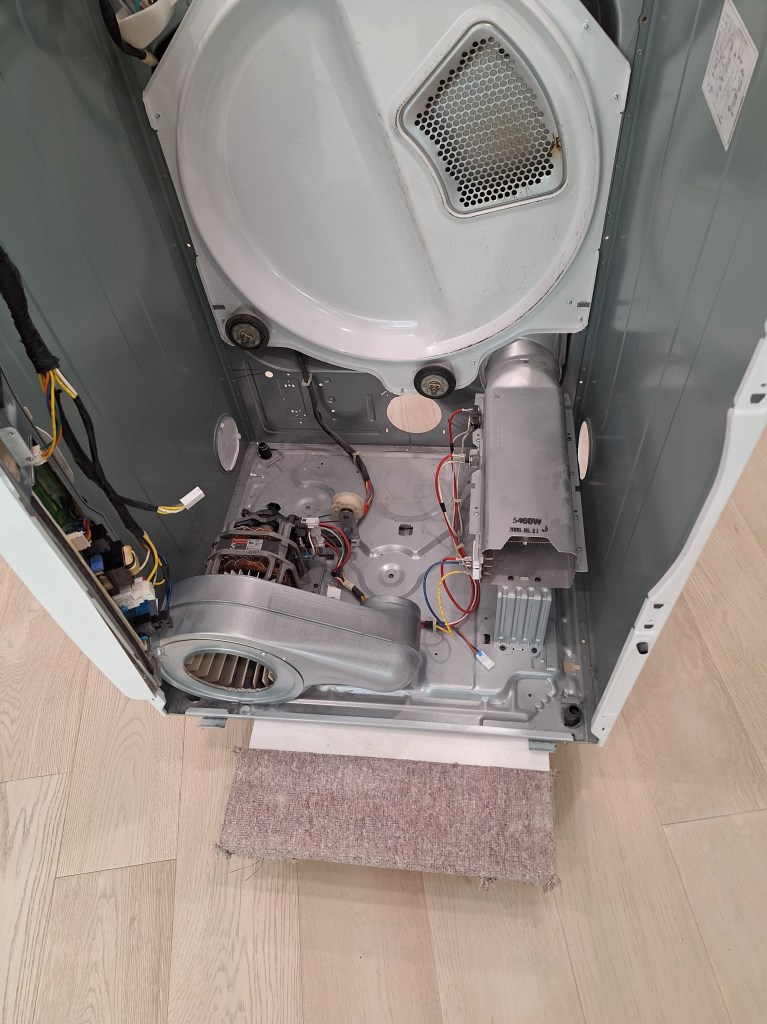
With the drum out of the way, I had access to the area where I would install the vent pipe. Below you can see it installed.

Straight run of Pipe out to the back of Dryer
The turn after Exiting the Dryer

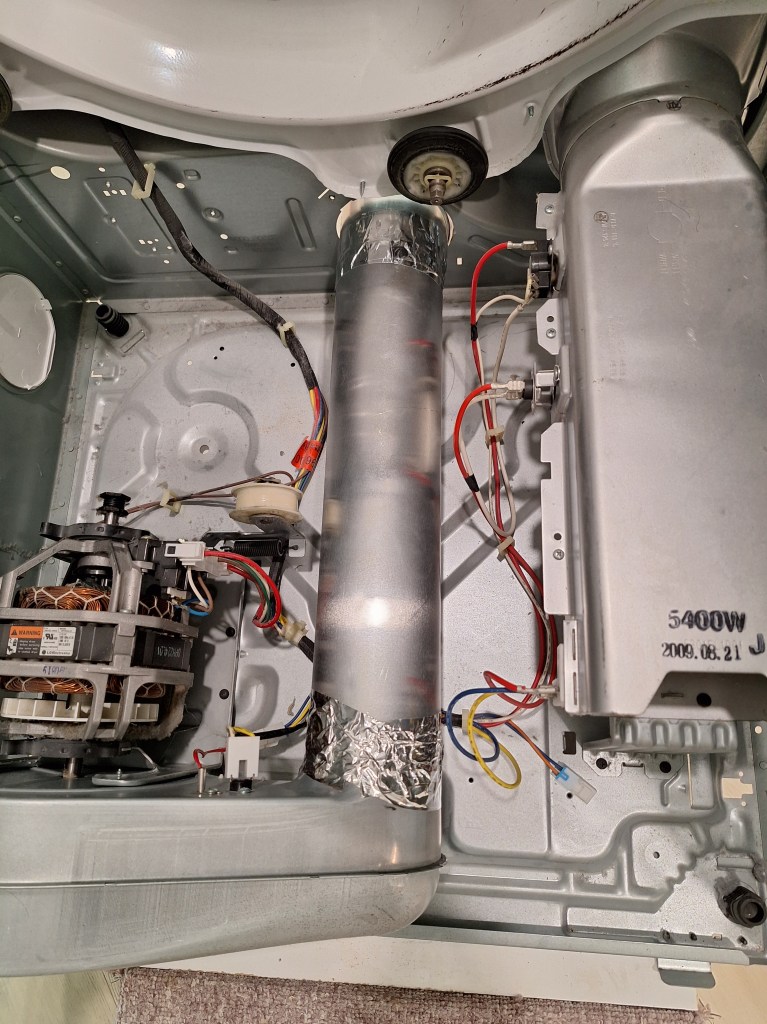
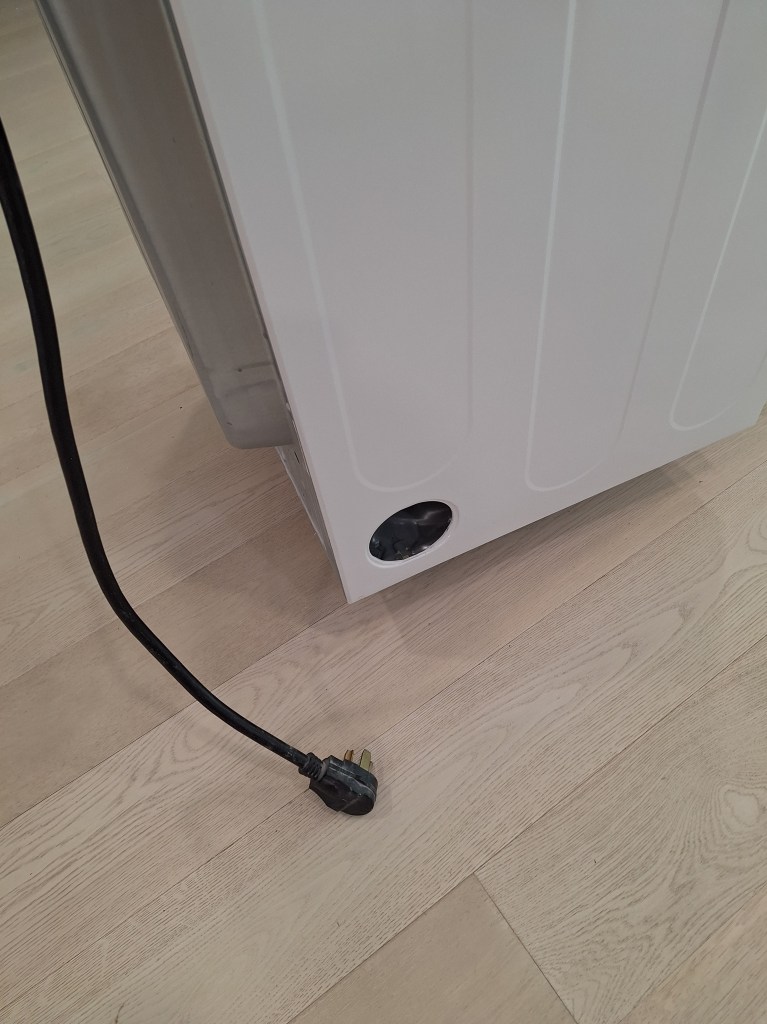
Something of note here is that the pipe that was installed before (the one that vented out the side) was very poorly installed. When I pulled it out I noticed that it was not sealed with foil tape. Instead, the installers simply lined up the sections of pipe as best they could and used foil tape to keep them together. Because they did not take the dryer apart like I did, they had very limited access, so they would have simply reached in as far as the arm would allow and tape the pipe sections together as best they could. They would not have been able to wrap the foil tape fully around the pipe, which is what I saw. Having no experience with this, I was oblivious. It worked, for the most part, but would have leaked a lot, which would have heated up the room, making my A/C work extra.

With the new section of pipe in place, I reassembled the dryer and used a flexible foil pipe to tie it to the section of pipe in the wall that leads to the outside.

Flex Pipe to the Outside

Here it is installed (sort of).

Dryer Installed (for now).

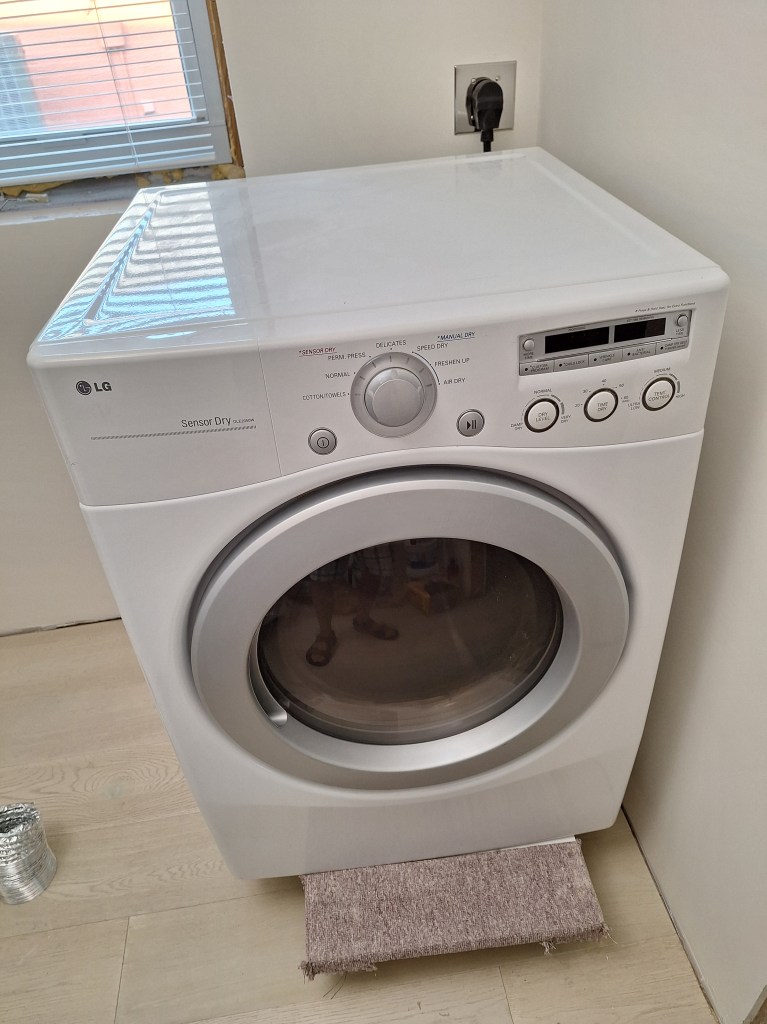
I turned it on, then went outside to verify that it was venting well, which it was. As you can see, I have kept it on the dolly. Since the dryer will have to be moved some day when I install baseboard, I decided to leave it on the dolly. A dryer doesn’t spin at a high rate of speed like a washing machine, so it doesn’t need to rest as securely on the floor. So this should be fine for the foreseeable future.

The installation of the washing machine was a much simpler matter. I did not need to make any modifications. I simply needed to remove the shipping bolts I installed before moving it from the other house, and then connected the water supply and lines put the drain pipe in place.

Washing Machine Installed and Running

Unlike the dryer, I could not leave this on the dolly. It needed to be on solid ground and level. To test it, I ran the “tub clean” program, which takes more than an hour. It was a good test and the tub was in need of a good cleaning. There were no leaks and it ran smoothly.

Another thing that needed to be sorted out before I could move in was having something on which to hang my clothes. The two closets in the master bedroom were blank slates. Eventually I will create a custom solution tailored to each closet, but for now, I just needed something that would do the job and not cost too much. I found a pretty inexpensive rack online and purchased it to see if it would work.

Large Rack in Large Master Closet
Large Rack with some Stuff added.

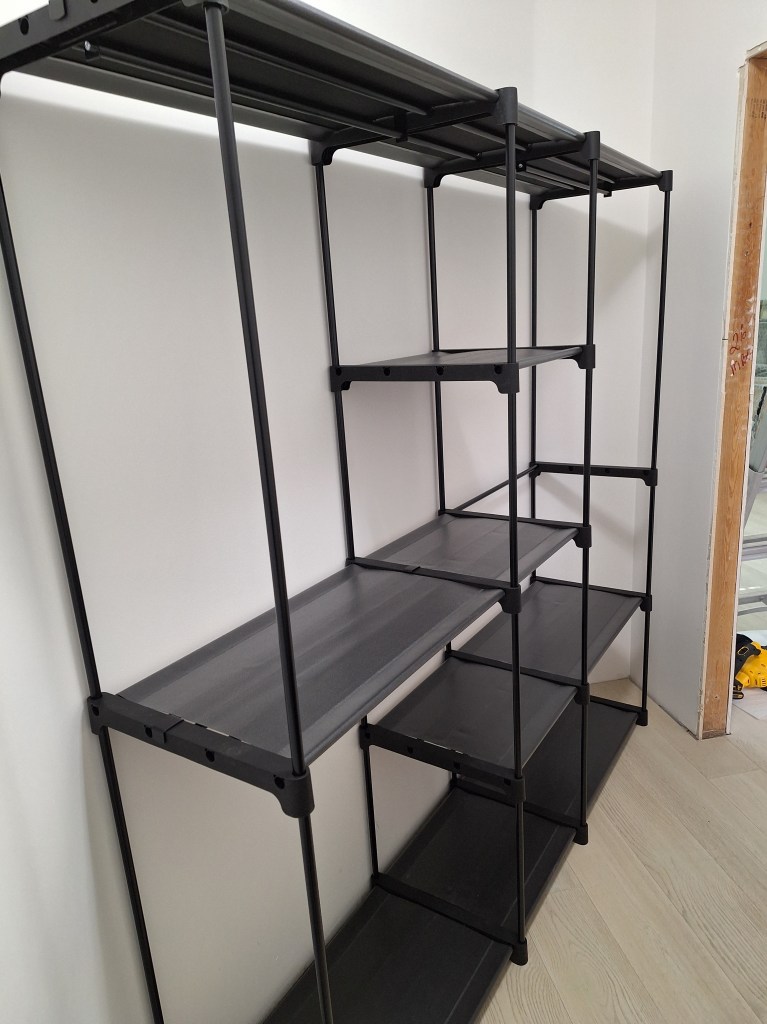
I was very pleased with this. It was easy to assemble and very light weight, yet was strong enough to hold anything I planned to put on it. It fit nicely along the long wall in the large closet, so I decided to purchase two additional racks from the same company, but just a bit smaller. One would also go in the large closet, and the other would fit nicely in the small closet.

Small Rack in Large Master Closet
Small Rack in Small Master Closet

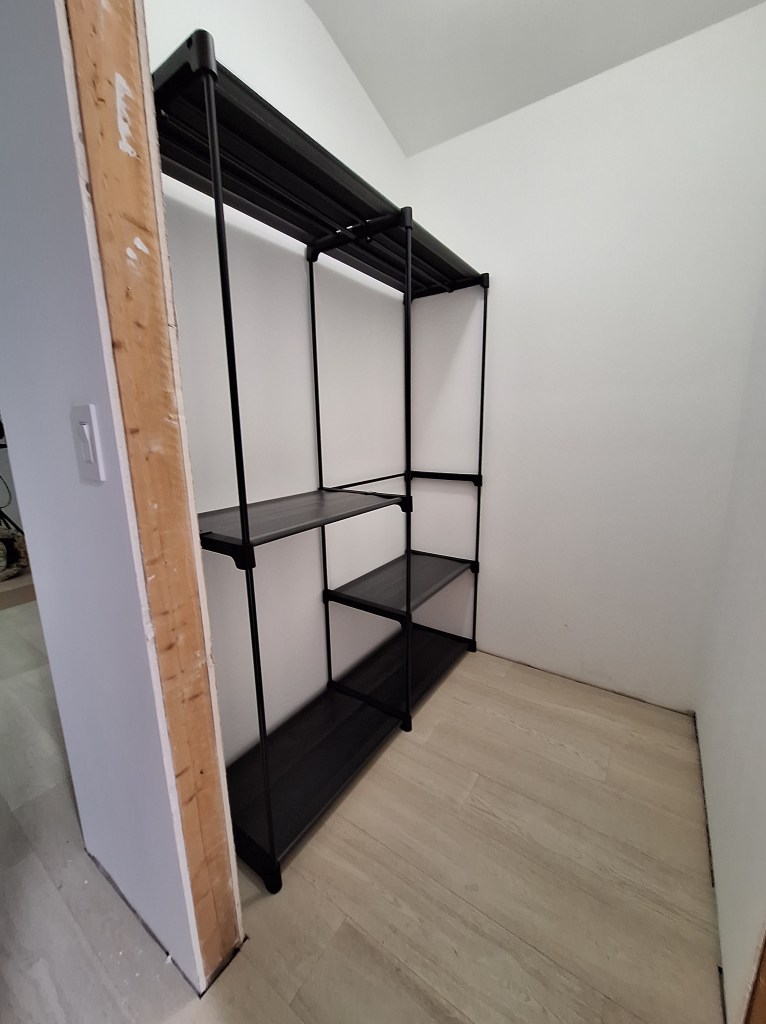
Look how well the smaller rack fits in the small master closet. I was pleased with that.

I also started moving some things from the apartment to the house; things that would fit in my car and would not be needed in my day to day life between now and November. One such item was a cube organizer, which fit nicely beside the piano.

Cube Organizer moved in, and a couple of Pics added.

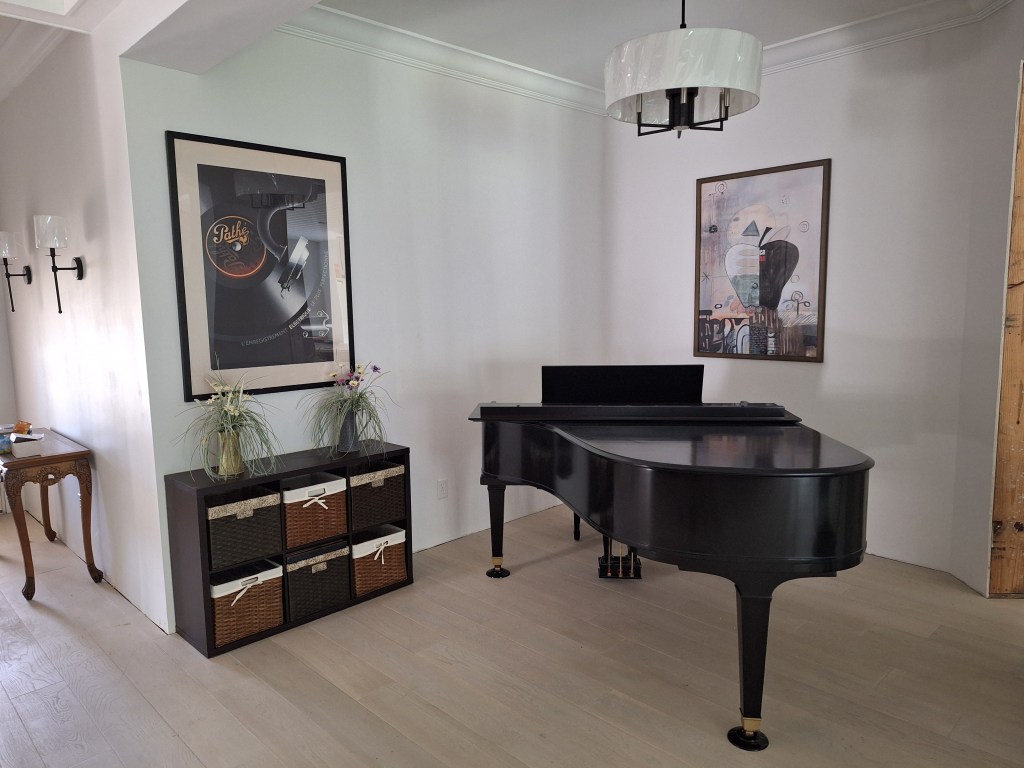
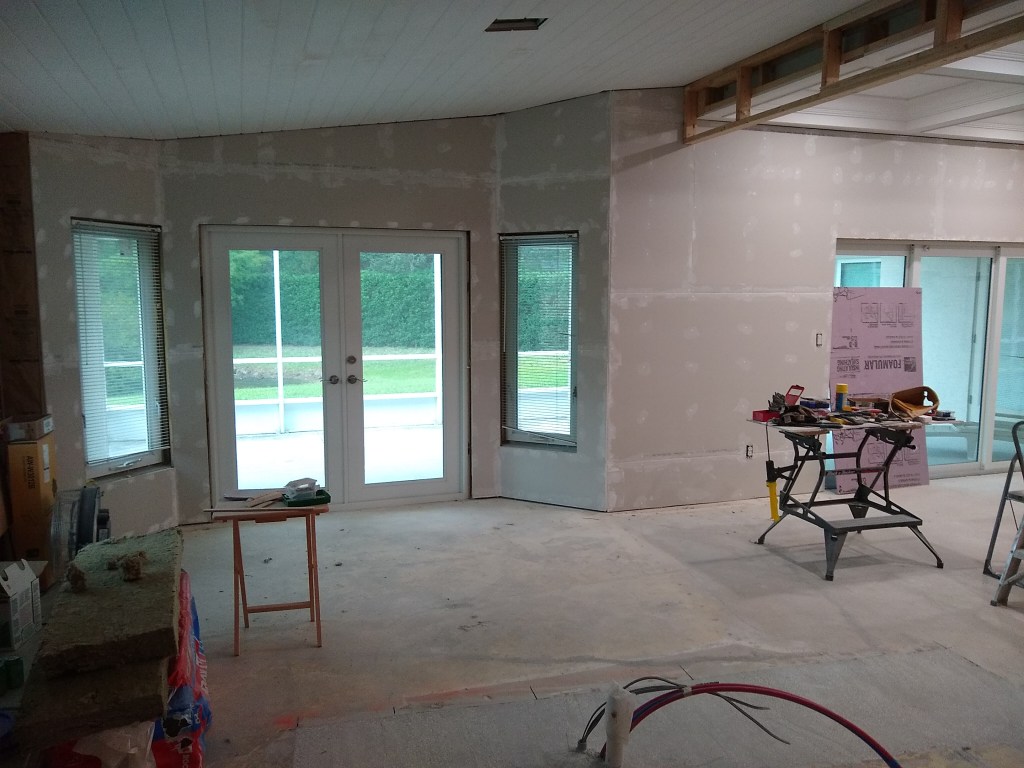
I got a bit carried away and even hung a couple of pictures. I like the look of this room. It is aligned with the style I am after (modern or transitional). Unfortunately, the furniture from my previous house is very traditional. Although it differs from the more modern style I want, I will not entertain replacing it until after the trim work is done. So it will be with me for quite some time. Here is a glimpse of what I mean.

More Traditional furniture to Occupy Great Room for time being.

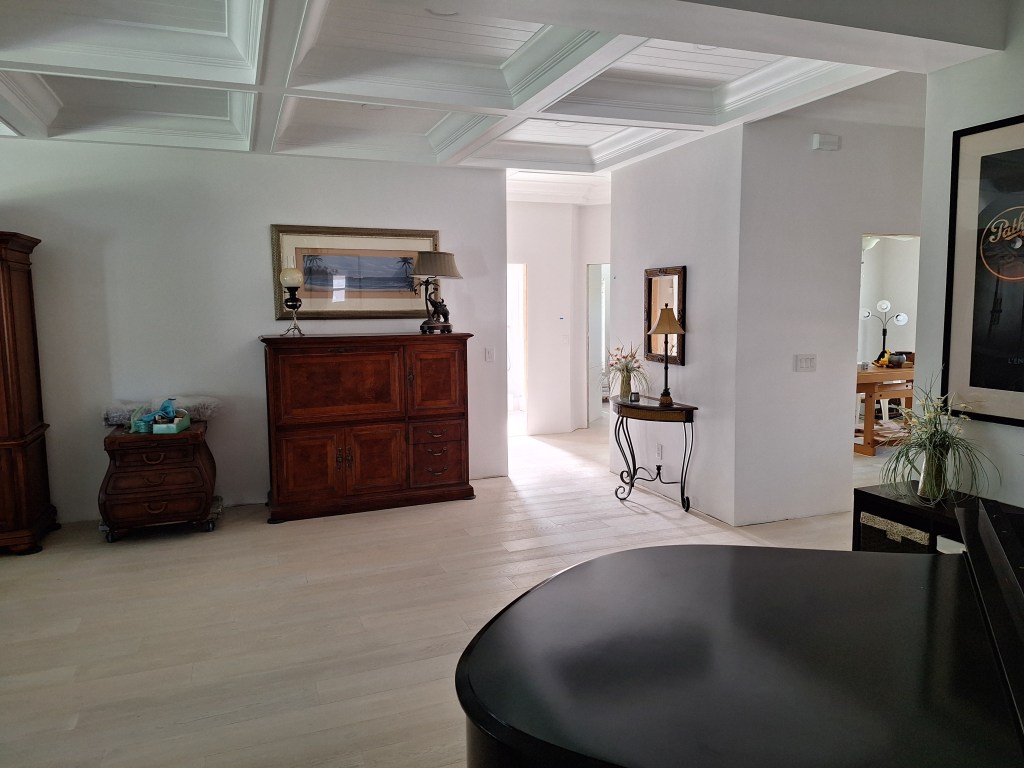
This contrast will become more pronounced once I move in.

I continued to do next to nothing with respect to construction work around the house. Instead, I just kept moving bits and pieces from the apartment to the house, sorting through boxes that had been packed for ages, and throwing out things I could no longer justify keeping. I also decided to start learning FreeCAD, which is 3D modeling software that I will use to design the various things I intend to build. I have a lot of projects I want to do around the house, such as building out the closets. Learning this software will allow me to fully flesh out the designs before I build a thing.

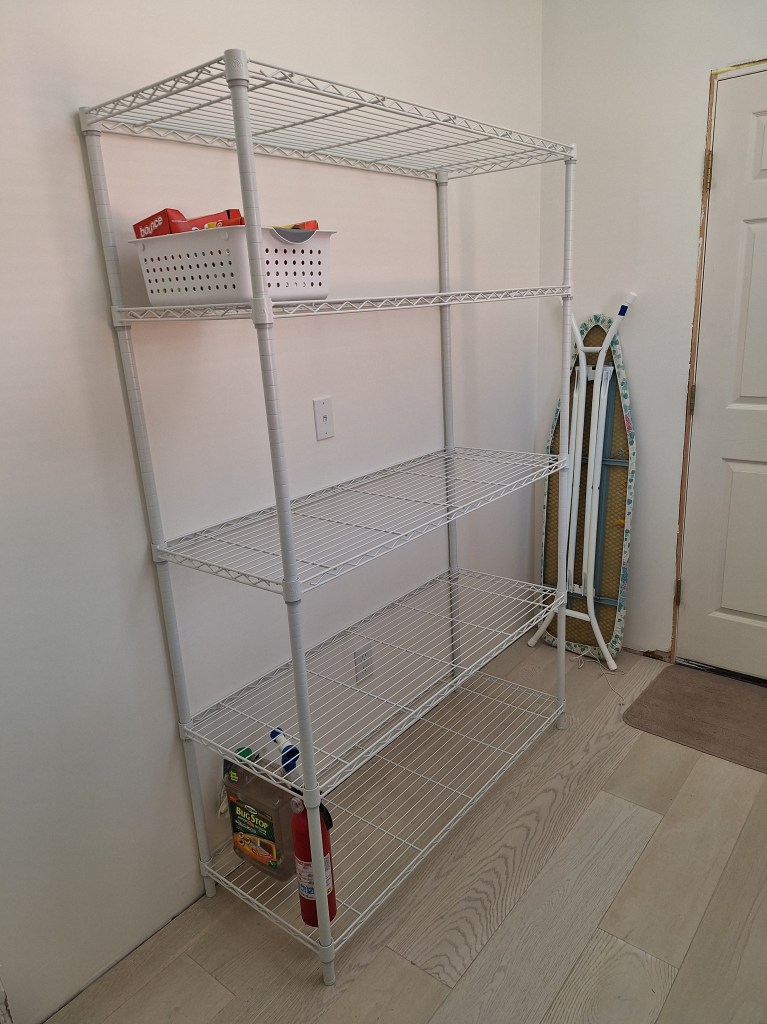
In the laundry room, opposite the washer/dryer, I imagine that I will introduce a “hall tree”, where there will be a bench where you can sit to put on shoes, above which will be hooks for coats and some cubbies for storage. I imagine flanking the hall tree with tall cabinets where I can store laundry supplies and an ironing board. All of that can be modeled in 3 dimensions using FreeCAD to make sure it is what I want. FreeCAD has a significant learning curve, so it’ll be a while before I am proficient, but I am on my way. In the meantime, I purchased a 5 tier rack to store laundry supplies and other such things.

Temporary Storage Rack in Laundry Room

To close out this post, I am pleased to show you the backsplash behind the cooktop. It was just installed today and I am very pleased with it.

Embossed Stainless Steel Backsplash

Master Bathroom – May 2023

As I did in April 2023, I divided my time between work on the master bathroom and kitchen. Just like last month, I’ve created two separate posts. The work in May started in the kitchen, so it’s best to start with that post. Within it I’ll mention when I switched to working in the master bathroom, which you can choose to jump to if you wish to follow the sequence. I also mention in this post when I switched to working in the kitchen.

The vanity arrived as expected and was deposited in my garage.

Vanity Delivered

It was a really large box, requiring two skids to transport it. I left it sitting for a day as I was still working on the kitchen drain and water lines in the trench. When I finished with that and had a day to wait for the inspector, I turned my attention to this. I started opening it and discovered this defect right away.

Finish messed up on Leg

I immediately stopped unpacking it due to the possibility for the need to return it. I sent the picture you see above to the place I ordered it and waited to discover how they wish to deal with it. My preference was to have someone come out and refinish that part. That this was damaged was not a major concern for me because I won’t be installing it in the bathroom for a long time. What I was really after were the measurements, which I was able to get with the vanity sitting where is was.

With the knowledge of where the sinks were with respect to the center of the vanity, and the size of the opening in the back I had to work with, I was able to relocate the drain for the left sink (the drain for the right sink was fine as it was). This required I cut off the drain that needed to be extended and cut notches into the studs in the wall to make room for a longer drain pipe.

Here is the drain before cutting began.

Left Drain Pipe before cutting.

And here it is after cutting.

Making space for a longer Drain Pipe

You can see that there are a lot of studs in this wall. I’m not entirely sure why so many were added. I suspect it was due to the fact that many of them have great big notches in them to make room for the drain, so they added more for reinforcement, but this is not a load bearing wall, so it seemed like overkill. Nonetheless, I had to add more notches to make room for the extended drain pipe. I used my SkilSaw and a hammer and chisel to create the notches. In the process, one of the lower sections below one of the notches no longer had any support to I just pulled it out.

I added the new section along with nail plates to protect it.

Drain Extended

With that done, I returned to working in the kitchen. The inspector gave the thumbs up with respect to the drain placement in the trench and gave me some advice regarding how to run the electrical wires, so I got to that next. I continued work in the kitchen until after the trench was refilled with dirt. I then had to wait for the pest control guy to spray for termites, so I returned to the master bathroom and began pulling the water lines down from the ceiling.

This required some rerouting of the PEX in the ceiling and I had to move some of the support clamps I fashioned. Here is the setup in the attic before I decided to relocate the vanity.

And here it is now.

New Routing of Water Lines

In the image above, the two lines on the far left are what were originally intended for the bathtub. Since they are no longer needed, they are just pushed off to the side where they will not be in the way when I need to move around up there.

Below I am showing the where this run of four lines head down into the wall where the vanity will be located.

Routed down into the Wall

And here they are at their final destination. These four lines will enter the back of the vanity and be hooked up to the faucets.

Vanity Water Lines in place

After preparing the trench in the kitchen for the pre-pour inspection, I unpacked the vanity. I was asked to fully unpack it by the vendor in order to determine if there were any other issues with it. There was another problem, which I’ll get to in a moment. Having unpacked it, I moved it into position, which you see below.

Vanity in Position

I put the marble top elsewhere because it is so heavy and was not needed to give me a sense of how the vanity would look in place. I will use this to help me decide where to place the electrical boxes.

With the vanity in position, I discovered a problem with the door under the sink on the right.

Damaged Door

I notified the vendor and recommended they simply send me another door. This thing is very difficult to move, so I don’t want to have to move it out of the house and bring another one in. After some back and forth we decided to simply return this one and replace it with another, hopefully undamaged, sibling.

After filling the trench in the kitchen, I turned my attention to the shower in the master bathroom. I hadn’t yet decided what shower system I would be using. I first wanted to have a good look at the existing drain situation, so I cut out a section for the shower pan to have a look.

Original Drain Flange

In the image above, I have already removed the drain that screws into the flange you see. Of note is how the screws are rusted. That tells me that water was getting in there, which is not what you want. So I decided to remove all the drypack mortar in the shower pan to get a closer look at what is going on.

The shower pan sits on top of a recessed portion of the concrete slab. The shower pan is then built on top of this recessed part of the slab using a much drier sand and concrete mix (mostly sand). This mix is often called deck mud or drypack mortar. It is much more malleable than the concrete used for the slab, so it can be shaped more easily to form a slope from the edges of the shower pan to the drain. It dries hard, but is not as strong and the slab. It is sufficiently strong for a shower pan. Because it is not as strong as concrete, removing it was not difficult, especially using my demolition hammer. It broke up easily. Here is what it looked liked after I removed it.

Drypack Removed

What you see above is the concrete slab and the section I cut out around the drain to have a look. Also notice the drain pipe coming in from the middle left. Until I removed the drypack, I didn’t realize that was where the drain connected.

Below you can see the nine buckets full of the mortar I just removed, ready to be taken to the dump for disposal. I managed to get them all in the back of my vehicle, avoiding the need for multiple trips.

Old Shower Pan Material ready for Disposal

Although I had not committed to the shower system I would use, I did know that it would be a curbless shower, so the shower pan would have to be built up to meet the floor of the bathroom, so I cut out the flange and installed a riser pipe that will be cut down once the final height is known.

Flange Removed

Note that the drain pipe below the flange I removed connects to the pipe on the right side of the image above via a p-trap, which means it flows down and then up again to meet the drain that takes the water to the street (sewer system). The p-trap provides place for water to reside, preventing sewer gases from flowing back into the house.

New Riser Pipe

The cap on the riser is not glued. I just placed it there to prevent any debris from getting into the drain, especially after having just vacuumed it out.

The next step was to start filling in the shower pan, but I would need an inspection first and I didn’t want to schedule an inspection until I had the shower valve installed so that could be inspected too, and I didn’t have that yet. I’d have to decide what fixture (aka trim kit) I wanted for the shower first because that would dictate the shower valve I would need. So some research was needed. That required a lot more work than I expected. It was very confusing because different manufacturers do things differently. After some frustration at not getting a clear answer online, I ended up sending an email to Moen support to help me understand what valve was compatible with the trim kit I wanted. They got back to me and gave me the answers I needed, so I ordered the valve and trim kit. Since that would take several days to arrive, I started on some miscellaneous tasks that needed to be done.

I needed to put the water lines for the shower where they needed to go, including the one that will go from the valve up over the ceiling then down to the shower head on the opposite wall.

After that I decided to grind smooth the concrete I poured in the trenches in both the master bathroom and kitchen. That was a messy job, but it was worth it.

I wasn’t sure what to do next. I could just take a day off, but I was keen to keep making progress, so I decided to do some prefilling of the drywall in the great room. Even though this post is supposed to be about work in the master bathroom, I wasn’t about to create a separate post for work in the great room since this was likely to only be a brief diversion, so here is a picture of that.

Long wall in Great Room Prefilled

Originally I was reluctant to do this because it meant relocating a lot of drywall off-cuts I had leaning against this wall, but I’m glad I did because, with the wall now accessible like this, I can come back to it (tape it) the next time I find myself having to wait on something or someone. What you see in the image above is all that I did, which is to say that the rest of the great room drywall was left for another waiting period, which turned out to be the next day.

The next day I received my shower valve for the master bath and installed it. That didn’t take long. I then scheduled an inspection for the next day so I stopped work on the shower for the day to wait for the okay from the inspector. I used the remainder of the afternoon to continue prefilling in the great room. I completed the south wall, extending into the kitchen.

South Wall of Great Room/Kitchen Prefilled

The inspection went without a hitch. As usual I use the inspections as an opportunity to ask questions. One of them was what the next inspection would be, which I learned would be the water test for the shower after I’d water proofed it. Therefore, I was clear to start on that. So I had to figure out what materials I would use and order them. I decided to go with Schluter products. They are pretty expensive, but reportedly top notch, and I did not want to skimp on this. Making the shower waterproof is very important. Getting it wrong can lead to all sorts of problems, some of which may not appear for years. So I ordered what I needed.

The Schulter products would not arrive for a while, which gave me time to start putting the ceiling up, which was required before working on the shower. I picked up some special moisture and mold resistant drywall for the ceiling and the areas near the shower. Since this will be a curbless shower with no door, I wanted to make sure the drywall adjacent to the water proofed area was somewhat resistant to any splashing.

Before hanging the ceiling I put up the electrical boxes for the vanity lights and the GFCI outlets and ran the wiring to them.

Junction Boxes for Vanity lights

I got started on the ceiling, beginning with the area above the shower. Notice the blue color of the drywall. This is how you can tell it is the moisture resistant variety.

Starting the Ceiling

Hanging this area was surprisingly tricky. I could not use my drywall lift because the shower pan area is recessed (as shown in images earlier in this post), so I didn’t have a level surface for it to sit on. So I ended up cutting the drywall into a rectangular piece and a small triangular one so that I could manage it on the ladder with the aid of a couple of temporary supports (sorry, I forgot to take a picture of that). I also added some additional nailers between the joists, two of which you can see at the edge of the drywall. A lot of nailers were added to the ceiling to make sure I had plenty of places to secure the drywall.

I extended out from there toward the opposite wall.

Moving to opposite Wall

The sun tunnel fell right between two sheets of drywall, so I was able to get on the ladder and use my small router to cut out half the circle at a time. The cuts were a bit rough, but were good enough that the trim piece will hide the irregularities. I’m still not very good with that tool.

Next I filled in the small triangular pieces then worked on the area in the toilet alcove. I decided to use regular drywall there because it is far enough away from the shower and has its own vent fan, so I’m not too concerned about moisture issues. Also, I only have a limited supply of the moisture resistant drywall on hand, so I want to place it where it matters most.

Ceiling Hung in Toilet Alcove
Ceiling Hung in Master Bathroom

That was the last work I did inside the house in May. On the same day I also ordered a bunch of items, including the shower wall tile and shower floor tile, the master bath floor tile, and also the counter tops for the kitchen. These things will not be delivered for a while. Of them, the only one I am dependent on is the floor tile. I need that, together with the Schluter products, in order to move forward on the shower. While I wait for that I will push on with drywall work, hanging what I can on the walls of the master bathroom and also the entrance hall to the master bathroom. That will start tomorrow, in June, so will be part of a separate post. So for May, here endeth the post.