Page 6 of 7

Coffered Ceiling – Crown Molding, October, 2020

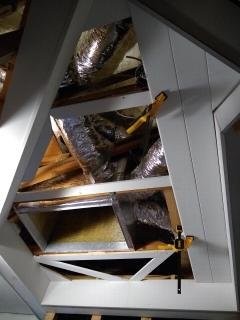
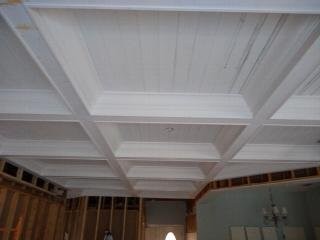
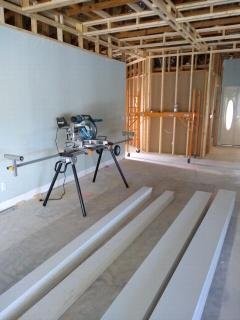
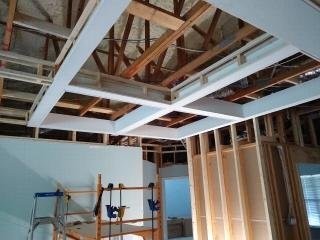
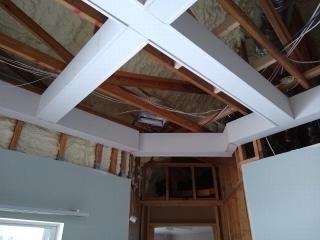
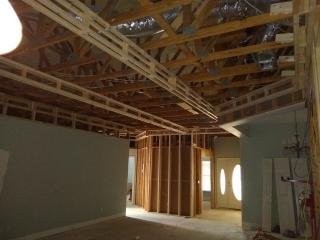
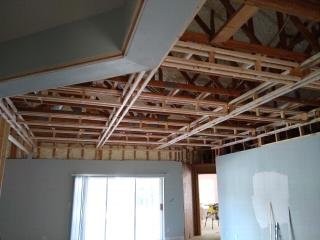
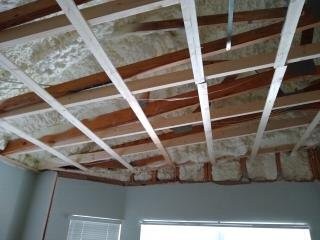
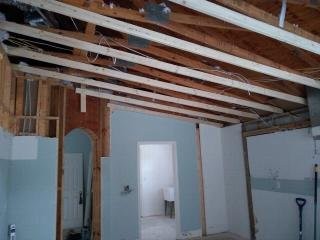
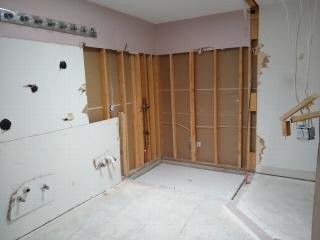
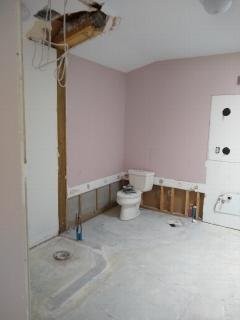
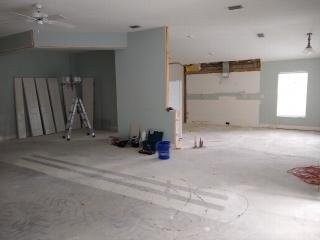
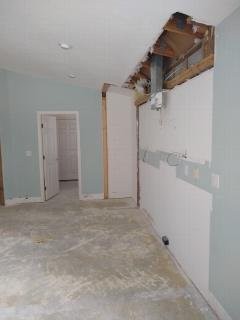
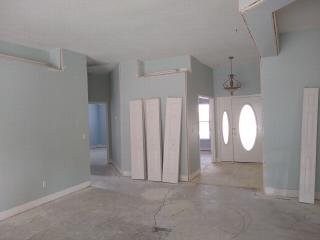
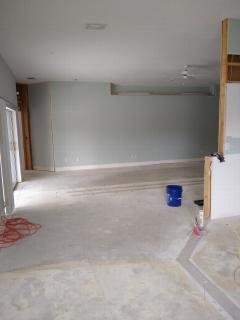
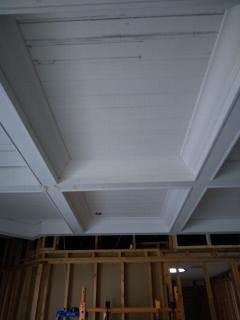
The crown molding arrived at the end of September. While waiting for that I did a little electrical work and some more demolition, which you will notice in some of the pictures that follow. I’d never done crown molding before, so a lot of time was spent researching it. Joining the pieces can be done using a straight 45 degree cut (nested or flat) or by coping. I’m not going to explain that here, but I tried them all and learned a lot. Except in a few places, I cut the crown flat on the miter saw (you need a compound miter saw for that). I tried my hand at coping, but only needed it in a couple of places. Coping takes a lot longer, especially for the uninitiated, so I was glad it wasn’t extensively needed. Below, I start by showing a side by side comparison of a coffer with and without the crown.

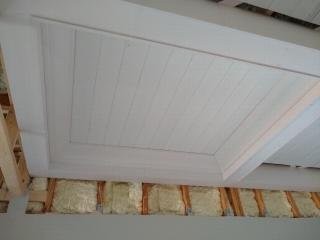
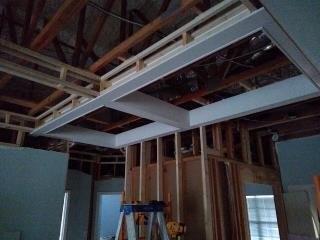
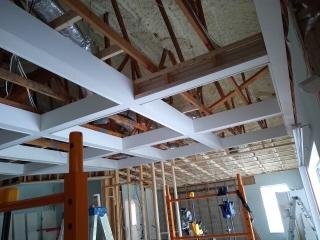
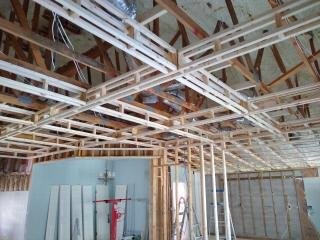
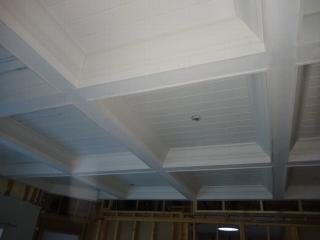
Doesn’t that look better? Here are some more images that will provide a better sense of it.

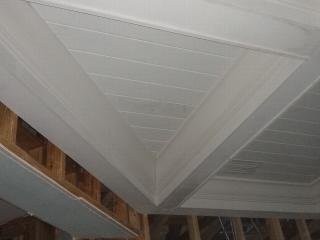
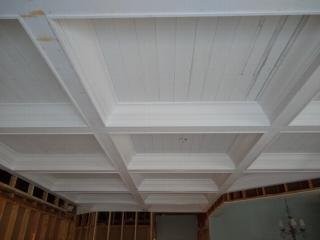
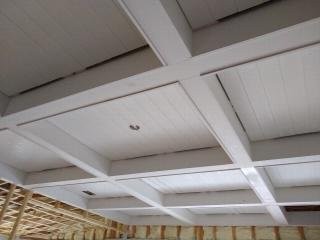
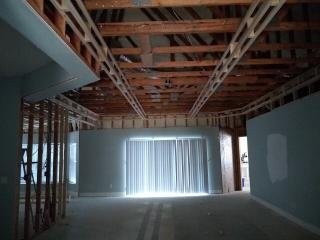
The triangular coffer was very tricky. I had to cope that inside corner. I was happy with the result.

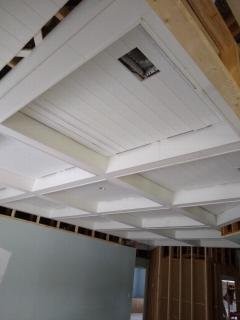
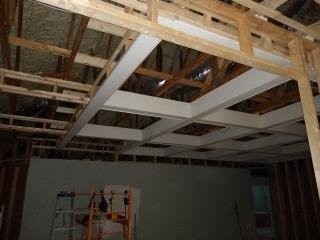
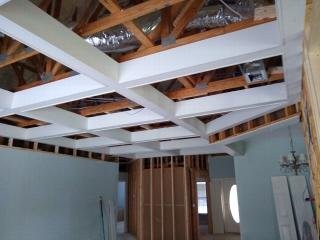
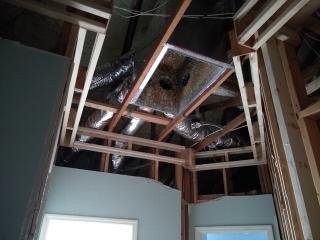
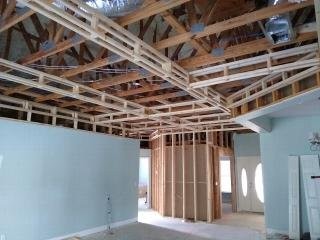
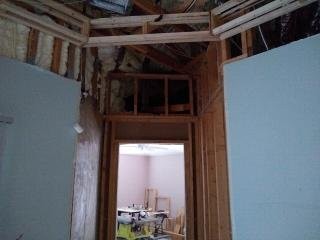
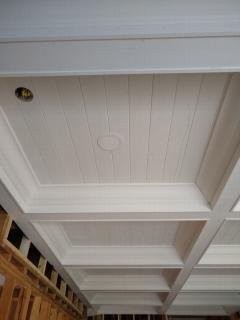
Next up, lights. I originally tried installing 6″ recessed lights in every other coffer, but found it did not illuminate the room sufficiently. So I ended up putting one in each coffer except the center one, which will have the fan. The lights are dimmable and I installed additional switches to control them, so you can turn them on/off from the main entrance, when entering from the kitchen, and when entering from the master bedroom.

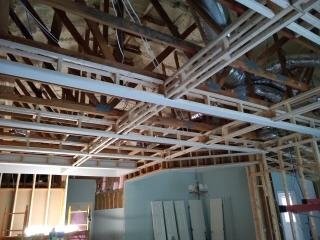
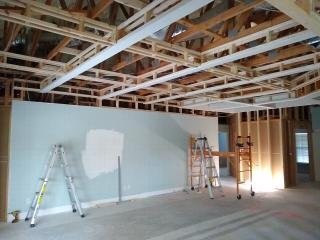
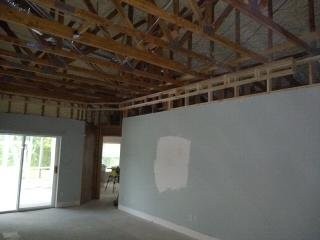
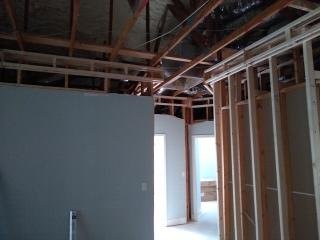
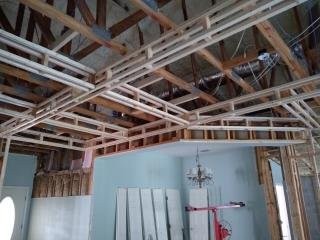
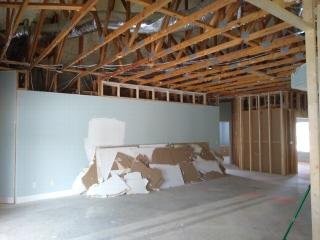
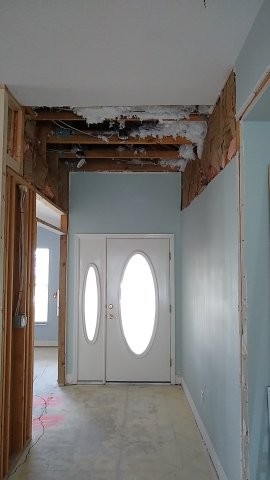
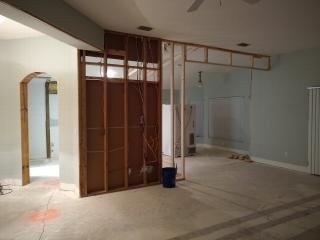
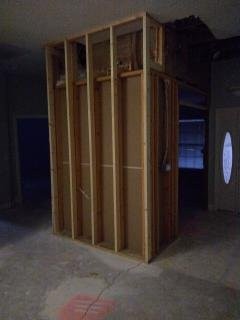
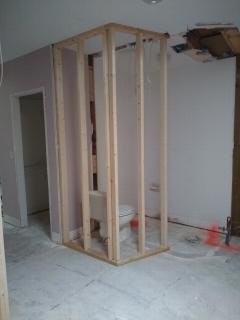
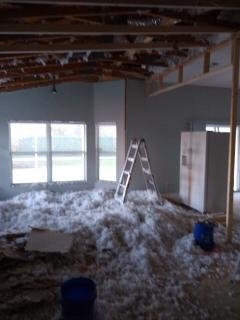
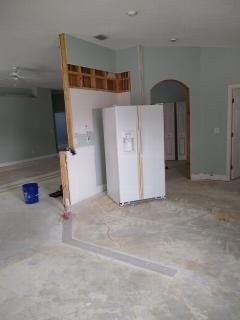
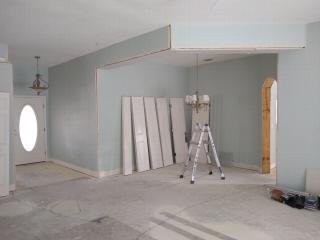
You’ll also notice from the above pics that I pulled down the drywall along the main wall. I will need access to that space for electrical and internet wiring down the road.

With the coffered ceiling up, it was time to move onto the kitchen ceiling. That will be the next post.

Coffered Ceiling – Tongue and Groove, August – September, 2020

The next step in creating the coffered ceiling was to fill in the middle part. That will be done with pre-primed tongue and groove pine then finished with crown molding. When I framed the coffers, I tried to make sure they was square and level, requiring shims between the frames and the joists. So after the frames were wrapped, I had a pretty good reference surface to work from. That is, the top of the vertical boards served that purpose. The picture below will show you what I mean.

Support for the T&G.

The tongue and groove (T&G) would need to be nailed to something that would be a consistent distance from the top of each coffer so that the distance from the T&G and the bottom of the coffer was consistent (we want a straight line all the way around). To achieve that I attached nailers to the top of the vertical boards as shown above, being careful to align them with the top of the board. I also added triangular nailers in all four corners. They are arranged diagonally so that the center is open for electrical stuff while still providing a surface for the T&G. These nailers were fastened to the vertical boards and I used a lot of shims when attaching to the joists. Below you can see how the T&G boards go up.

The image on the right above is in the hallway by the guest bath. It was an irregular shaped area and was where the A/C plenum resided, so I had to improvise a bit with the nailers, but the same approach was used. The pictures below show them with all the T&G boards up.

Because I was going to be using crown molding within each coffer, I had the luxury of not having to extend each T&G board to meet the vertical board, hence the gaps. This worked out very well for me because I was able to cut each 8′ T&G board in half and get two fully usable pieces. Had I been more experienced at this, I would have thought about that ahead of time. I was very fortunate that it happened to work out this way. Imagine the waste if I had not been so lucky.

I continued in this way until I reached the end of the room. With the coffers filled in, it’s looking more and more like what I was after.

The rest of the month was spent filling in nail holes and gaps with wood filler followed by a lot of sanding. The prep work for painting will be significant, and can make all the difference. So I will be very diligent when it comes to that. The filling and sanding done at this stage is just a start. I’m sure I will go over much of it again when the time comes. During this time I also ordered the crown molding, as that would be the next step.

Coffered Ceiling – Wrapping the frames, August, 2020

The new finger pine boards arrived, and to deal with them I needed a pretty decent sliding miter saw and stand. I also picked up a scaffold, which you can see in the back if you look closely. With all the overhead work, a scaffold was a must.

Setting up Shop

I started putting the horizontal pieces in place first, near the front of the room. I used a 1/4″ thick piece of plywood to serve as a template for the reveal (the part of the vertical piece that hangs below the horizontal piece). Seeing the boards go up was very exciting, as it gave me a real sense of how it would look.

From there it was a matter of moving forward bit by bit.

And further still. Now it is really starting to take shape. I’m happy with the results so far.

Reaching the end of the room.

Here are a few details of the entrance to the master bedroom and the hallway by the guest bath. The brown stuff you see on the wood on the right image is wood filler. Later I decided not to use that brand; not because of the color, but it was a bit more difficult to work with.

The next step was to fill in the coffers with tongue and groove. We’ll get into that in the next post.

Coffered Ceiling – July, 2020

Now that the ceiling in the great room was down, Chris met me at the house to start work on it. It was July 7th. Chris frequently shares his admiration for the framing that was done (that’s sarcasm, BTW). With the joists and rafters in full view he was not afraid to point out further concerns and what would be required to put a new ceiling up that would give me the look I wanted. During that discussion I brought up the idea of doing a coffered ceiling. I really like that look and thought it might hide any inconsistencies that might show up due to unevenness between the joists. Chris agreed, but said it would cost a fortune to hire someone to do it. So we talked about me doing it. He showed me how to frame boxes from 2x2s that would support the drywall that would be the skin of the coffers. We created a quick and dirty one and hung it so I could see the approach. I was to do the perimeter first, then fill in the middle after that.

Over the next two days I picked up a load of material to start creating boxes. I refined the boxes to use minimal wood with spacers that would limit the twisting that the 2x2s are inclined to do. After a few attempts, I came up with a design I liked that was light weight and strong. I put together a little assembly area in the master bedroom because I was going to be making a lot of these.

Final Box Design

At this stage I moved into full production and started working my way around the perimeter.

By July 17th, I had most of the perimeter framed and started on my first straight run away from the perimiter. That run took four boxes to complete, but it was pretty cool to see it up, as it gave me my first inkling of how the coffers would look. Sorry for the fuzziness of the picture, but that’s the only one I have. Had I known I was going to create this blog, I would have been more careful.

First Run down the Middle

On July 18th I completed the second long run and finished the perimeter. It was getting really exciting at this point. I was feeling more confident that this would come together.

On July 20th (happy 60th, Dale!) I started on the cross members. On July 21st, it looked like this:

I finished the framing on July 24th.

In reality, I wasn’t done with the framing because I was not happy with the area in front of the entrance to the master bedroom. I originally had a straight angled piece, but it did not align with the angle of the entrance, so I reworked it later on.

Misaligned Angles

During my initial discussions with Chris, I mentioned my preference for wooden coffers with a reveal (you’ll see) instead of drywall. He encouraged me to use drywall due to the cost savings, but as the framing progressed he reconsidered the idea of using wood. I suspect he was feeling a bit more confident in my abilities. I was keen on that idea, and we also decided to use tongue and groove between the coffers. So that required some time to get the materials picked out and delivered. 18 1x6s and 28 1x10s of 16 foot pre-primed finger pine arrived July 31st.

Demoing the Great Room Ceiling – June, 2020

After a two month hiatus due to Covid-19, I had Chris up to the house in the first week of June to discuss out next move. It was also when I started keeping a paper log of my trips to work on the house. So, it was June 8th.

We looked at the ceiling in the great room, as I was concerned about how we were going to get it to look flat over the entire area given the questionable framing. After some discussion we decided to pull down the ceiling and put up a new one. After so much demolition already I was not looking forward to that, so the plan was to bring in a crew. On June 10th I moved the tools into the master bedroom to clear room for the demolition. Between that trip and my next I decided to try demoing the ceiling myself rather than waiting on the availability of a crew. At least gravity would be on my side. On June 18th I climbed up into the attic and simply kicked the sheets down. It was much easier than I expected and I was able to pull it all down in one visit. On another trip up (June 20th) I removed the drywall screws and shifted the debris into the garage. I eventually hired a company to haul it off.

Ceiling Down

Spray Foam Insulation – March, 2020

After a lot of thought, I decided to replace all the blown insulation above the ceiling with spray foam that would be applied directly to the underside of the roof deck. My motivation for this was twofold. Firstly, I wanted good insulation to help keep the A/C bills down. Secondly, and probably the deciding factor, was that it would provide greater access to the attic space and make working in the attic much more tolerable.

The blown insulation that most houses are built with lies just above the ceiling. It is usually about a foot thick and, in my home, it was white. Above that layer and below the underside of the roof deck is very hot air. Although vented from the soffit to a ridge vent at the top of the roof, it is like a sauna on a hot summer day. Since I would be doing a lot of work in that area, I wanted to have access to it year round.

This is not a DIY job. It requires special equipment and training. The company I hired took two days to complete the work. The first day involved sucking out all the blown insulation. That is not a job I would have wanted. Kudos to the fellows who did it. A very difficult task. Below I show the sacks filled with the blown insulation that was removed.

Out with the Old

The second day a different crew arrived to do the spraying. The pic below shows the area in the kitchen. This was the only place where you can easily see it because I had already pulled the ceiling down, which also made it easier for the guys doing the spraying.

Spray Foamed Ceiling above Kitchen

The whole job cost a little over $7K, so it wasn’t cheap. But I am sure glad I did it because I have spent a lot of time climbing around up there since and, although warmer than ground level, it was very reasonable.

More Repair – February, 2020

The ceiling in the great room was flat and done with wall board (drywall). The drywall was attached directly to the joists, which are rarely a good reference surface. So the ceiling was a bit wonky. This was especially evident above the entrance at the front door. I pulled down the ceiling there to see what was going on. It revealed a misaligned joist and a cracked rafter. I wonder how that passed inspection. Perhaps it happened after the house was built. There are many cracks in the concrete slab, which means there was significant movement after the slab was poured. You can see some of that in the following picture.

Cracks in the Slab

My neighbour subsequently informed me that the builder used a type of concrete that was not supposed to need rebar, so none was used. I think they made a mistake. We marked the cracks with spay paint so we can monitor them. There has been no movement in the year since we did that, so I am confident that the cracks that exist relieved the pressure that caused them in the first place. Irrespective of that, I will have to prepare the floor properly to guard against any further movement because I will be putting large 32″ square tiles down.

The pictures below shows the repair work that was done to shore up the area above and around the entrance foyer. The picture on the left shows how one joist is sitting lower than the other. This produced a bowing in the ceiling. The higher one is at the correct height, so I had to get in there with a hammer and chisel to correct it. The second picture shows how there was no header other than a 2×4 above the entrance to the front bedroom/office. Not only that, but the 2×4 that served as a header was not attached. Once I pulled the trim away, it moved freely. The third picture shows how we fixed it. We put a substantial header in place and sandwiched the 2×4 that sat on it with two more 2x4s. This was to provide ample strength for the cracked rafter they supported.

Reconstruction and Repair – January, 2020

The first non-destructive thing we did was to build a header from the wall that separates the kitchen from the great room. This serves to further delineate the two spaces. I like an open plan design, but not completely open plan. So I thought this separation was necessary. It is a bit blurry, but in the picture on the right you can see the lazer lever used to make sure it was straight.

We also decided to fill in the plant shelves. There was a long plant shelf on the main wall in the great room, and a smaller one adjacent to it. The long one wasn’t centered, so it looked a bit odd, I felt. Also, I didn’t know what I was going to do with them, so that was the main reason to fill them in. The picture below shows the framing.

These were the only two pics I could find of this work, so clearly I wasn’t going overboard with picture taking (yet). Unfortunately, my framing for the smaller plant shelf was for nought. The wall upon which is sat was very poorly framed. It’s not especially noticeable in the above picture, but it had a severe lean. So much so, that I was not comfortable leaving it that way. Since that wall was load bearing, I couldn’t just shift it, so pulled out my plant shelf framing and built a “sister” wall beside it.

The picture on the right, although dark, shows how far away the top of the sister wall is from the original top of the original. They are touching at the bottom. That’s way out of plumb, and hence my desire to correct it.

The master bath was going to be reconfigured. Part of that required dismantling the toilet enclosure (room) to make more space. The toilet would be moved to a somewhat private area tucked around the corner of a new wall, but with no door.

New toilet location in Master

We decided to do the kitchen ceiling with tongue and groove (T&G). To support this we needed to run straight 2x4s from one end to the other, as shown below.

This required that I pull down the existing ceiling board and all the blown insulation that was sitting on top of it. That was a big clean-up job. I had 15 green garbage bags piled at the end of my driveway when I was done with it.

Demolition Begins – December, 2019

Before commenting on the real demolition, I should mention that I experimented with the existing cabinet doors to see if they could be rejuvenated. I wanted to remove the thermofoil wrapping, exposing the MDF beneath, and see if painting them would produce a decent result.

Exposed MDF Cabinet Door

The result was okay, but not good enough to push forward. So new cabinets would be needed. Working with Chris, we worked out the new kitchen layout I wanted, which would require moving pipes to accommodate a new large island with a sink (a big job, as you will see in a future post).

Before the serious demo work started, I got going by removing the cabinets along the wall.

Cabinets and Pantry Demoed

The week before Christmas, a dumpster was brought in and Chris got to work doing the major demo work, which involved pulling up the flooring and demoing the two bathrooms.

Notice that we removed the rounded corner beads, which will be replaced with proper square corners when the drywall is restored.

Renovation Plan – November 9, 2019

Below is a side by side comparison of the original floor plan the builder provided and the one I came up with.

The main changes will be in the kitchen and master bath. Both are to be reconfigured, requiring the relocation of plumbing, which means we will have to dig into the concrete slab (trenching). In the kitchen I want to remove the peninsula counter and replace it with a large island around which people can sit, eliminating the need for a separate kitchen table. The island will also be a work area and house the sink.

I wanted to do something interesting with the master bath, but wasn’t sure quite what. I wanted to open it up a bit, but that was about all I was clear about. Chris came up with a good plan, which I adopted. To accommodate it, we would have to reduce the size of the larger closet a bit to allow a direct path to the walk in shower. The shower would no longer have a door. It would simply have a glass wall separating it from the bath tub, which would be the center piece. To the left of the the tub would be the vanity, and to the left of it would be the toilet in a semi-private area (no longer a separate room with a door). The following 3D rendering provides a cleared picture.

Looking down from the South East.

The furniture, cabinets, appliances, colors etc., are just what I could find to give the general impression. So pay little attention to the details. I’ve arranged the furniture and set up the rooms to reflect how I intend to use them (how the rooms in my current home are set up), so that will probably be close to the final result. The front two bedrooms will be used as a woodworking shop and an office, respectively. The bedroom by the guest bath will be a guest bedroom.

From the South West.
From the North West.

Also of note; we intend to replace the double window looking out to the lanai with french doors, allowing access directly to/from the kitchen. With that, demolition is ready to begin.

The following video was taken before any significant demolition was started. It should provide a pretty good idea of the starting point as we proceed with the renovation.

Before the renovation was started.